
Our Easy Powder Room Refresh is finished and I couldn't be happier with the way it turned out! I hope you feel inspired to tackle a room in your house that doesn't feel like you! Our homes are our sanctuaries! Make yours what you want it to be!
I'm so happy to be sharing this easy powder room refresh with you! To say this powder room was a labor of love would be a gross understatement!
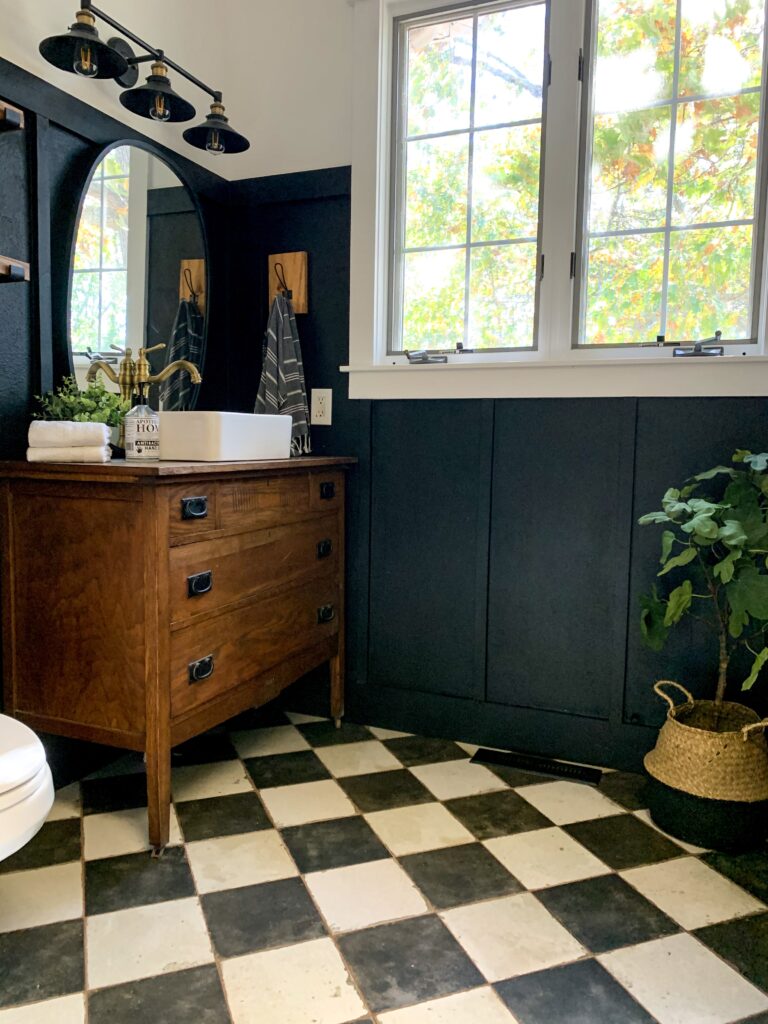
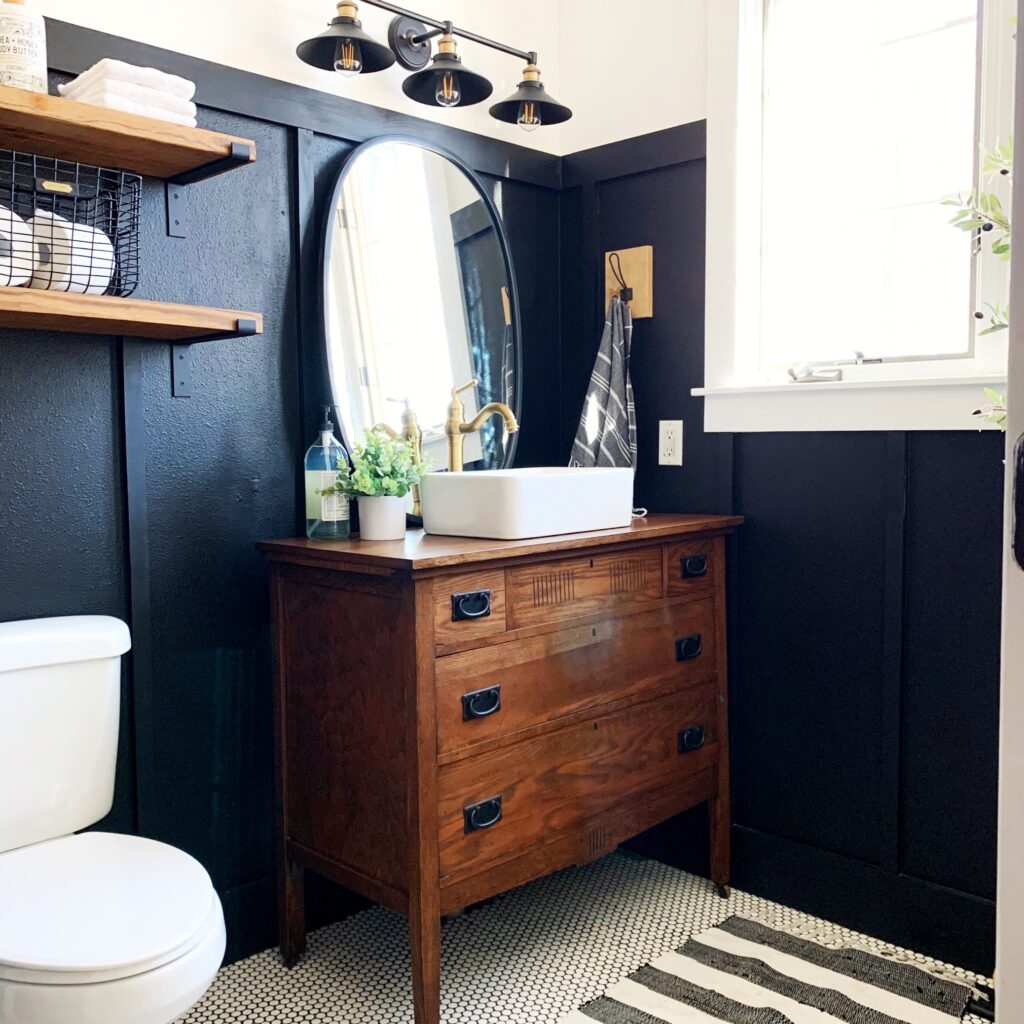
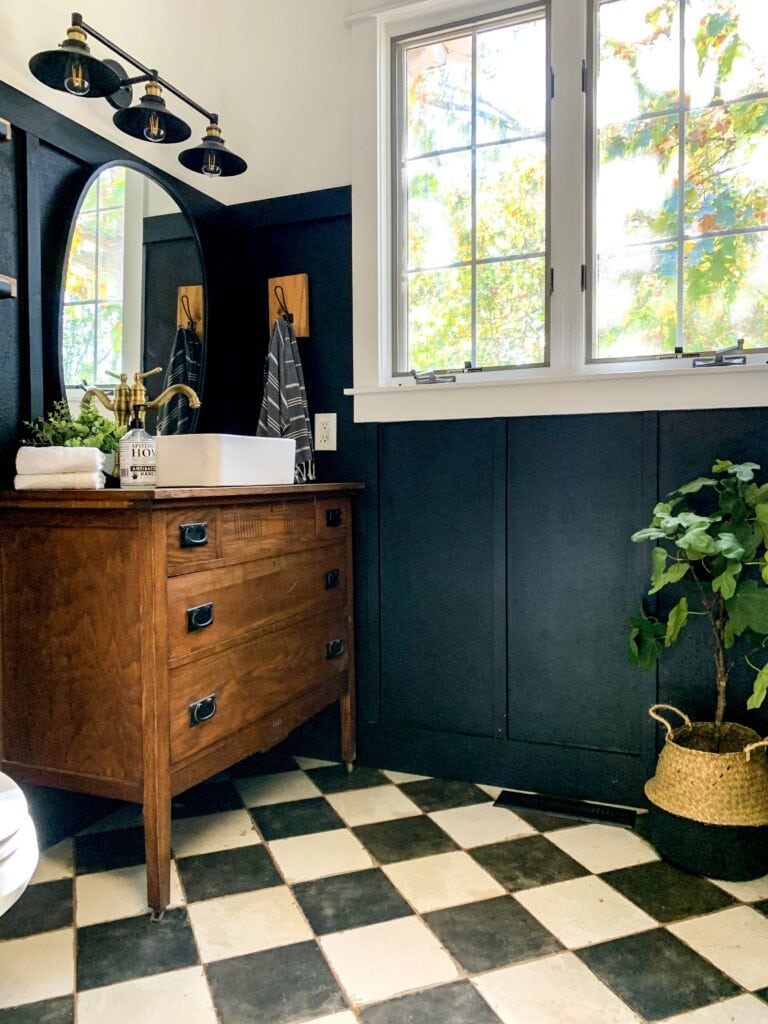
In the Fall of 2019, I did this bathroom refresh as part of the One Room Challenge. This room was given a refresh with new paint, wall treatment, flooring, cabinet, trim work around the windows, and Shelving! There have been plenty of bumps along the way, but the outcome was well worth it! This easy Powder Room Refresh has been so much fun!
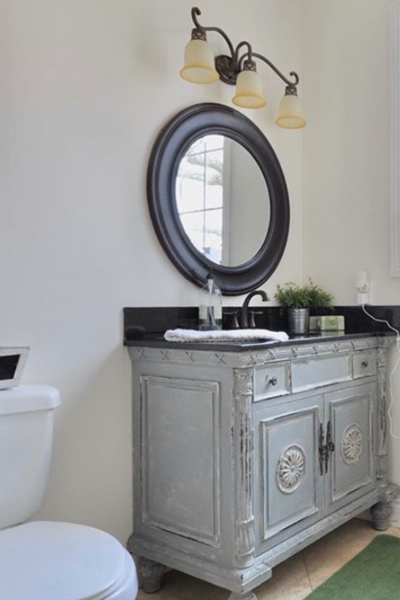
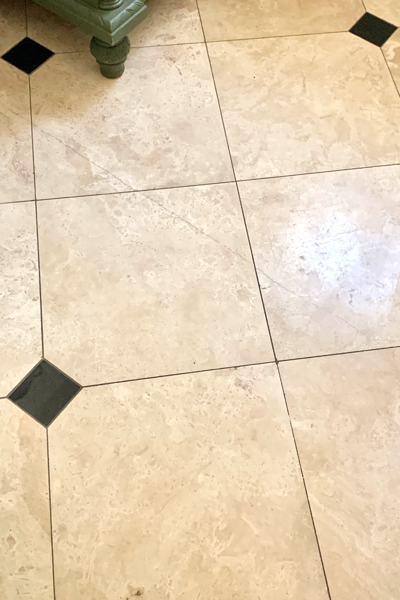
BEFORE
Easy Powder Room Refresh in a Few Steps
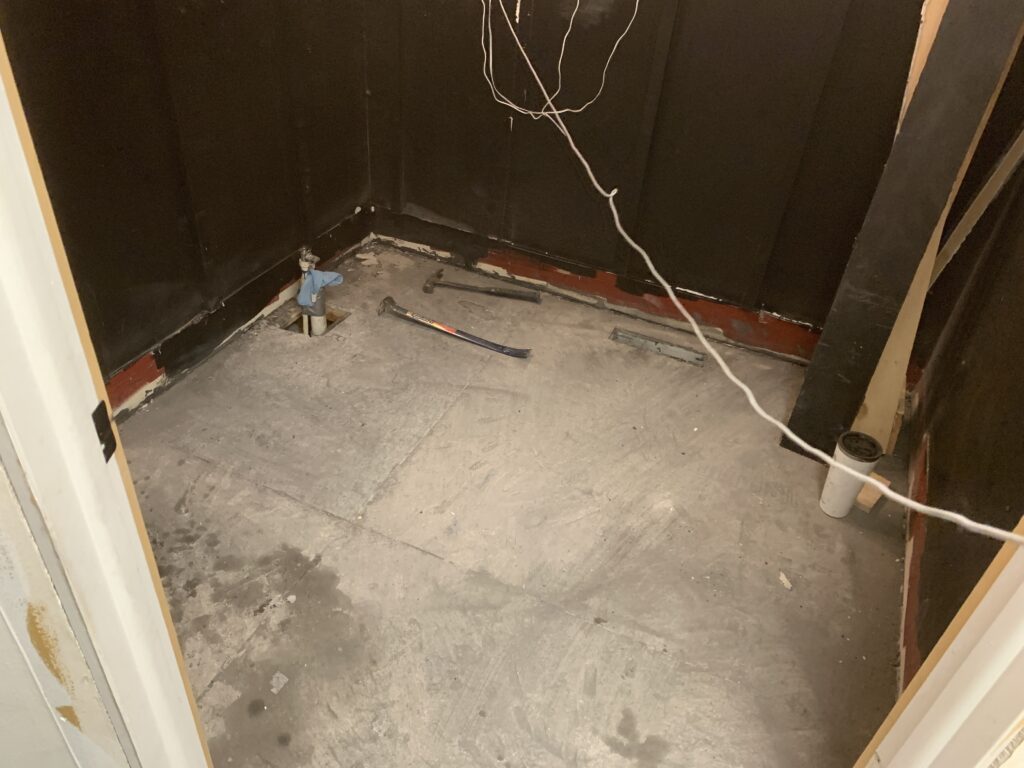
Removing Tile
I haven't been shy about about my dislike for travertine. My husband loves it, but he hates the black granite insets that ours has. It's all wrong and I'm beyond happy to get rid of it! Sit back and buckle up as I tackle this little powder room! Below you'll see a before picture of the tile.
Last Fall I removed the travertine and replaced it with white penny tile. It was so stunning, but I installed the tile myself and had no clue what I was getting myself into! My grout lines were crooked and it made me lose my mind! I tried for a year to ignore it but ultimately made the decision to remove it.
I don't think the grout lines would have bothered me if they were white, but I can't even imagine cleaning those when they would inevitably get dirty! You can see more about the penny tile process here!
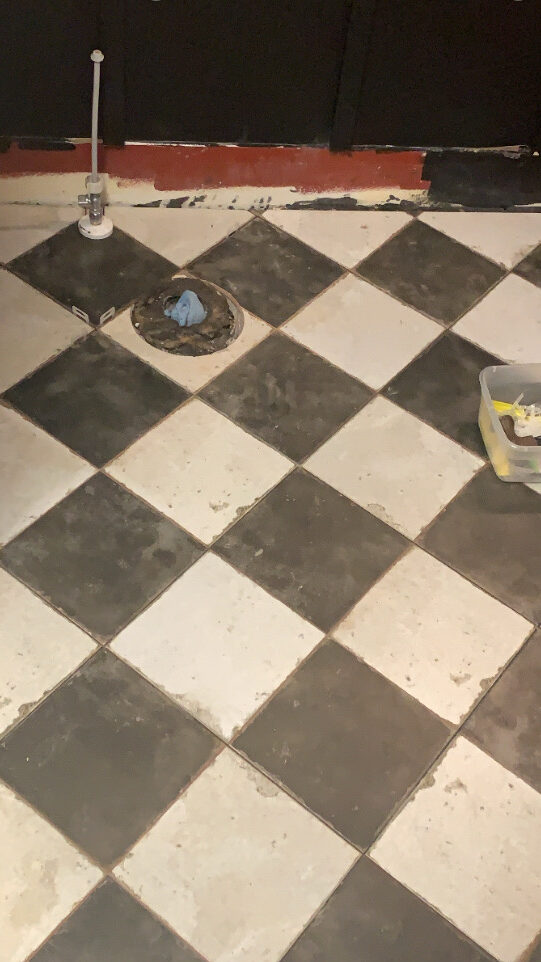
Installing Harlequin Tile
I love how this new tile turned out! I chose this specific tile because it has just the touch of distress I needed in this house! So many things are fancy and thats just not me. I love the classic and timeless Harlequin Tile, but was worried about having a stark white and pure black so this tile worked great! The grout I chose is called "Nutmeg" and it is the perfect compliment to the black and white.
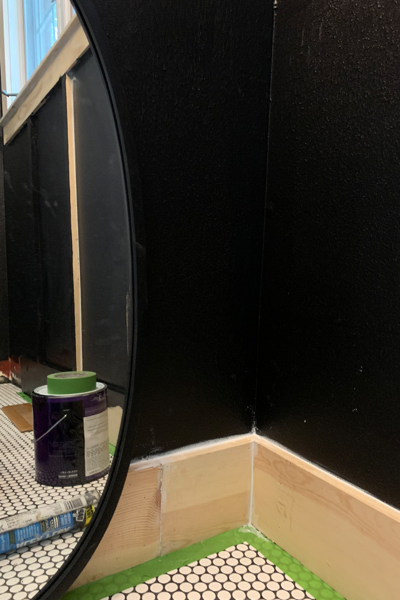
Base and Board & Batten
Base
With my table saw I ripped down a 1x12x6 common pine to 5" wide, I was able to get two pieces of trim from each board!
Board and Batten
I purchased pine boards that are 1x2 that measure 64" each. I placed each vertical piece every 15" inches. Once I finished nailing I used caulk on all the seams. This creates a flawless finish.
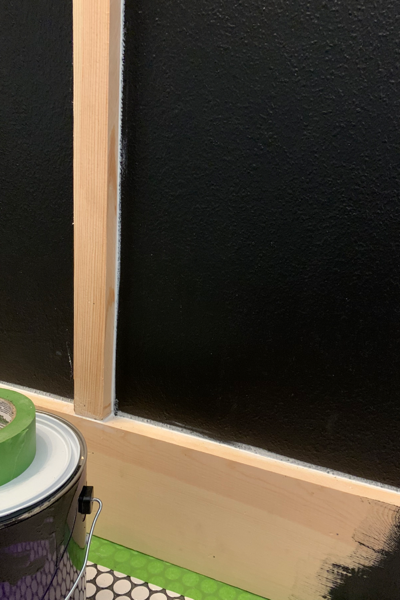
Painting
I painted the Board and Batten with Behr Limousine Leather in the Marquee line in an Eggshell Finish.
Shelves
Cut a 2x10x8 down to two 23" pieces. I had scrap-wood for this and I would recommend you so do the same if you can make it work! I stained mine with a mix of Varathane "Golden Oak with a splash of Ash." If you are curious about the many stain colors check out our "Staining 101" post! We've got lots of info and samples for you to reference! I finished with Varathane Finishing Wax.
Vanity
I scored this beauty at a local antique store! You can check out my "Furniture Restoration" tips for more details!! I chose a rectangular vessel sink and antique brass faucet. The Brass on my light fixture ties it all together! I completed this area with this oval mirror and Turkish Hand Towel.


- Furniture Restoration
- Three Quick Cricut Projects
- Painting Walls For Beginners
- Wood Staining 101
- Spool Clock
- Room Refresh in 6 Steps
- DIY Vanity Update
- Bathroom Update
- Painted Checkboard Floor
- DIY Range Hood
As always, thank for stopping by! We so appreciate your support and please let us know if you have any questions!
Leave a Reply