
Painting walls for beginners. Let's dive in to painting interior walls and the tools and paint that will make this job a breeze!
This post is sponsored by Rust-Oleum. As always, ALL opinions and wording are our own. Post may contain affiliate links.
Painting Walls For Beginners
Welcome to Clover Lane! We are thrilled to have you here. This comprehensive post, Painting Walls For Beginners, is a great place to start on your DIY journey. Between Cassie and I, we have painted SO many rooms. Too many to count. Below you will find our tried and true techniques for achieving a polished paint job. Without further adieu, we present Painting Walls For Beginners.
Why Paint a room?
Before we dive into the step by step of painting, let's talk about something super important. The power of paint NEVER ceases to amaze me. Never. There is something so fun about completely transforming a room with a very small investment (aka can of paint).
I am a firm believer that you should LOVE WHERE YOU LIVE. There may be certain things you are unable to change about your home, but trying to make your space fit your needs and style is well worth the effort.
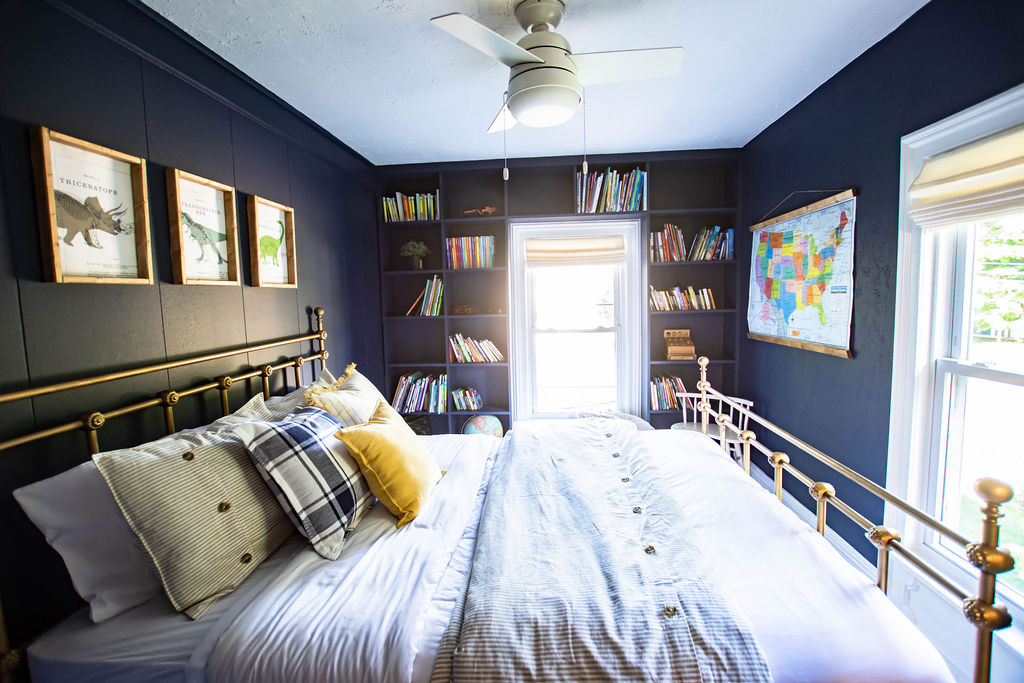
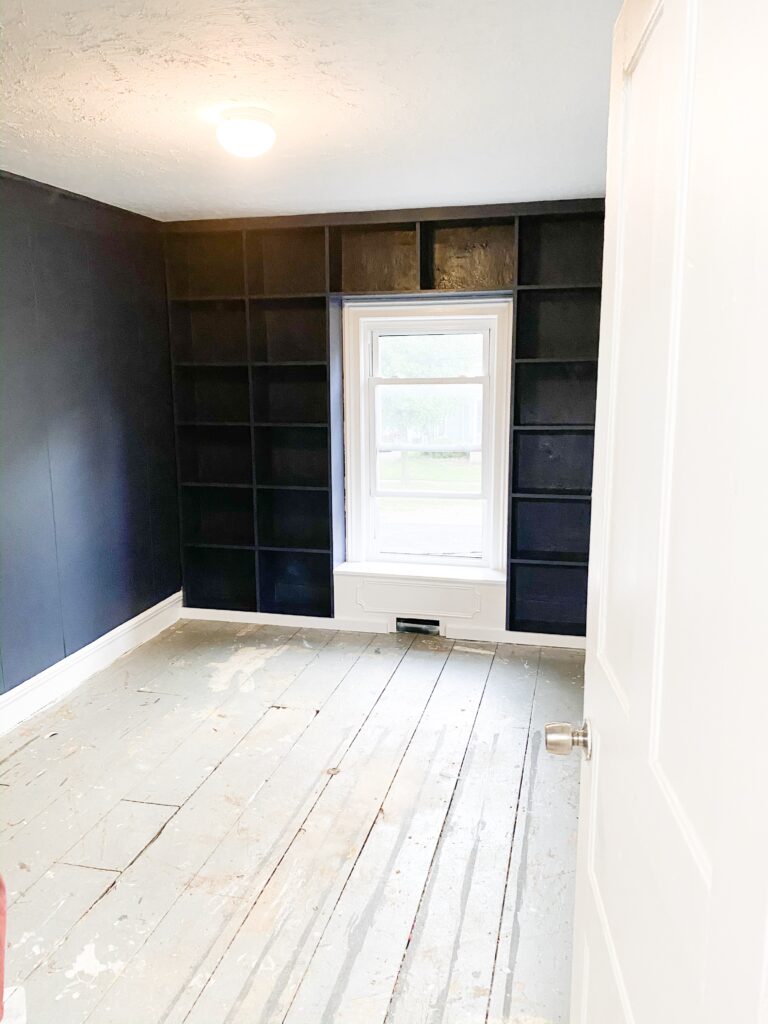
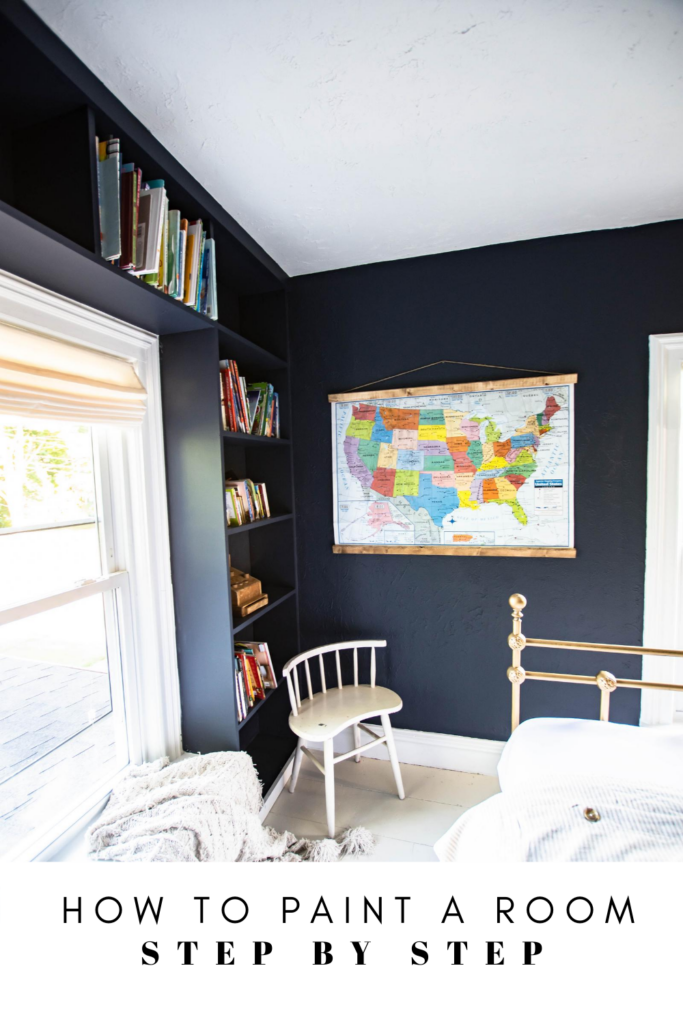
Paint is the most inexpensive way to transform a space. I would like to introduce you to the room I will be using for my step by step photos today. Here it is in all of its glory. The BEFORE!
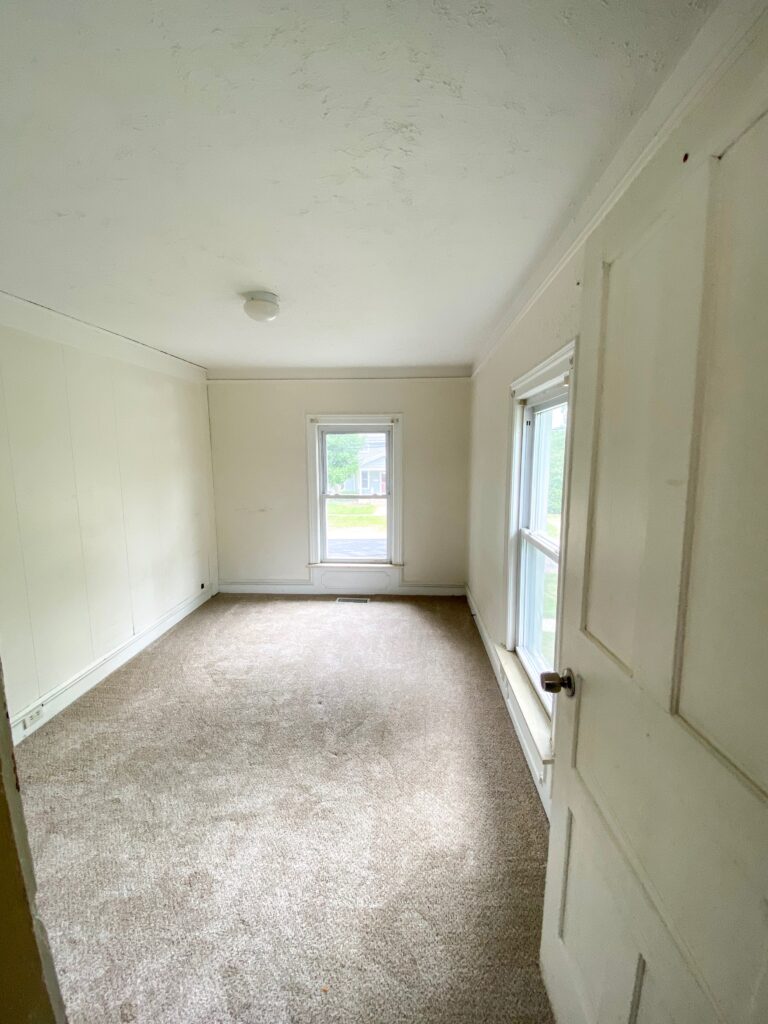
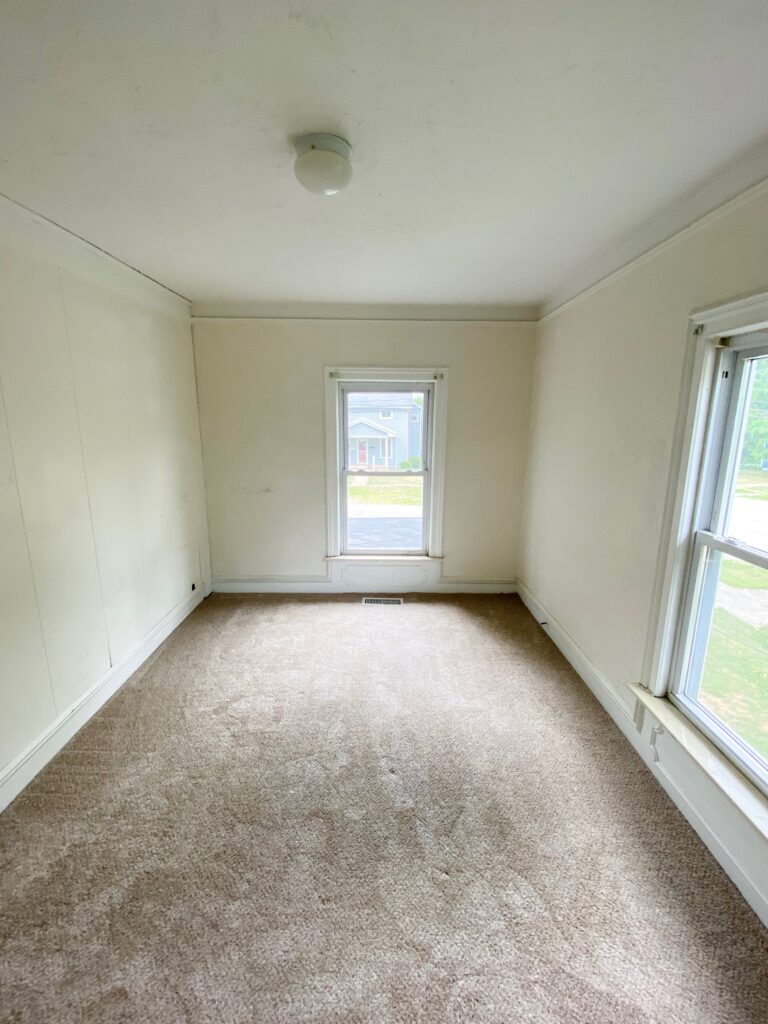
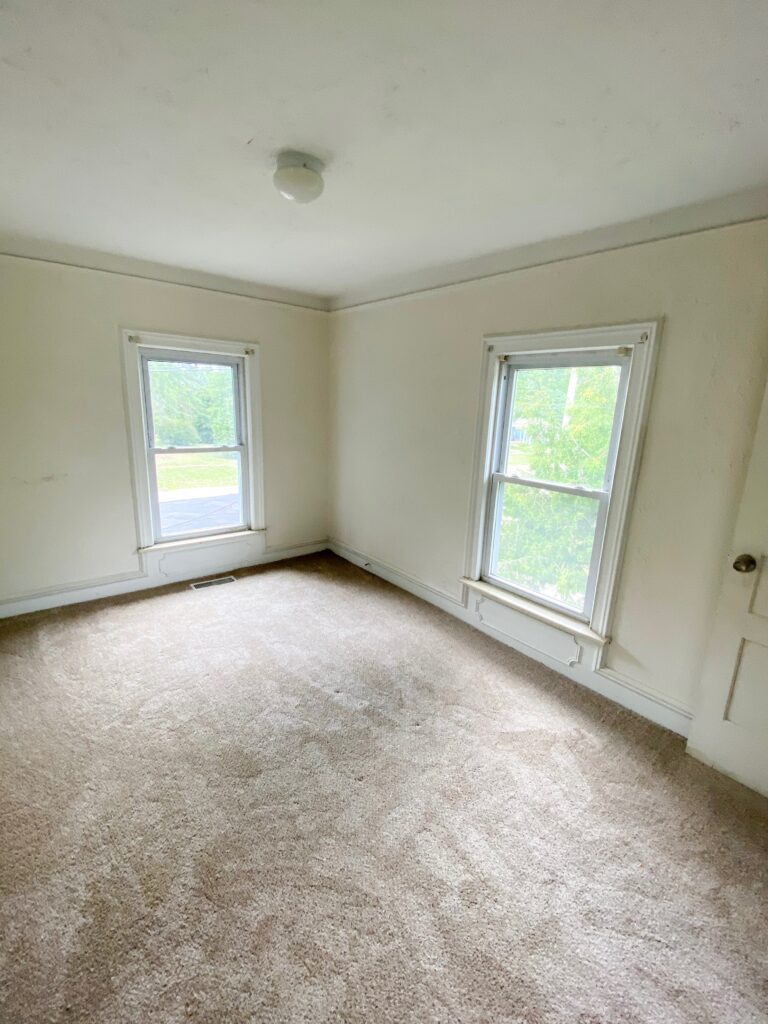
It's really not that bad, but I can tell you it's not a comfortable room. This house is old (built in the year 1880) and this room just feels dirty and gross. I can't quite describe it, but I have a feeling you can all grasp what I am saying. Bottom line- this room needs help.
Now that I've shared the room we are painting let's get to w0rk!
Supplies Needed
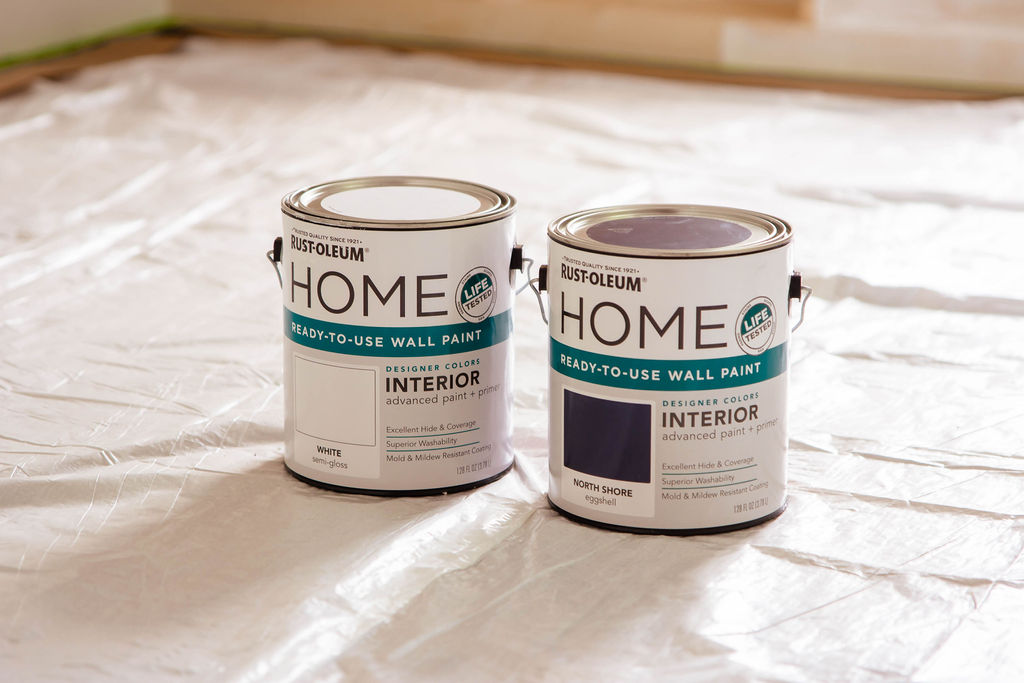
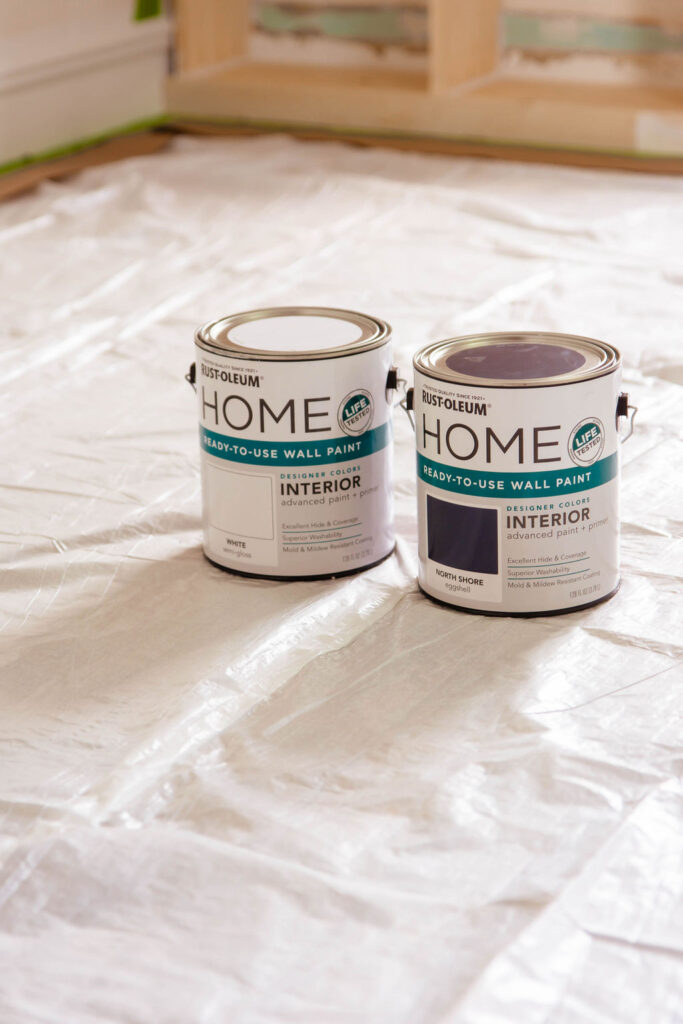
- Wall Paint- For this project, we are using Rust-Oleum Home Wall Paint. I chose a moody navy blue called North Shore in an eggshell finish. This paint comes in 12 pre-mixed colors, 3 different sheens. It shipped straight to my door! Pure convenience my friends!
- Trim Paint- I chose the crisp White in the Rust-Oleum Home Wall Paint line in a semi-gloss finish. Semi-gloss is a durable choice for trim work.
- Primer- We used Zinsser Bullseye 1-2-3 Primer.
- Rag and all-purpose cleaner to clean walls before painting.
- Drop-cloth. For this project, I used a poly/paper drop-cloth. It did end up tearing during the project so I would recommend using a canvas cloth if possible as it is more durable. If using canvas, an inexpensive plastic drop-cloth is recommended to lay underneath in the off chance paint bleeds through the canvas.
- Nail Hole Filler
- Caulk
- Painters Tape
- Handy Paint pail tray and disposable liners. This tray is a game-changer when painting. The disposable liners make clean up a BREEZE. Highly recommend.
Achieve the best results by doing these 3 things.
Pick Good Paint.
Do not go cheap. It isn't worth it. Pick a brand and company you can stand behind. This can make or break the success of a project.
Fill Nail Holes
I want to take a quick second to talk about why nail hole filler and caulk are on the supply list. Filling nail holes and wall imperfections are easy things to dismiss and not do. You may be thinking the paint will cover these things up. It just won't happen. I promise it is worth your time and effort to grab that nail hole filler and get to work. Pull out all nails, take out screws, and fill the holes. Don't forget to check the baseboards too.
Use Caulk
The next item to address is Caulk. Take the time to inspect your room and fill any cracks along the molding or baseboards with caulk. Do not be intimidated by this. It isn't hard and there are plenty of resources on how to do it. Be aware that you'll want to buy paintable caulk. Most say that it can be painted within 30 minutes. I highly recommend waiting a few hours or even waiting until the next day to paint after caulking. You do not want it to be tacky at all. Caulking should also be done after any sanding or buffing that you plan on doing. Dust particles can stick to the tacky caulk before it dries, creating a mess.
Now that your supplies are gathered, lets prep.
Step-by-Step on how to prep and paint walls for beginners:
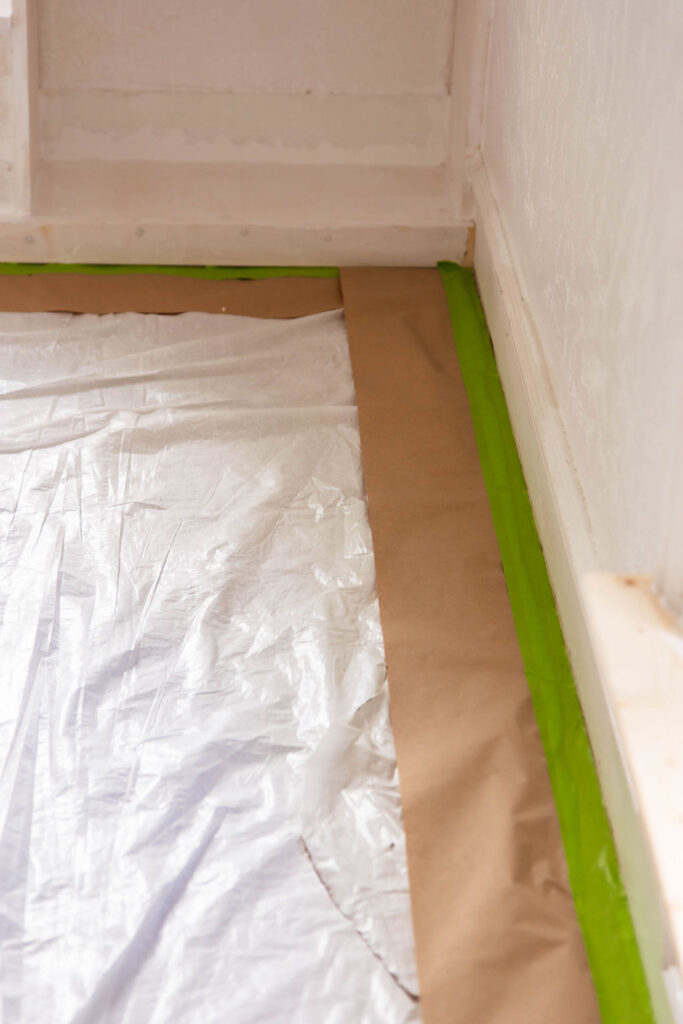
Step 1- Protect your flooring
Protect your flooring and any big furniture you are unable to move out of the room. All furniture unable to move out completely should go in the middle of the room. You do not want your drop-cloth to touch your baseboard. Leave a 1" border around the room with your dropcloth, fold it if necessary. The reason for leaving a border is so that you can tape it down and have your painters tape directly below and barely touching your baseboard. This will hold the drop cloth in place and prevent paint from dripping on the floor.
Step 2- Wash your walls
Wash your walls using an all-purpose cleaner or degreaser for tough stains or oil spots (Krudkutter works great for that). Take care to get any cobwebs along the perimeter of the ceiling or corners of the room. Really wash the baseboards well as they tend to collect dust.
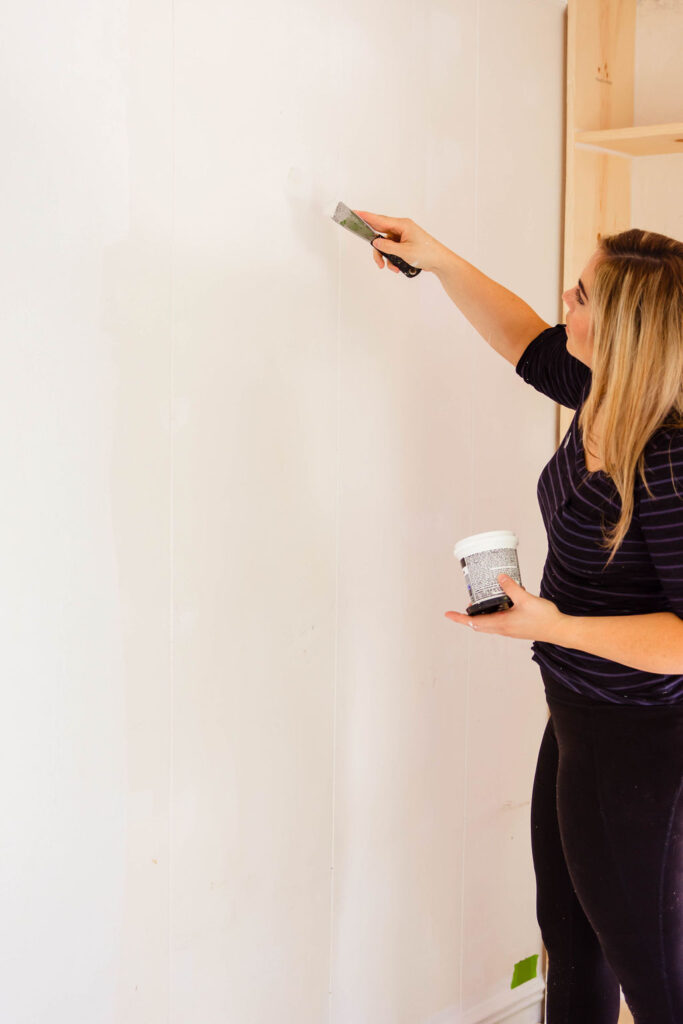
Step 3- Fill Nail holes
Fill nail holes or imperfections. You can use a metal spatula, 5-in-1 tool, or even your finger for this. Take a generous glob of product and scrape it into the hole. Wipe away any excess filler around the hole. Try to get the hold as flat with the wall as possible. If you have any bumps around the hole that protrude out farther than the wall, lightly sand it down before filling the hole. Once your nail hole filler dries (check product dry time on the label) lightly sand so the area is smooth. **Fine grit sandpaper is recommended so you do not disturb the texture on your wall.
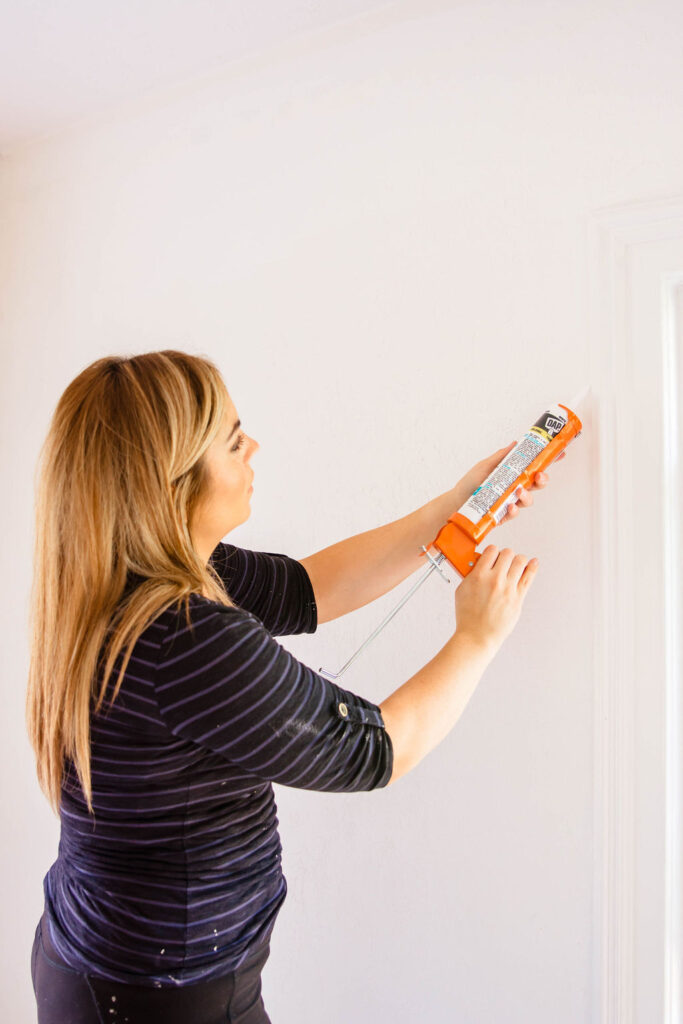
Step 4- Caulk
Caulk. Grab your Dap paintable caulk in white from the store along with your caulk gun. Open the tube by inserting the pointed tip of the caulk tube at a 45-degree angle and snip off just the top of it. Caulk any baseboards that have cracks where they meet the wall, or any corners or along the ceiling where you see imperfections. Use your finger or your 5-in-1 tool to spread the caulk line making it as smooth as possible. It should blend into the baseboard and wall. No residue lines should be visible. This small step will take you from painting walls for a beginner to painting walls like a PRO!!
Step 5- Priming
Priming walls. Open your Zinsser Bullseye 1-2-3 Primer and give it a good stir with your wooden paint stick. Pour into your paint tray and apply it to the wall using a roller with a pole extensions. Use a ladder and an angled brush (2''-2 1/2" size preferably) to prime along the ceiling. You can also choose to prime your baseboards. If doing so, include that on this step. Dry time as follows according to manufacturers instructions: Dry Time – At normal temperatures, Bulls Eye® 1-2-3 will dry to touch in 30 minutes and can be recoated after one hour. Topcoat within 30 days. Lower temperatures, higher humidity, and the addition of tint will prolong dry and cure time of the product. Full adhesion and hardness develop in 7 days.
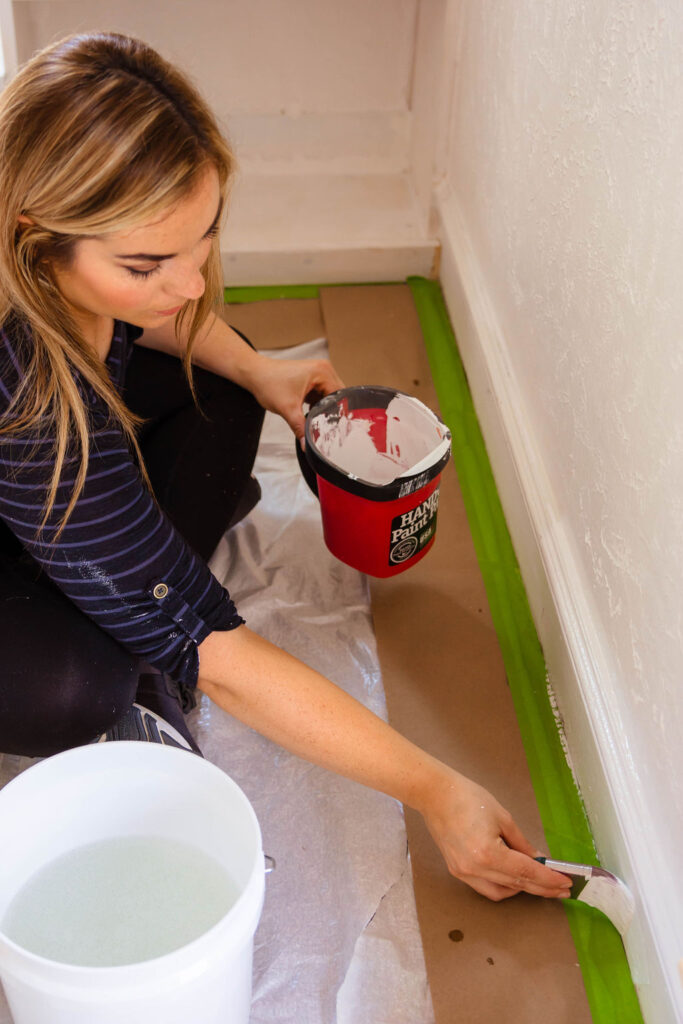
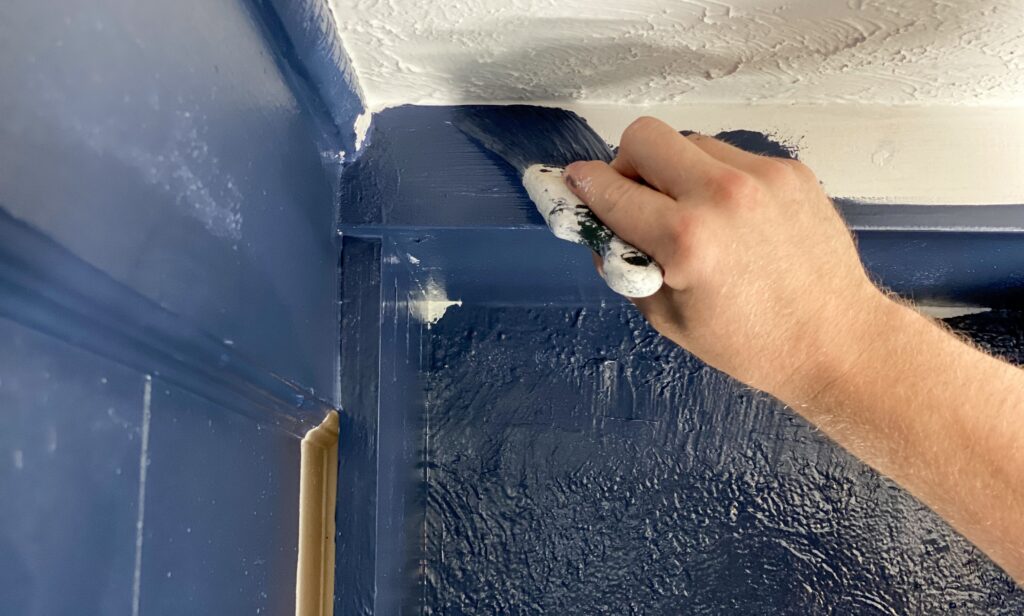
Step 6- Paint Trim and Ceiling
Paint trim-work and ceiling. If your ceiling is in good shape, you can skip this step. Ours looks great so we just did trim-work. At this point, we only have the tape along the bottom of the baseboard (where the baseboard and floor meet). The reason being that I didn't want to tape multiple times. When we paint our trim-work, we get it up onto the wall. It won't matter because the wall color will cover this up. Use long motions when painting and use that 2''-2 1/2'' angled brush for this step. A good quality brush will go a long way. Look for Wooster and Purdy are trusted brands. Dry time as follows per manufacturers instructions: Dries to the touch in 1 hour, recoat after 4 hours.
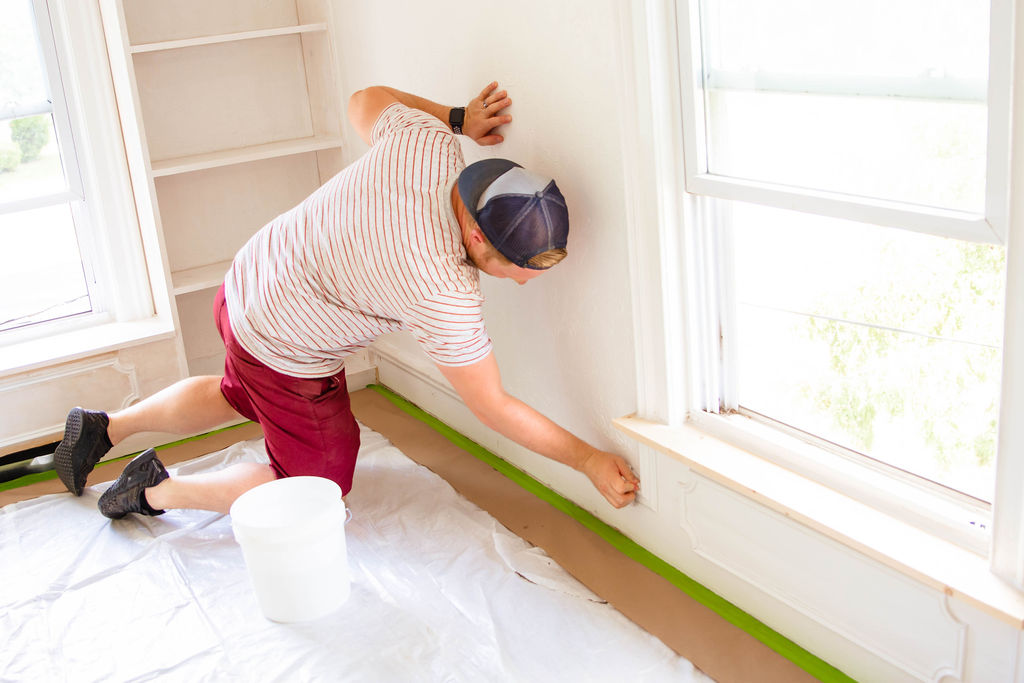
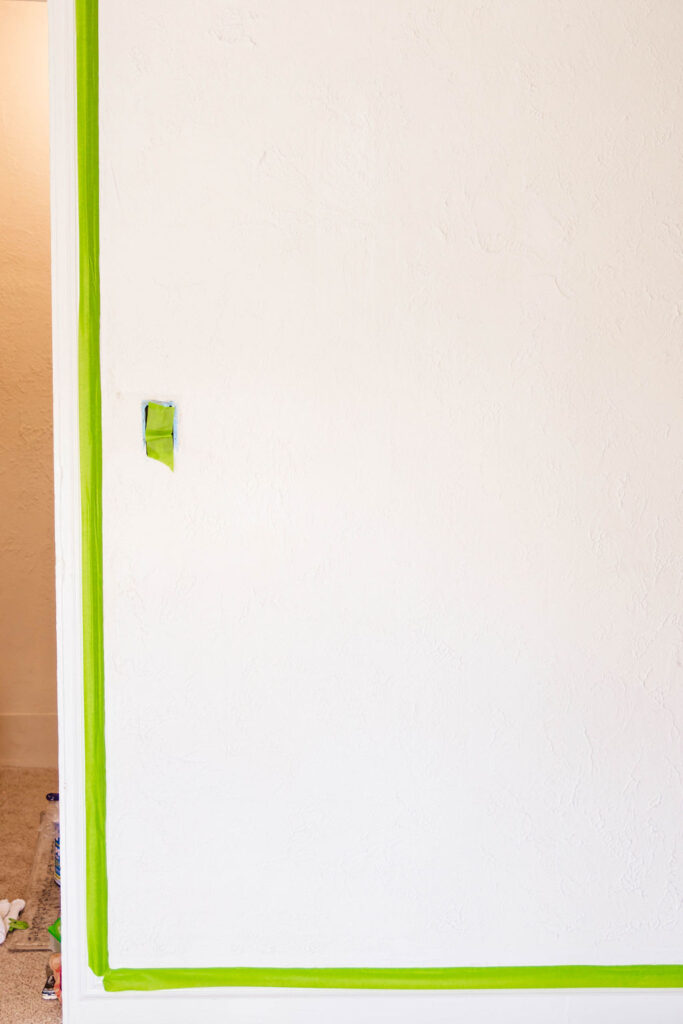
Step 7- Tape
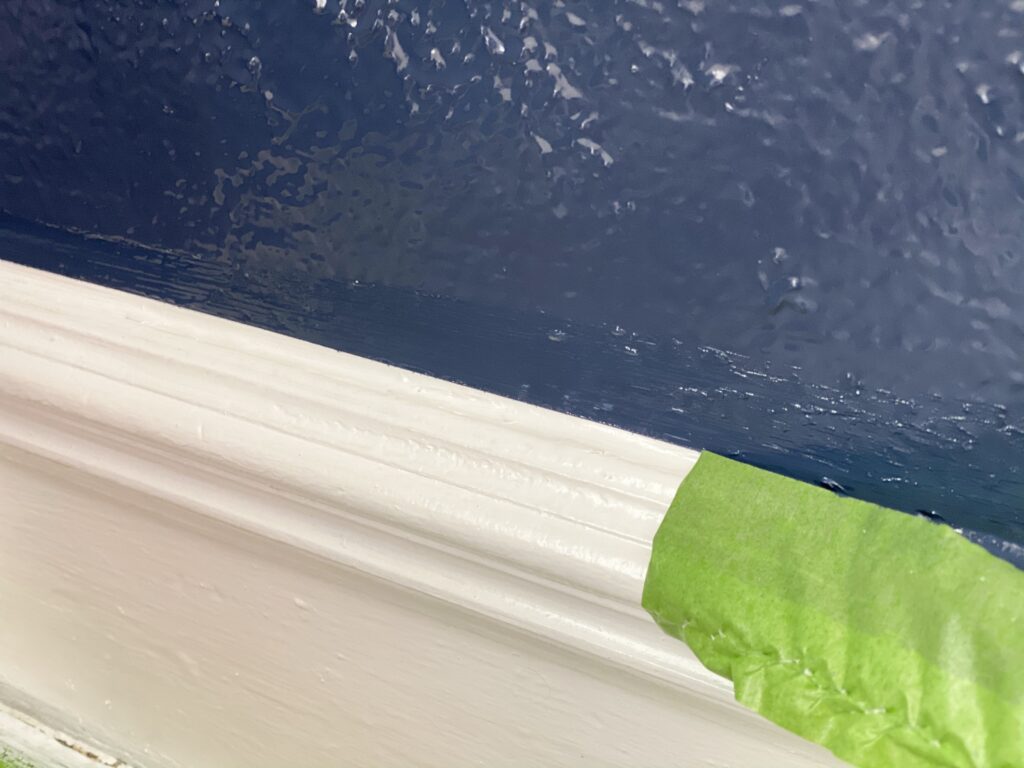
Tape. Once your trim has completely dried, you can begin taping for the wall paint. Use long pieces of tape and press it right on top of the baseboard where the baseboard meets the wall. Use a sharp tool or your finger to press the tape down so it has an optimal seal. **We choose to not tape along our ceiling and freehanded the "cutting in" with the 2''- 2 1/2'' angled brush. If this intimidates you, tape along your ceiling on this step too.
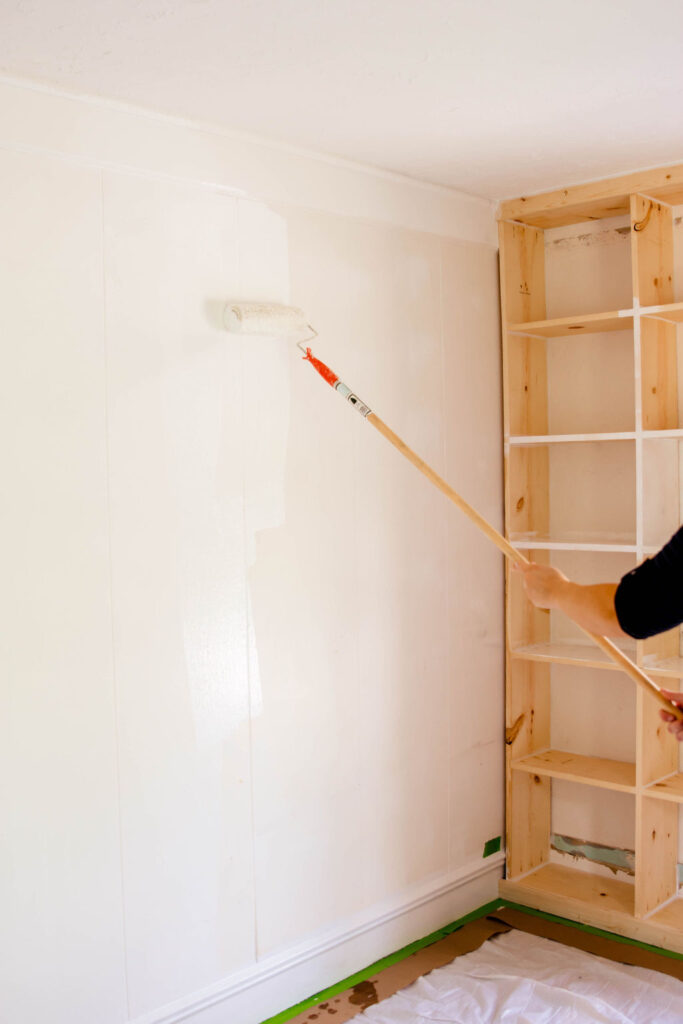
Step 8- Paint
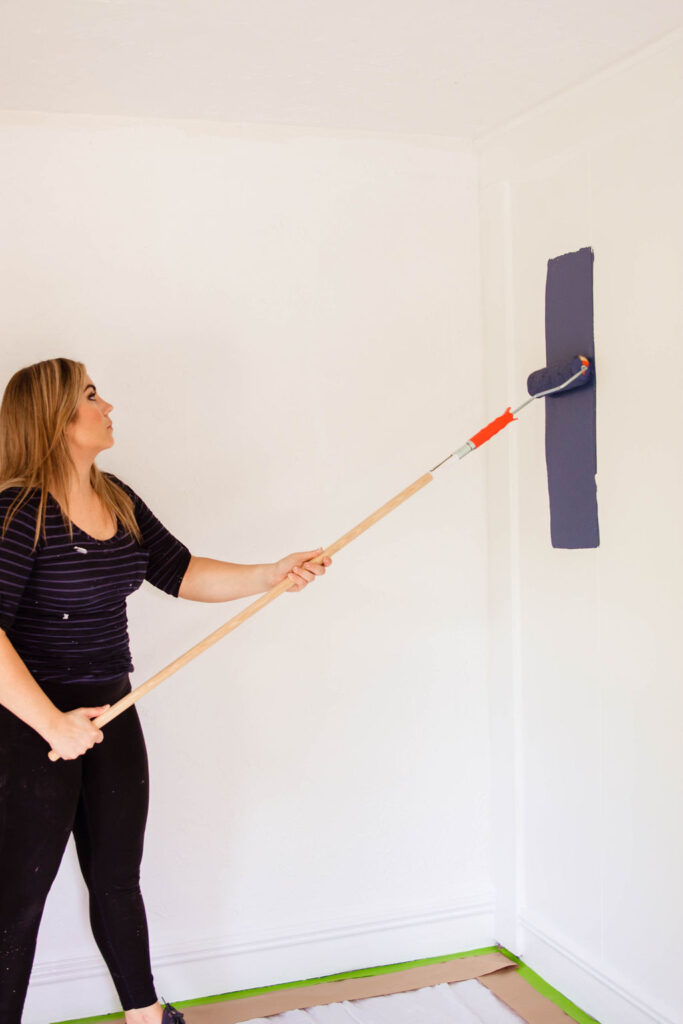
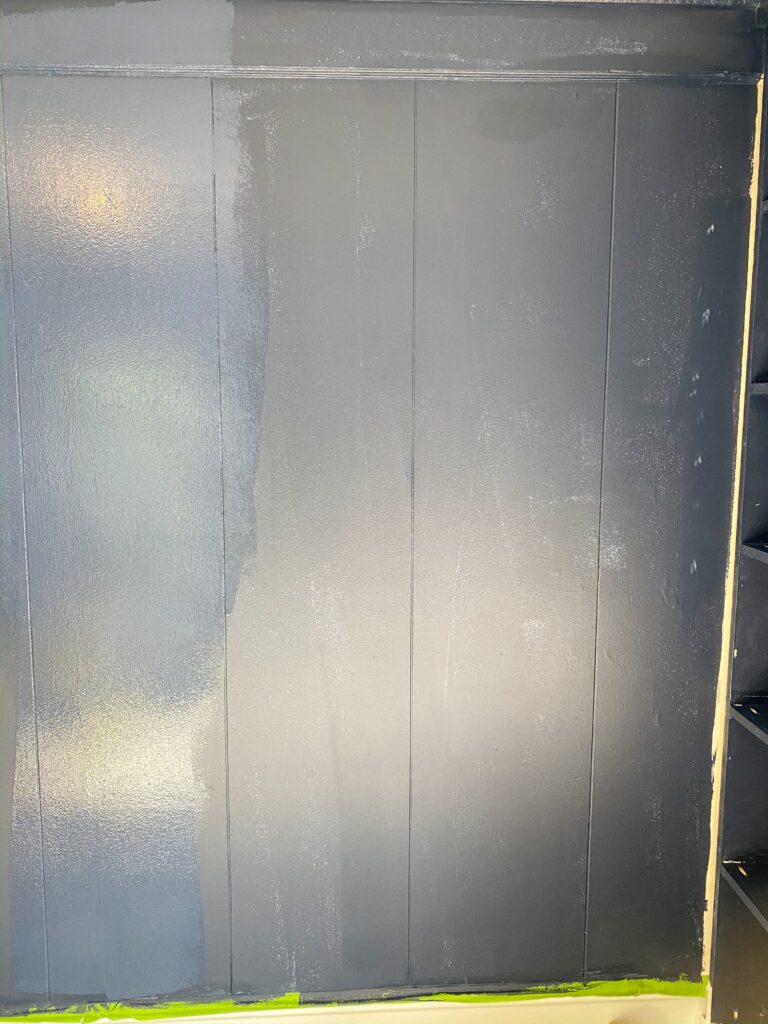
Paint. Now that you are prepped and ready, open your can of interior wall paint and pour it into your paint tray. Using the appropriate size roller for your paint sheen and wall texture (ALL roller brushes include this info on the packaging), get your brush evenly coated with wall paint and begin painting. Use a brush extending pole for this just like you did for the primer. Work in long sections, overlapping each stroke so as to ensure there are no paint lines or drips. Try to use the same even pressure for each stroke. Picture yourself making a "W" on your wall in each section. Be careful not to get too close to your ceiling with your roller. It will make things messy!
Painting tips:
To get to corners, baseboard line, and where the wall meets the ceiling, use your 2''-2 1/2'' angled brush.

If you are lucky enough to have help, put one person on angled brush duty and the other on roller duty. You will be doing 2 coats of paint. Allow the first layer to dry at least 4 hours before applying the 2nd coat.
Use your angled brush to cut in along your ceiling. As mentioned above, you can also tape this part. We find it easier to not tape. This will come down to personal preference.
Step 9- Peel off the tape
Peel off the tape while your first coat is still wet. Wait the full dry time (or more to be safe) before taping for the 2nd coat. Wet paint will pull off when taped. Always air on the side of caution. There are times where I will completely avoid the baseboard on my 2nd coat so I do not have to tape again. This is something you will get more comfortable with as you paint more. Also, if your paint lines aren't perfect, don't stress. You can go back through and touch up paint with either your wall color or trim color once everything has dried. Use a steady slow hand and you will be just fine!!
Step 10- Clean your tools
Clean your tools with water until all of the paint is cleaned off. If using oil-based paint, you'll need mineral spirits or something similar. Latex interior paint cleans perfectly with water. Do not leave your tools sitting in water.
Step 11- be proud
This might be the most important item on our list. Step back and take a look at your new space. Not only does it look lighter and brighter (because even dark rooms look brighter with new a new coat of paint), it is clean and more YOU! Be proud of the work you put into this project. Painting walls for beginners no more. You are ready for the big leagues!


Why use Rust-Oleum Home Wall Paint?
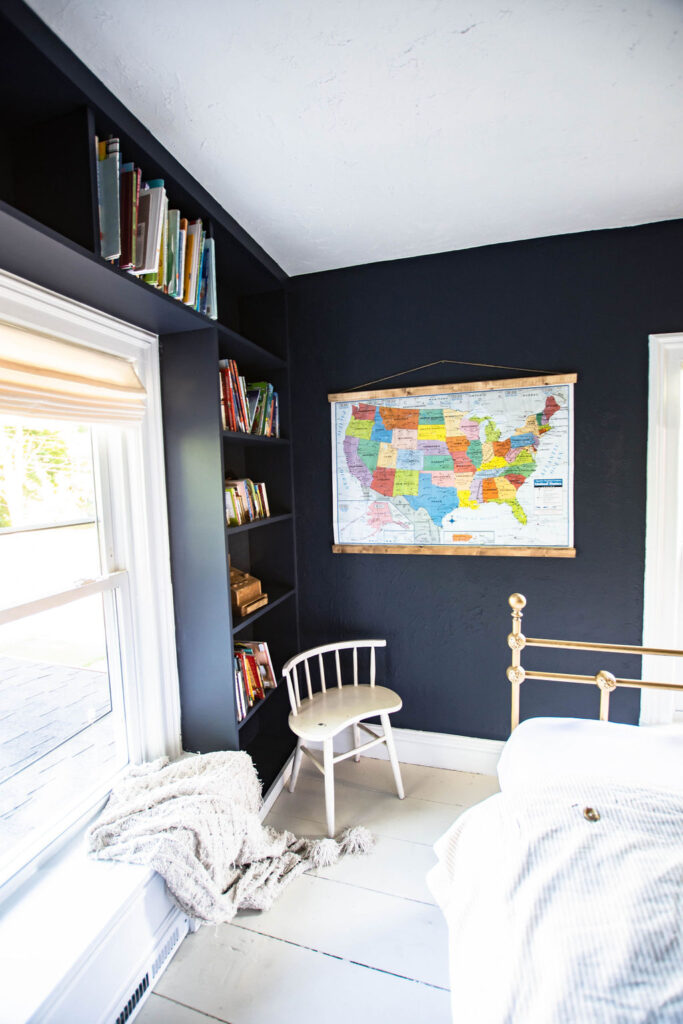
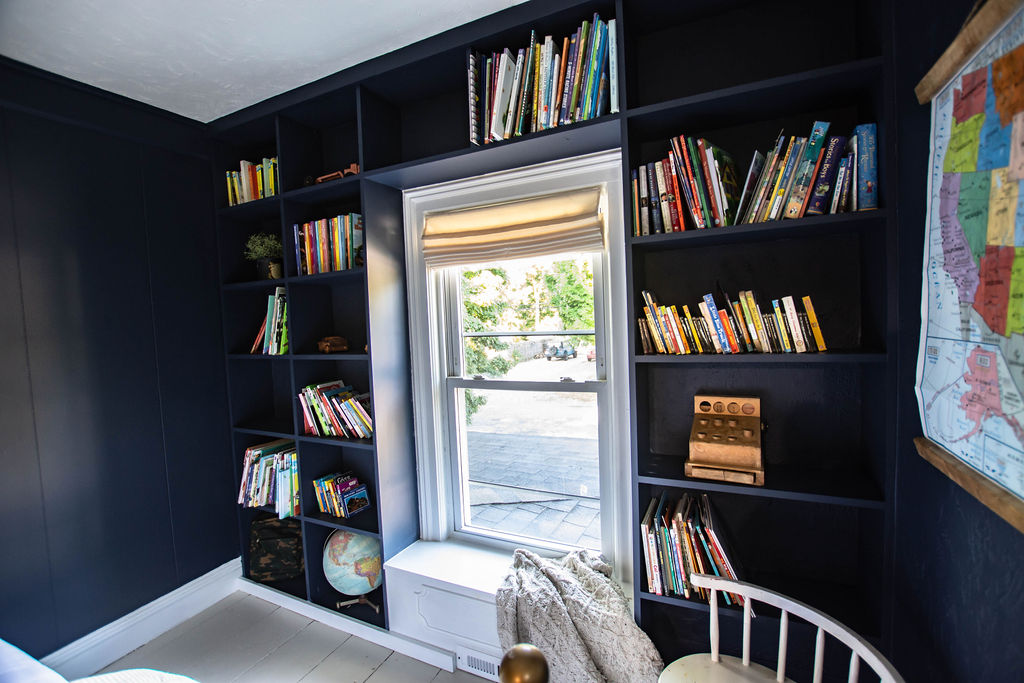
Rust-Oleum has just released their new paint line and I am VERY pleased with the way this paint handles. It was easy to use and the 2 colors we chose are spectacular. The Navy Blue (North Shore) is a fabulous shade of blue and the White trim paint is a true white. No blue or yellow undertones.
Nowadays we all value the convenience of having items shipped to our doors. Paint shouldn't be any different! You do not need to wait in line at a paint counter. Have your paint shipped right to your door and begin that project you have been putting off.
Where can I buy Rust-Oleum Home Wall Paint?
Sold exclusively at Home Depot online. Find the 12 specially curated colors here.
Just do it.
The last thing I am going to say is that you, yes you, are completely capable of painting a room. Don't be scared. Now that you have an idea of what tools you need and the proper steps, just do it. Go for it. There isn't anything you can mess up. If you hate the color, change it. That is the beauty of paint, my friends. It's the easiest way to transform a room. Head to Home Depot Online and get that paint ordered. Take the time to make a room you love. I am confident you won't regret it.
Pin it!
New to DIY? Here are a couple areas we transformed with paint you might want to see!
Dining Room Update Using Paint
Affordable Bathroom Update
Painted Checkboard Floor
I need to paint my whole house. Thanks for all the great tips!
Thank you Amy!! Hope they help!
It looks SO good! The built-in is so classy! Love the navy, too! 💙
Thanks girls! So excited to see your dining room!!
Looks great. Can’t wait to see it in person. You’ve done a great job
Homeowners who freshen up their homes with fresh paint make a real difference in the value of their homes
Thanks Mom!