
**We do not sell stencils, thanks for reading!
The first thing we need to talk about is stencil "bleeding". I think it is safe to say that when you are painting with a stencil, a little bit of bleeding is normal. If you prefer an extremely polished look, vinyl might be more up your alley than a stencil. We happen to love the rustic and old look. That makes stenciling perfect for our projects.
This doesn't mean your stencil is going to look bad. In fact, we have a few steps and magic techniques to help you achieve the best possible outcome with your stencil.
We are simply telling you that when crafting, if things don't go on perfectly, don't be too hard on yourself! Handmade items always have such great character....and at the end of the day, we are alway our biggest critics!
To get started you will need the following supplies:
Stencil
Board cut to size (for your sign)
Paint for surace of sign
Paint for letters or design on sign
(2) Foam paint brushes
Exacto knife or a sharp instrument
Stencil
Board cut to size (for your sign)
Paint for surace of sign
Paint for letters or design on sign
(2) Foam paint brushes
Exacto knife or a sharp instrument
This sounds like a big list, but chances are you will have most of these things sitting around the house.
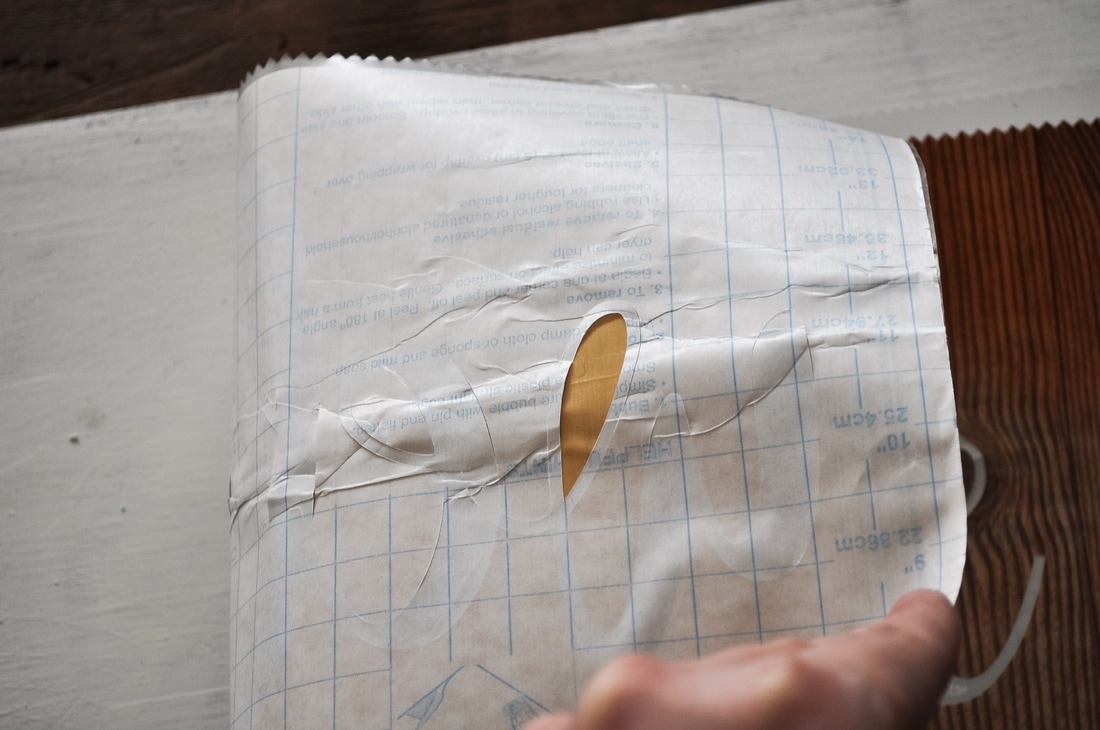
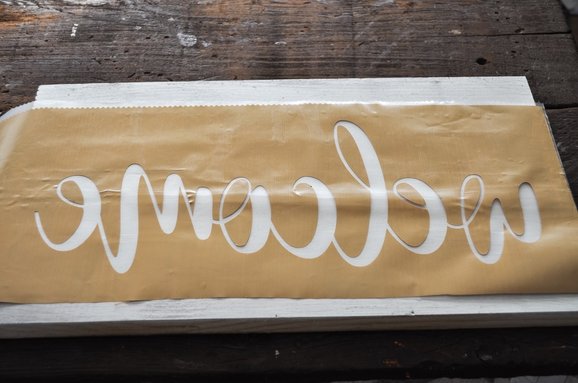
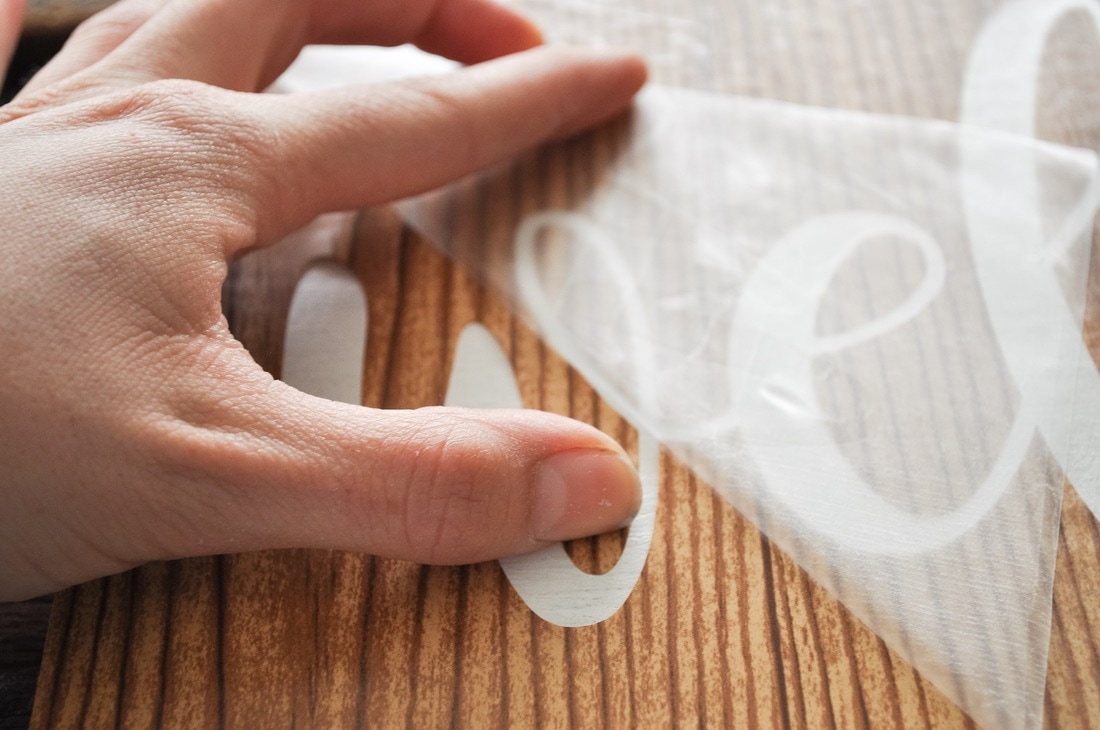
First things first: Your stencil has 3 layers to it. The very bottom layer and very top layer will both be removed at some point in your stenciling, leaving you with just the middle layer.
Your stencil should look something like this.

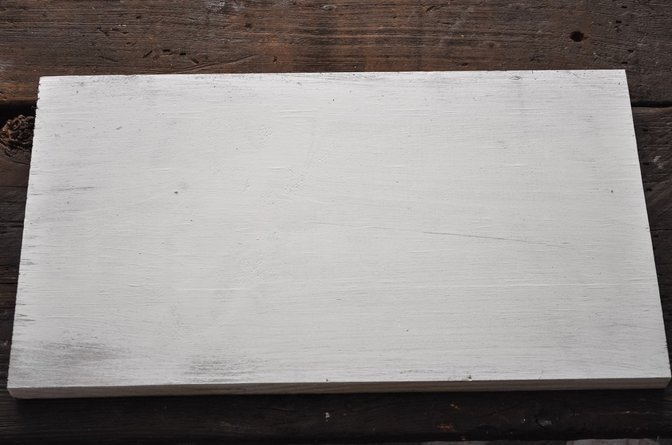
Your first step is to sand and paint your board (or stenciling surface). Allow the paint to dry thoroughly.
Peel the very bottom layer off of your stencil. Remove slowly and do not pull "up", instead pull to the side.
|
|
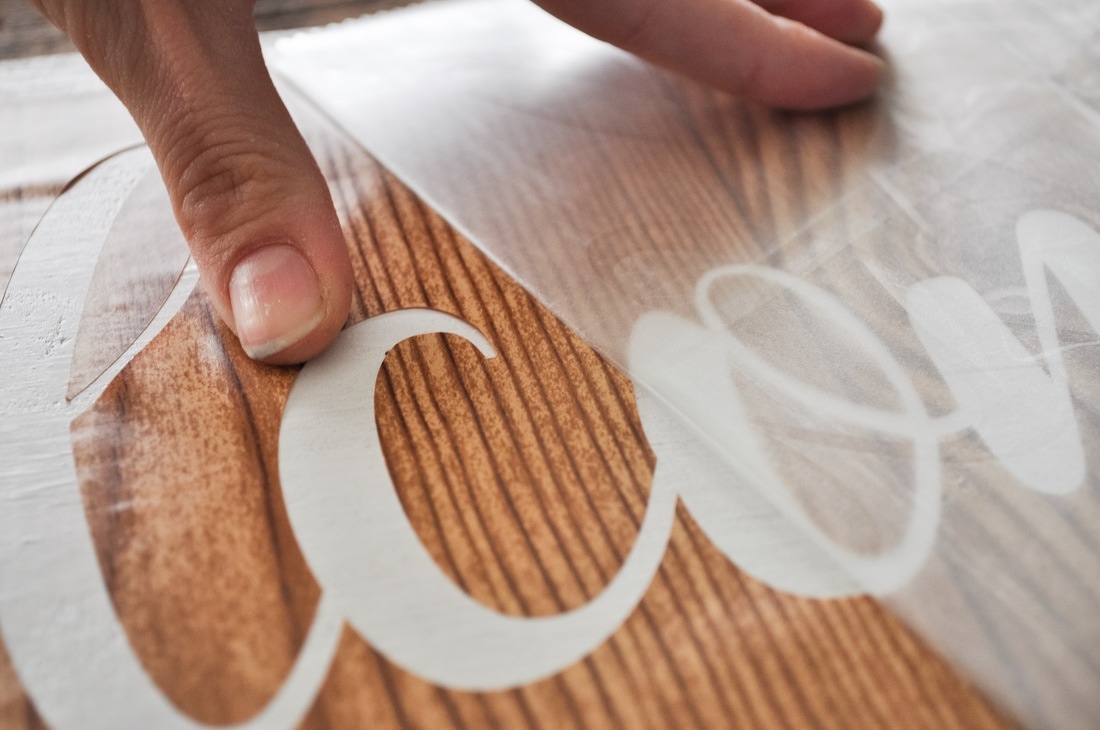
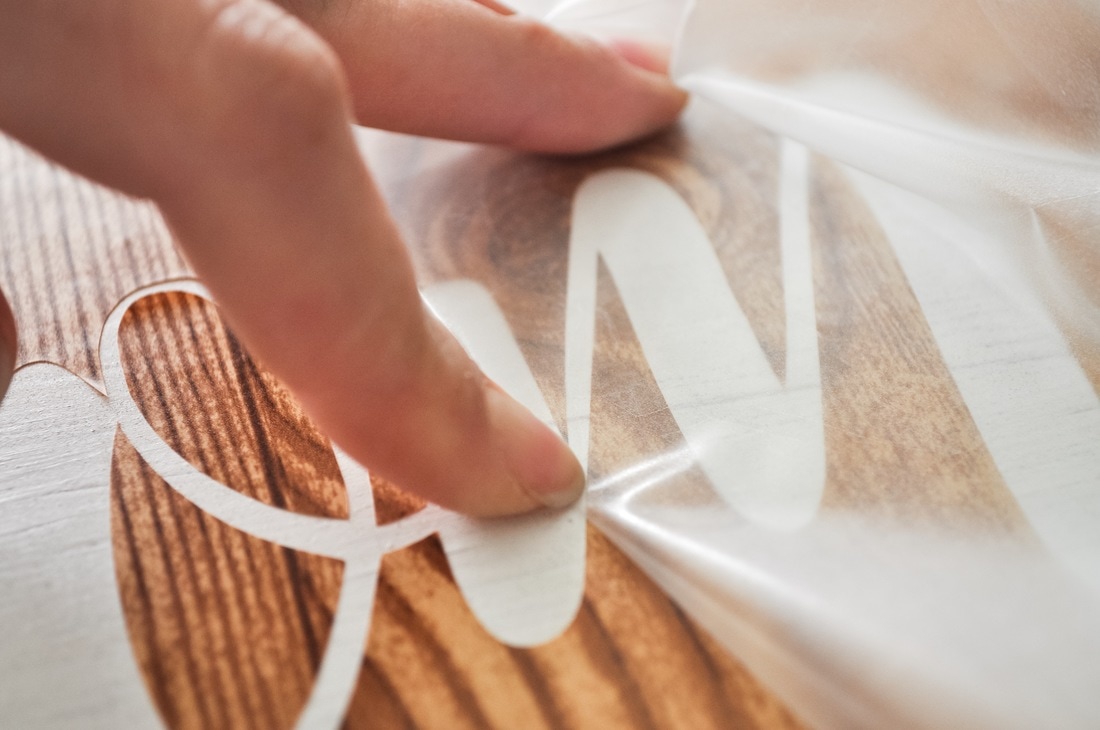
We highly recommend measuring exactly where to place your stencil, with that being said, we typically just eyeball it. Place your stencil exactly where you want the words to be, and press down "burnishing" your stencil to the wood. Use a credit card or your hands for this part.

|
|
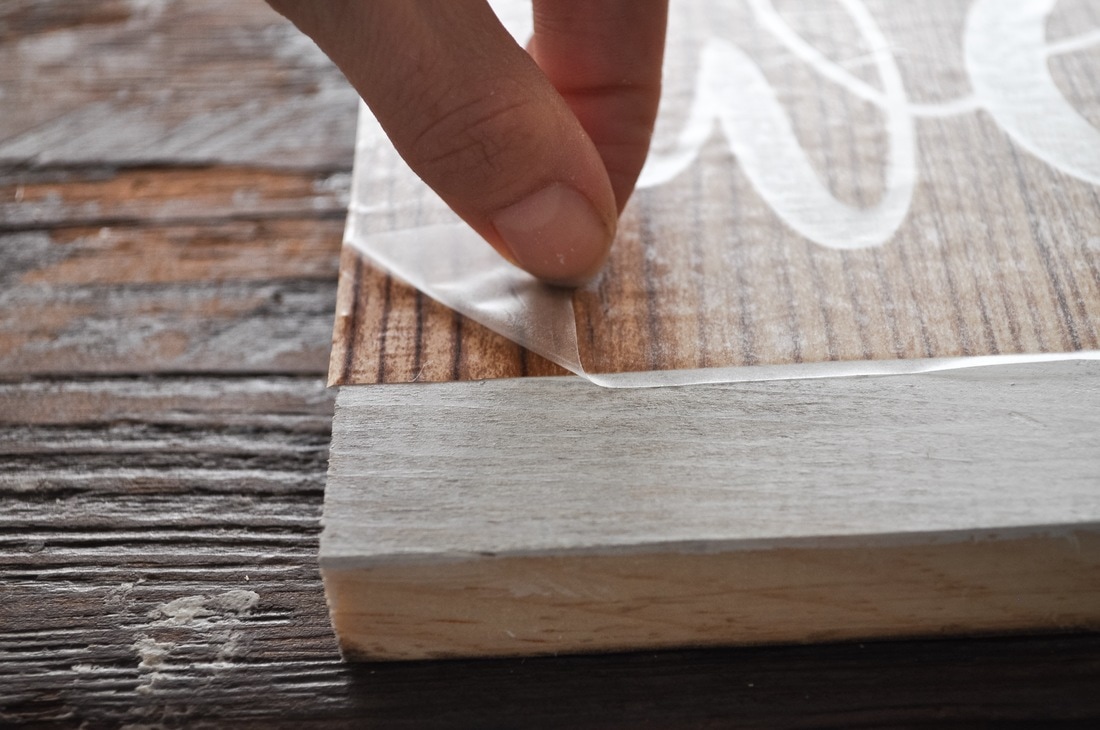
It is important that the stencil be applied to new wood surface. Stencils do not stick well to old barnwood.
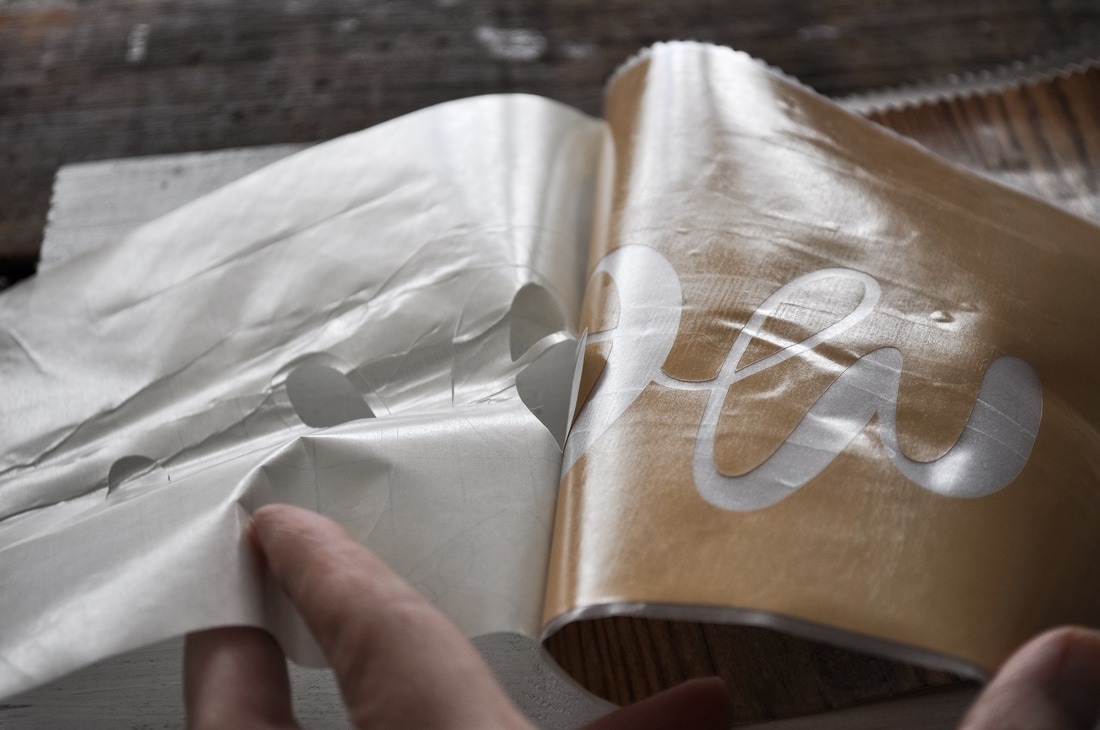
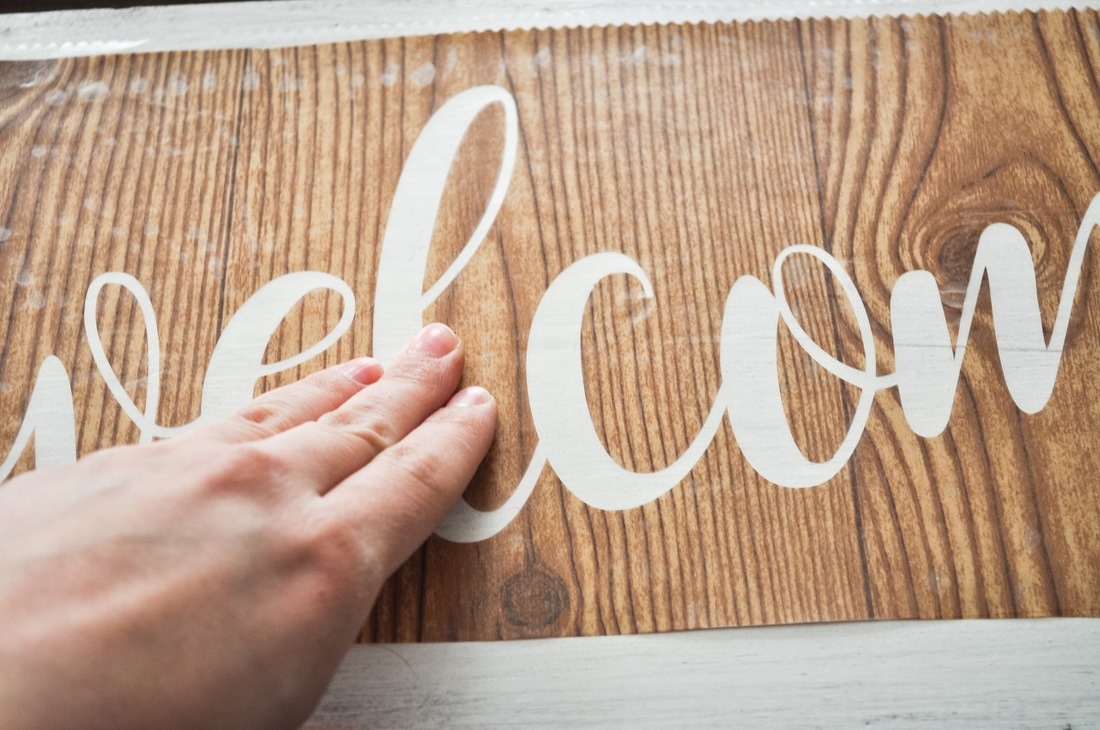
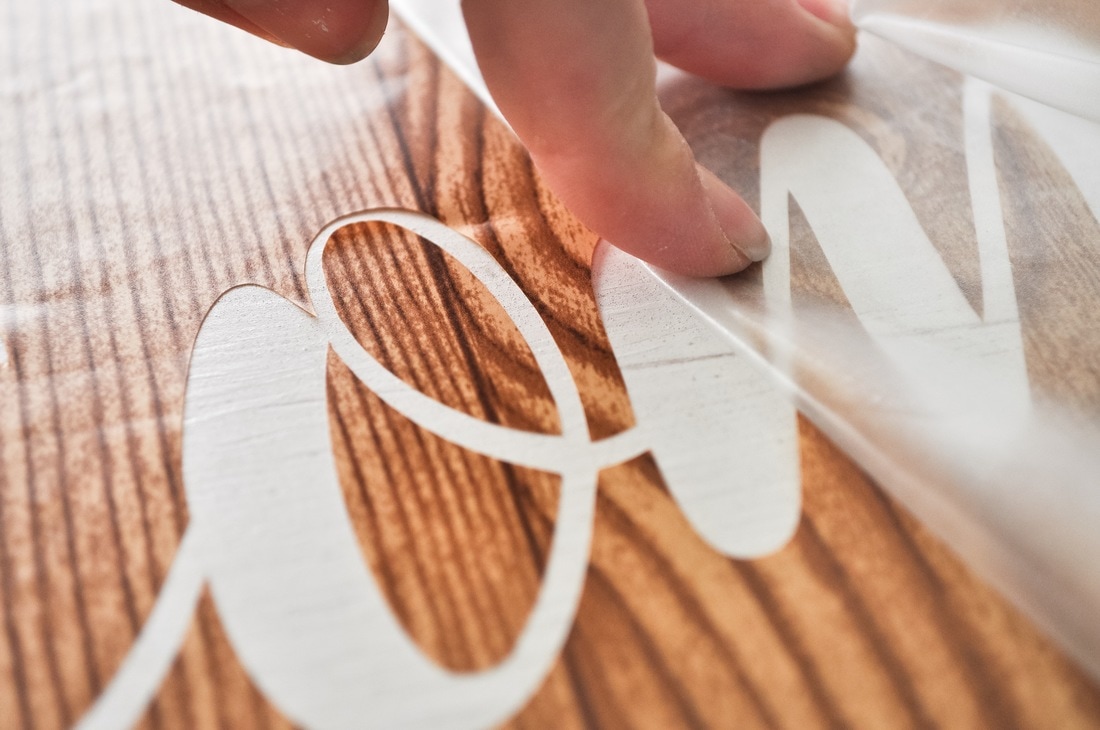
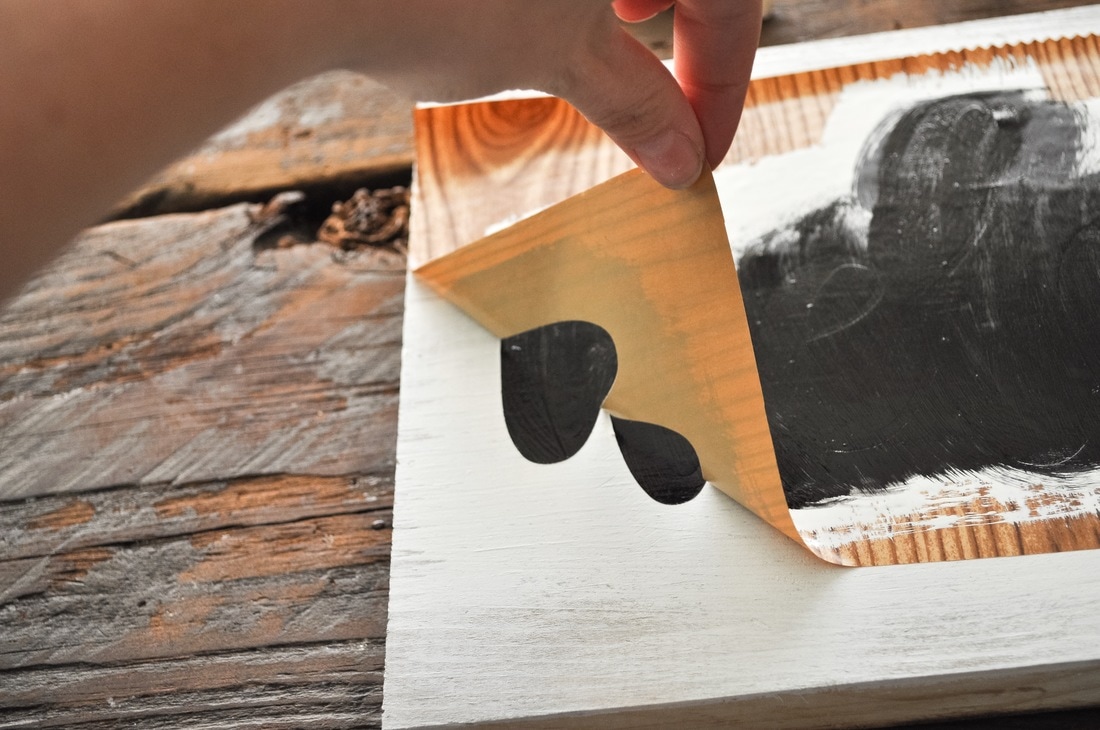
Now you will remove the top clear layer of your stencil. This layer is very sticky and you need to remove slowly. You will also want to use the same sideways motion for removing instead of pulling up on the stencil. Keep your hand flush to the board as you remove.
|
|
If your stencil comes off of the board at all, pause and rub the stencil down into the board before resuming your pulling again.
|
|
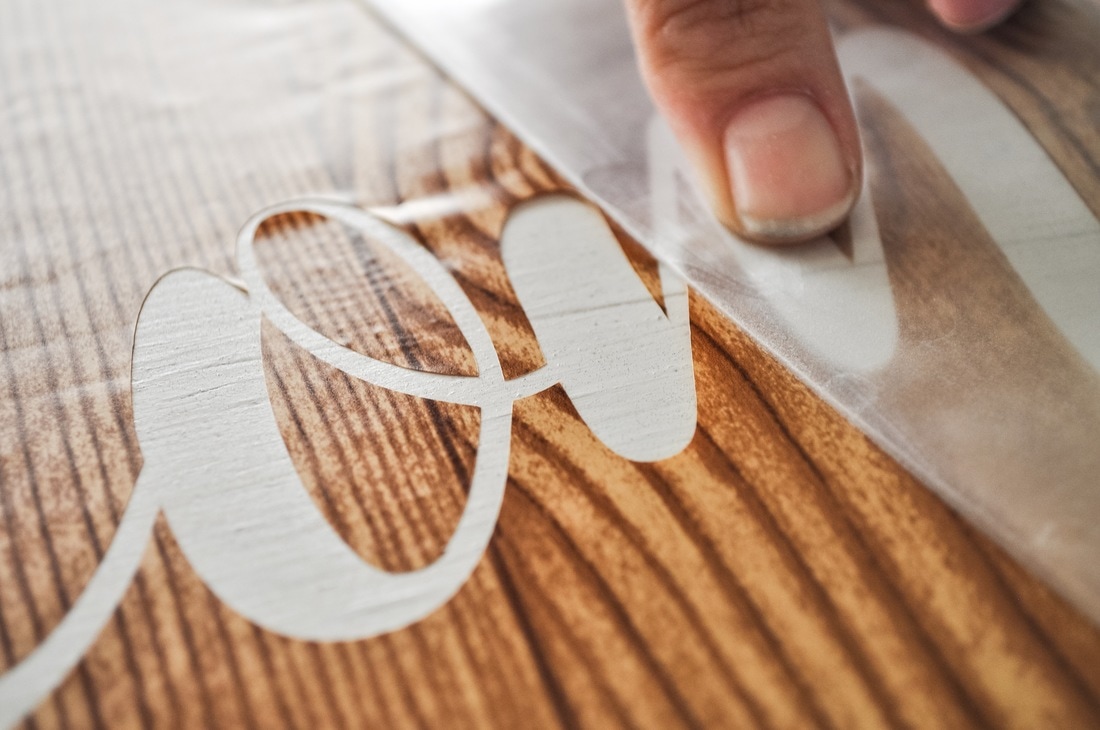
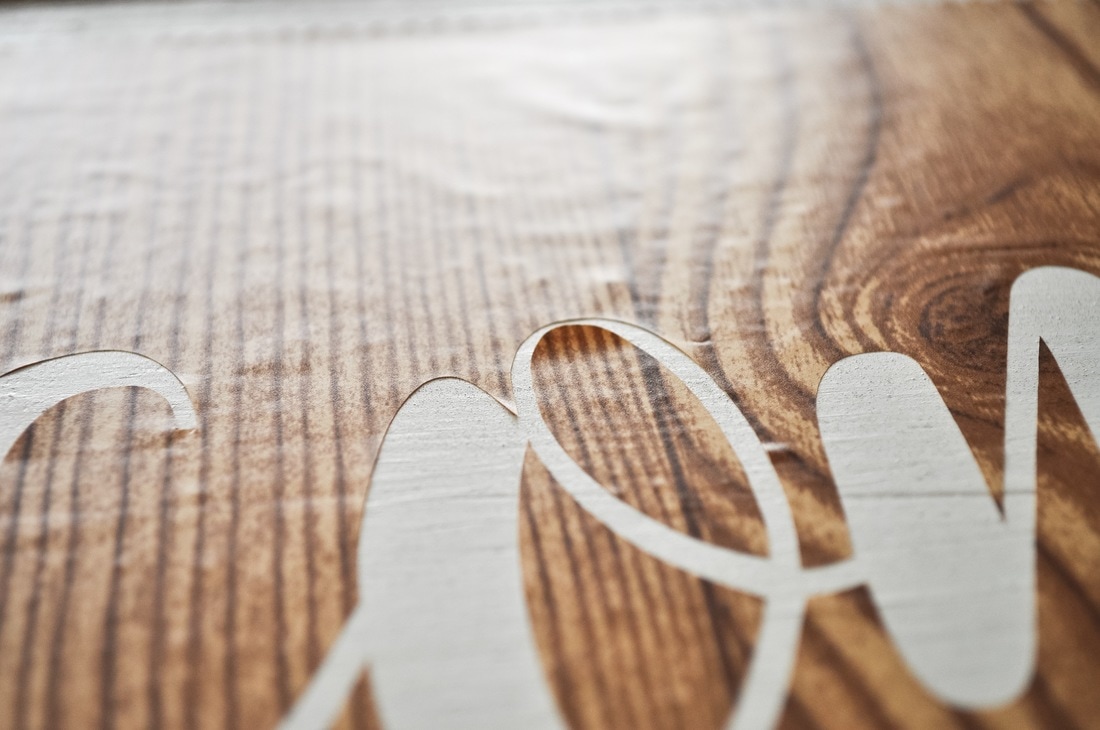
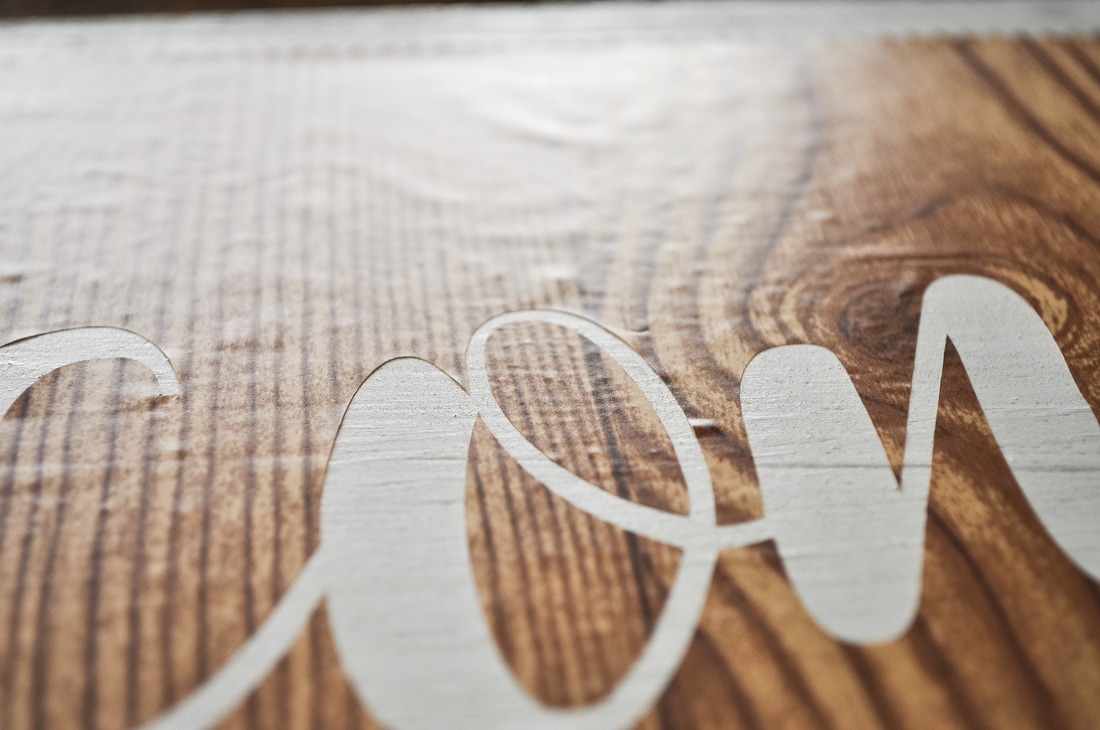
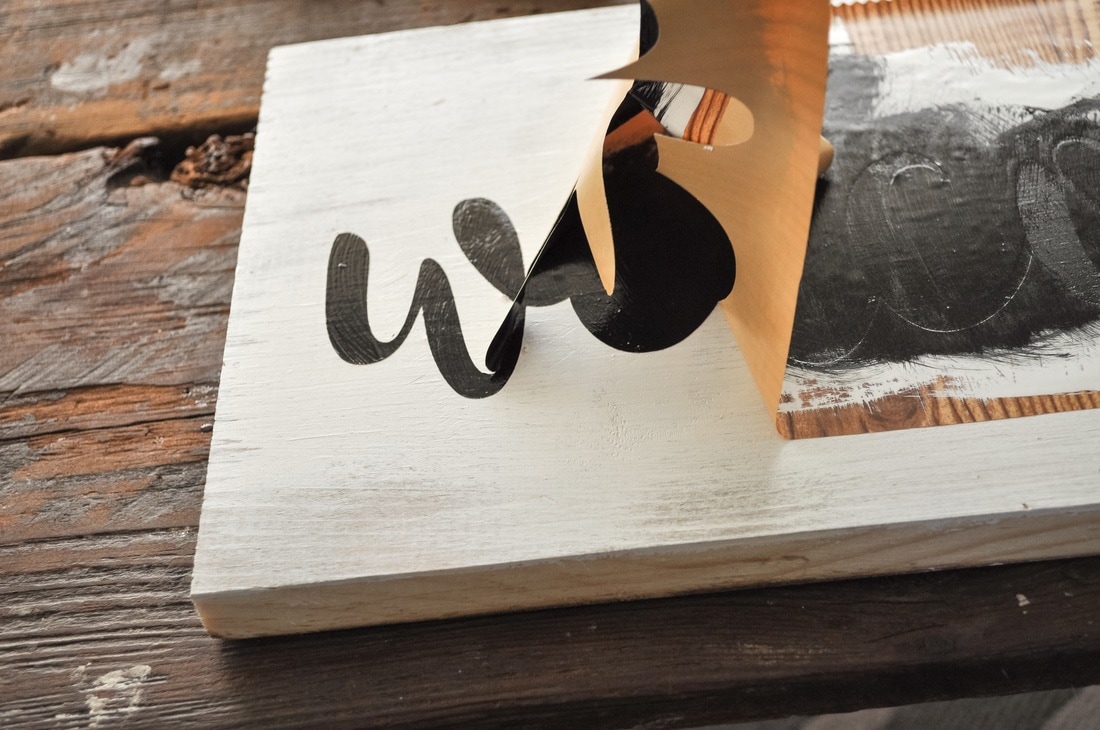
Keep peeling the clear layer off until you are just left with the stencil.
|
|
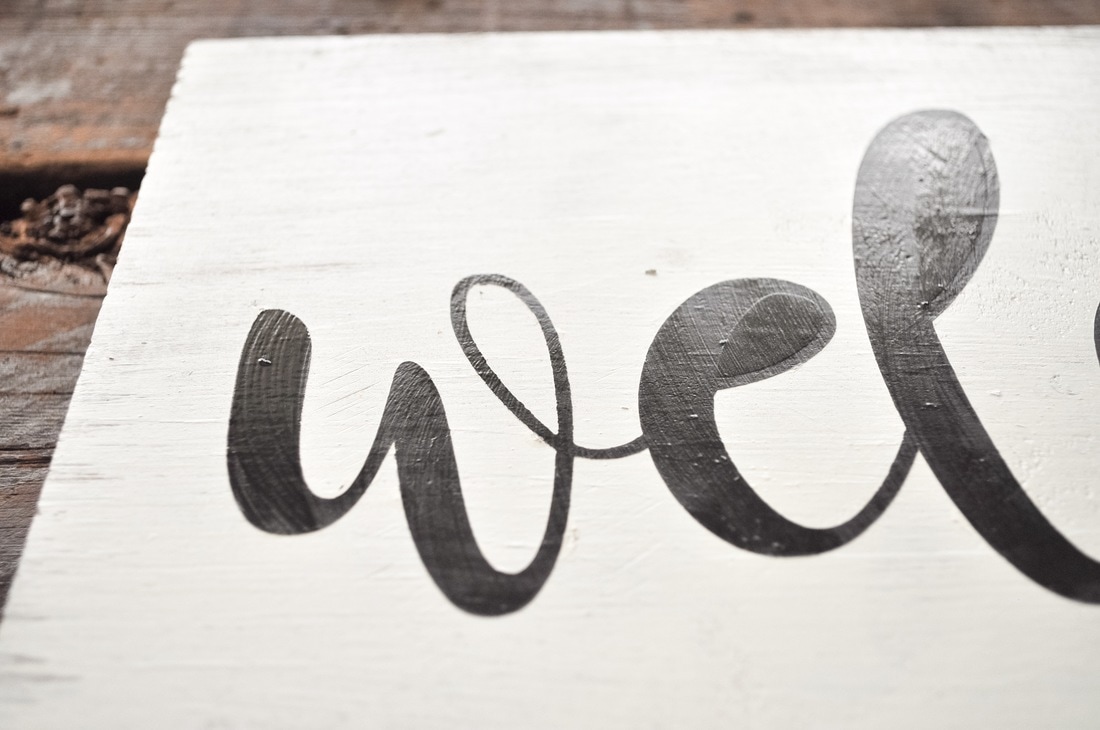
Smooth out any bubbles or flaps of vinyl poking up around the edge of the words.
|
|
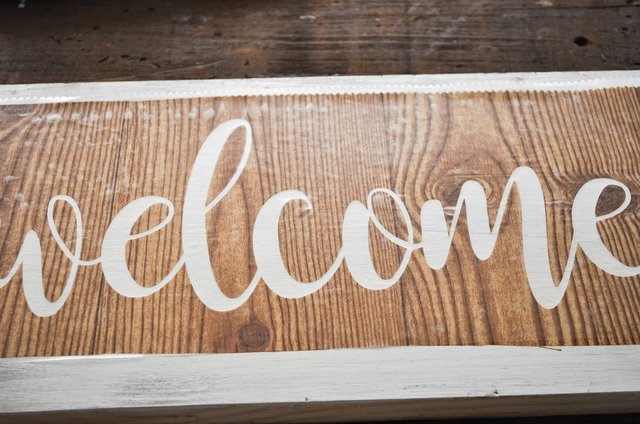
Now your stencil should be flush with the board. If there are any bubbles in the vinyl not right on the words, that is fine. As long as right around the edges of your words is flush to the board, then you are good!
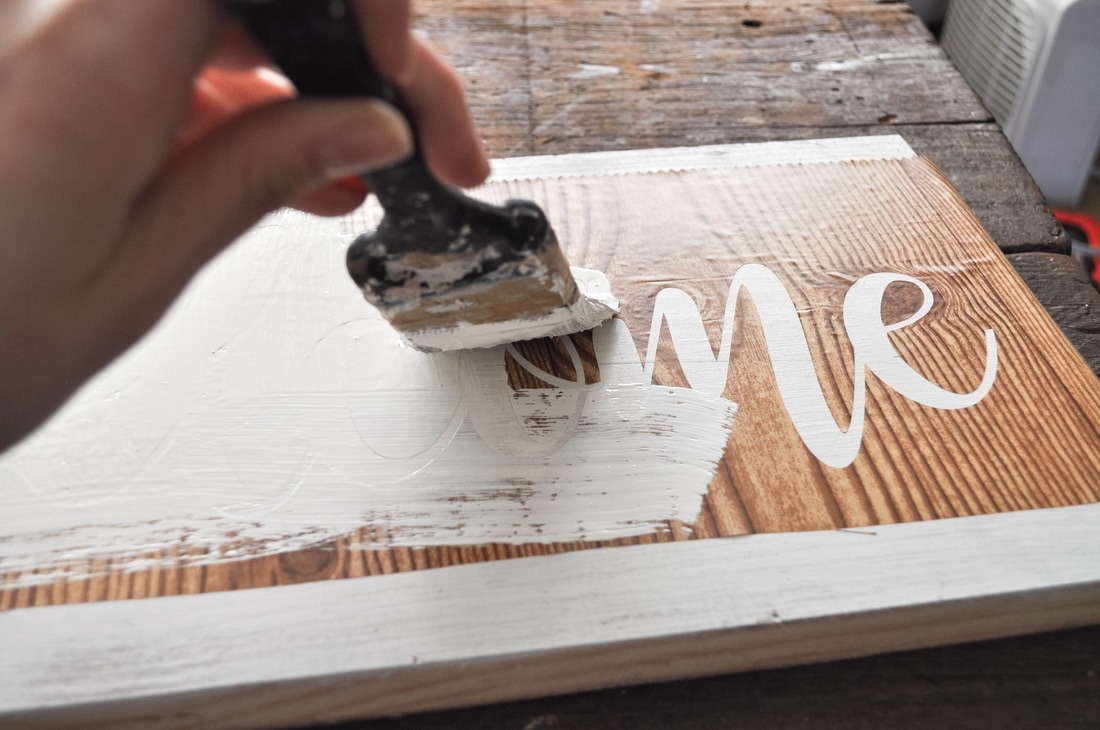
This next step is optional. If you want to achieve a crisper, cleaner look, then do this:
Paint over the words on your sign with the exact same color you used on you board surface.
Paint over the words on your sign with the exact same color you used on you board surface.
Mine is white in this demonstration.
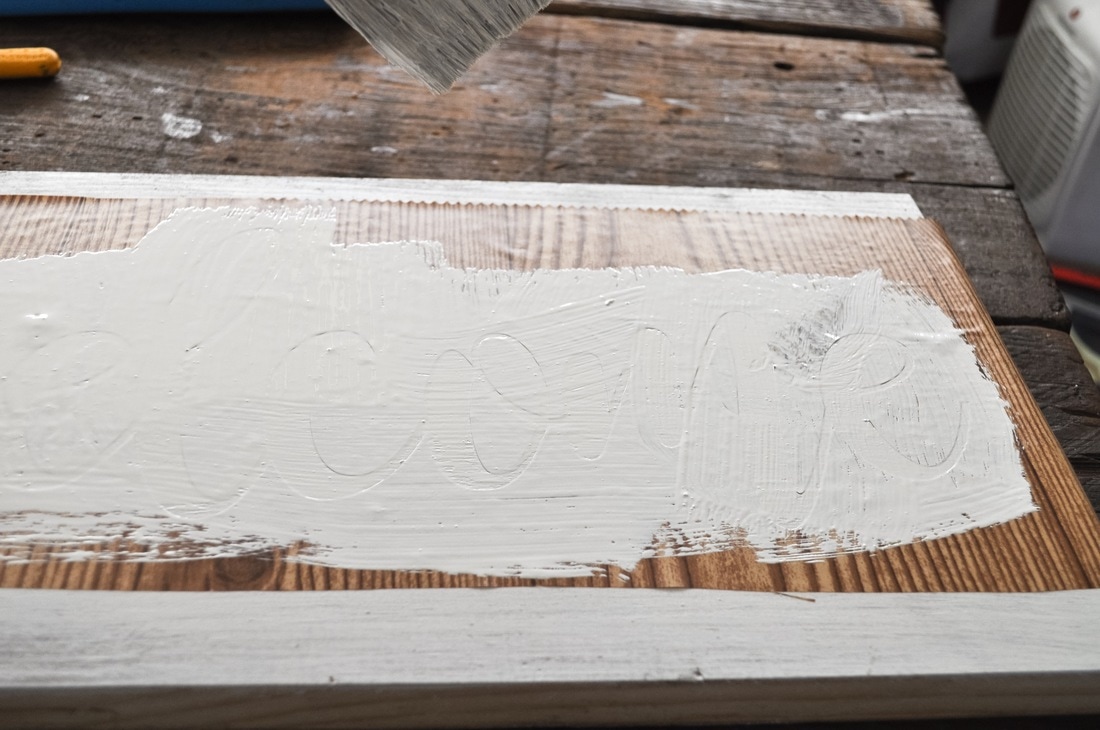
**A thin layer is optimal! The thicker you paint this layer, the better chance you have of "peeling paint" when removing your stencil.
|
|
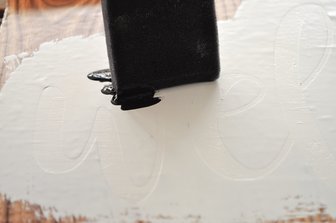
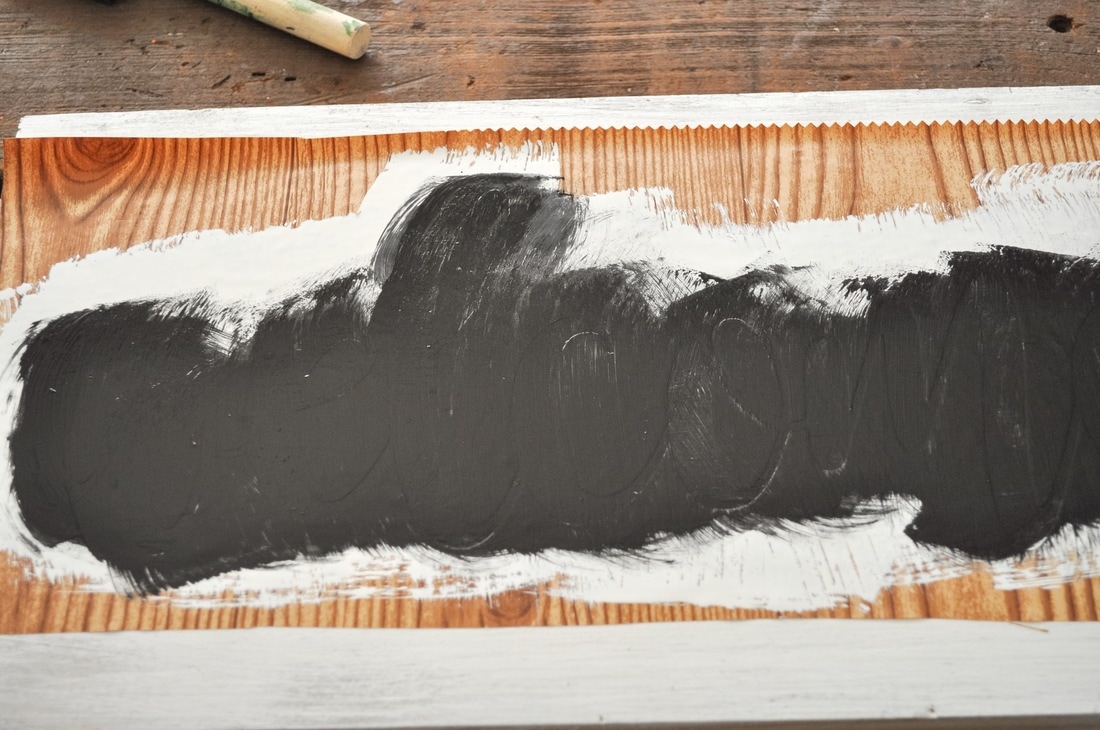
Allow this paint to completely dry, then paint your stencils the desired color you want. I chose black.
|
|
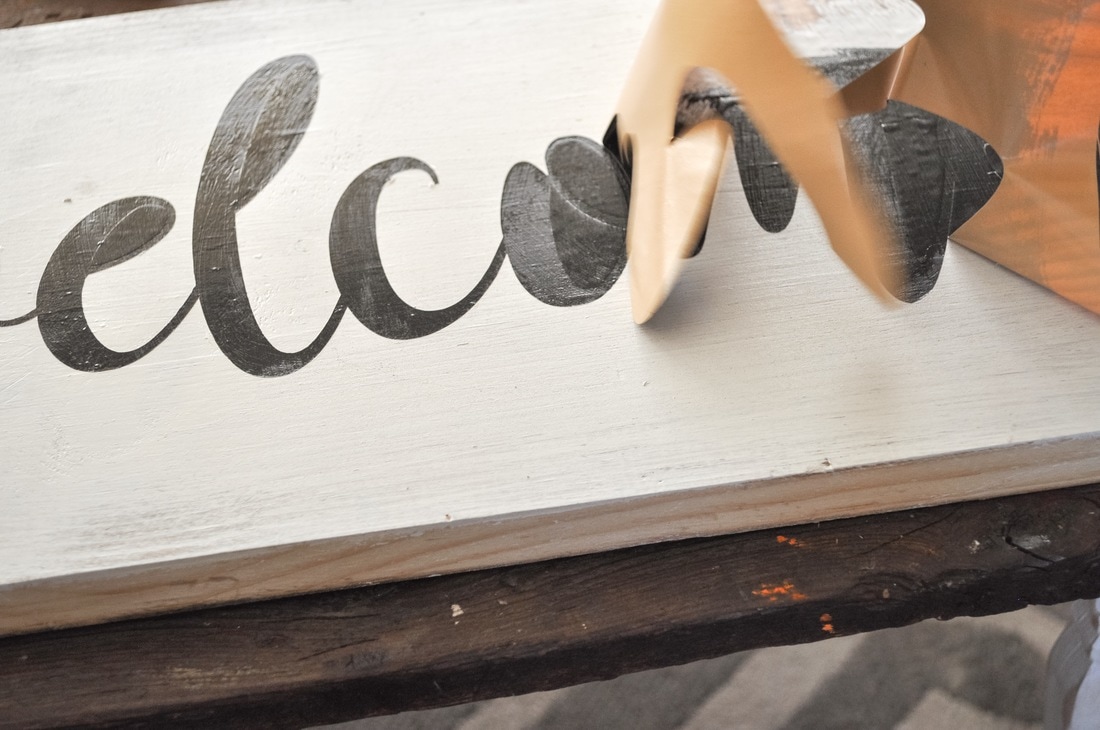
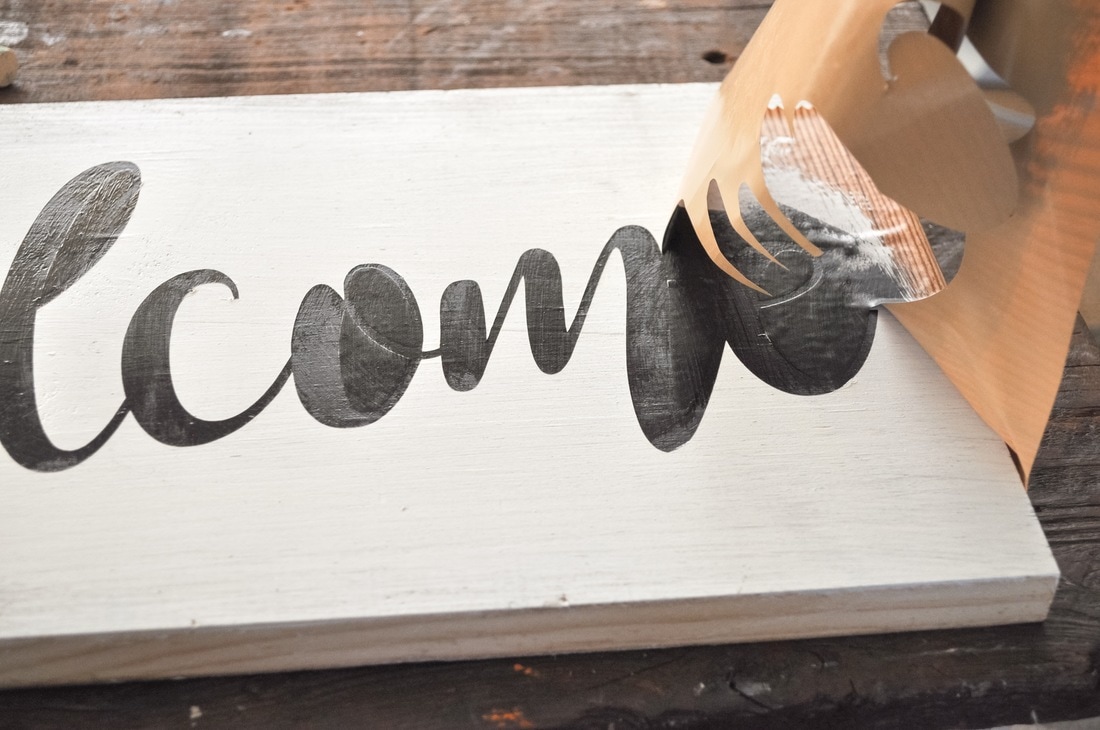
Once your letters are thoroughly covered with the stencil paint, remove your stencil. Do not wait for drying.
|
|
|
|
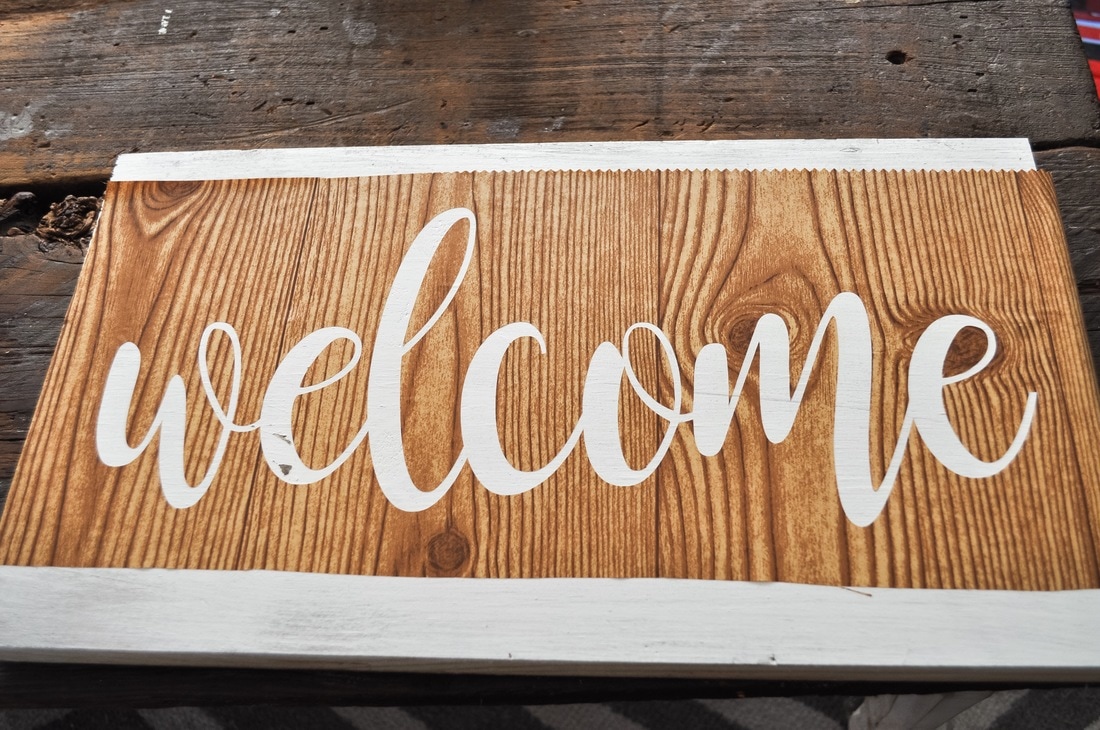
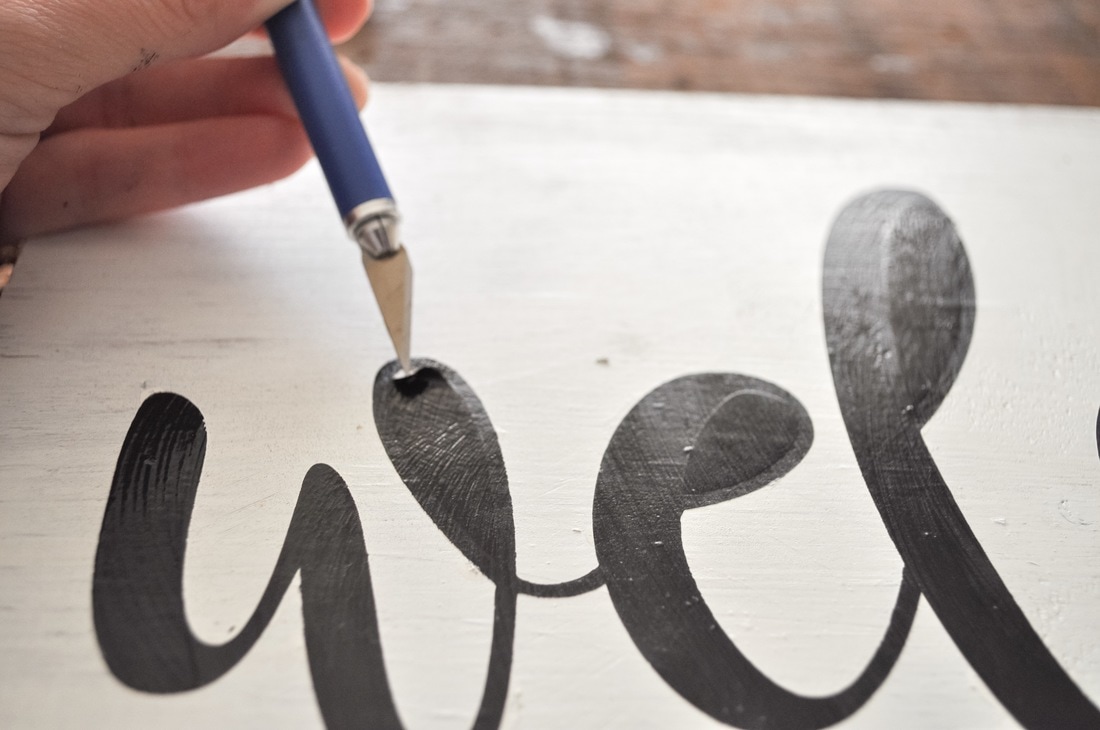
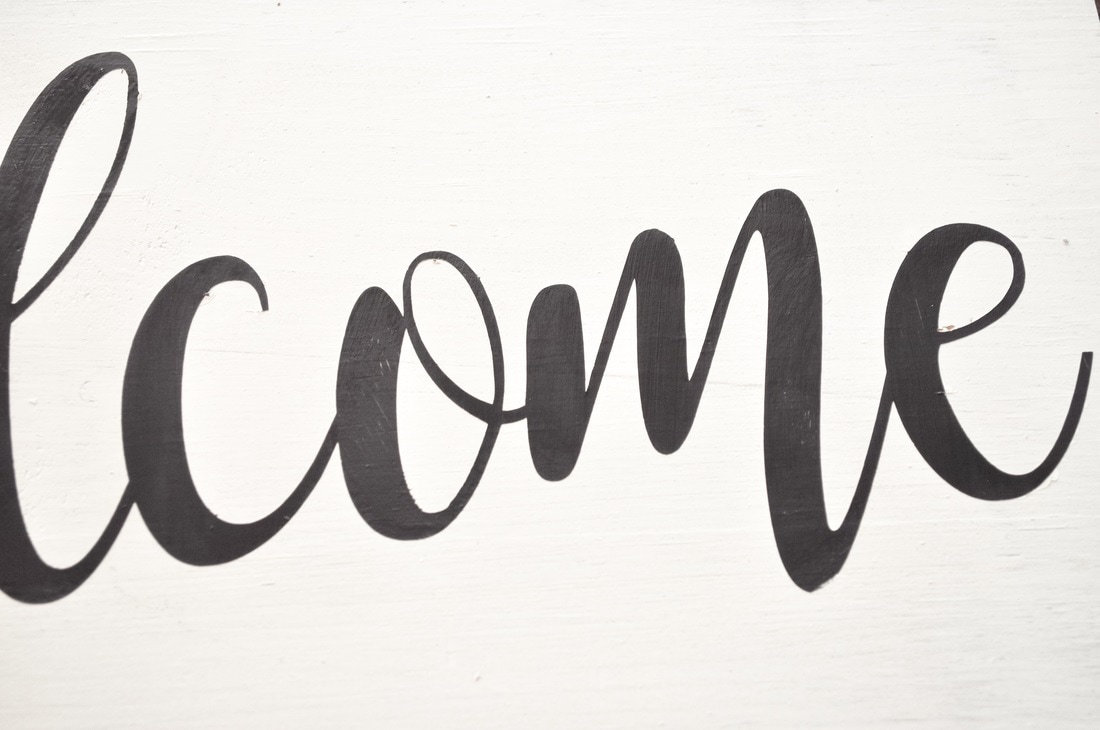
At this point you will need to remove the leftover stencil. The "o", "e's" and "l's" all have centers that need removed. Use your exacto blade or a sharp instrument. Stab the center of the circle you are removing, and lightly lift the edge.
Once all remnants of the stencil have been removed, let your paint completely dry.

|
|
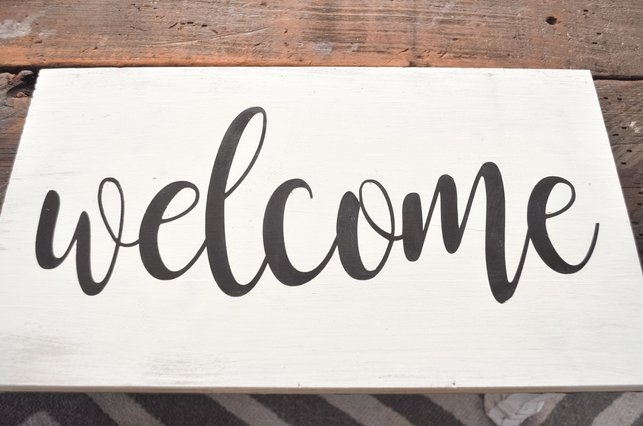
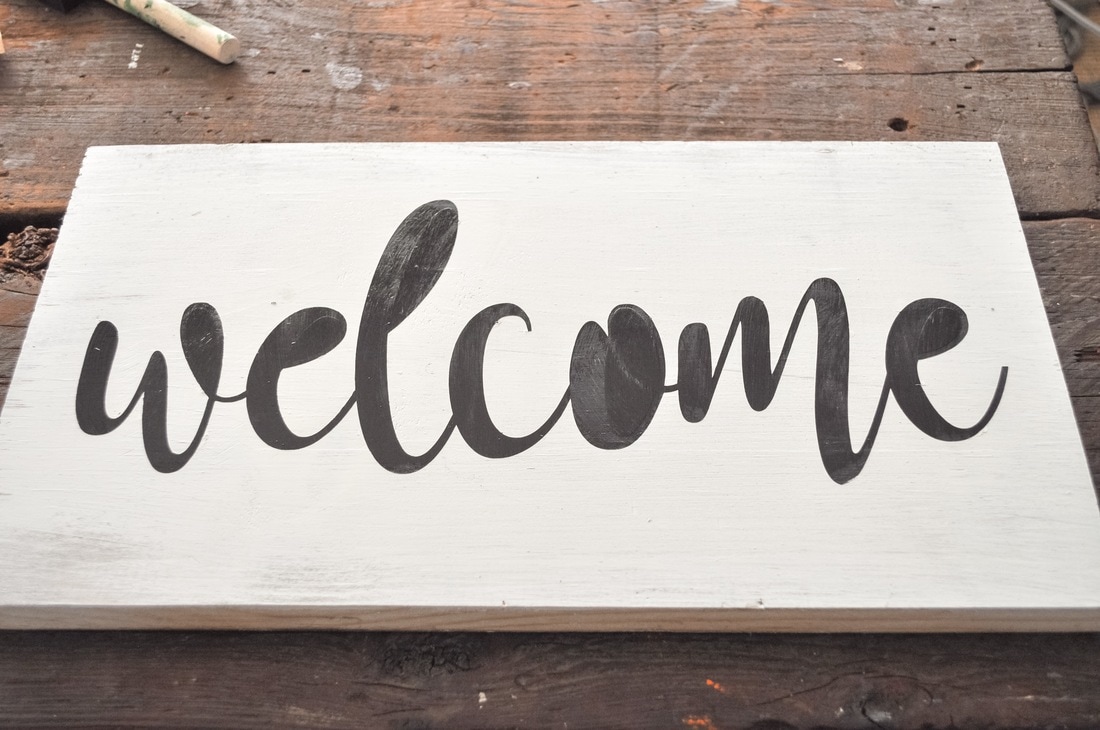
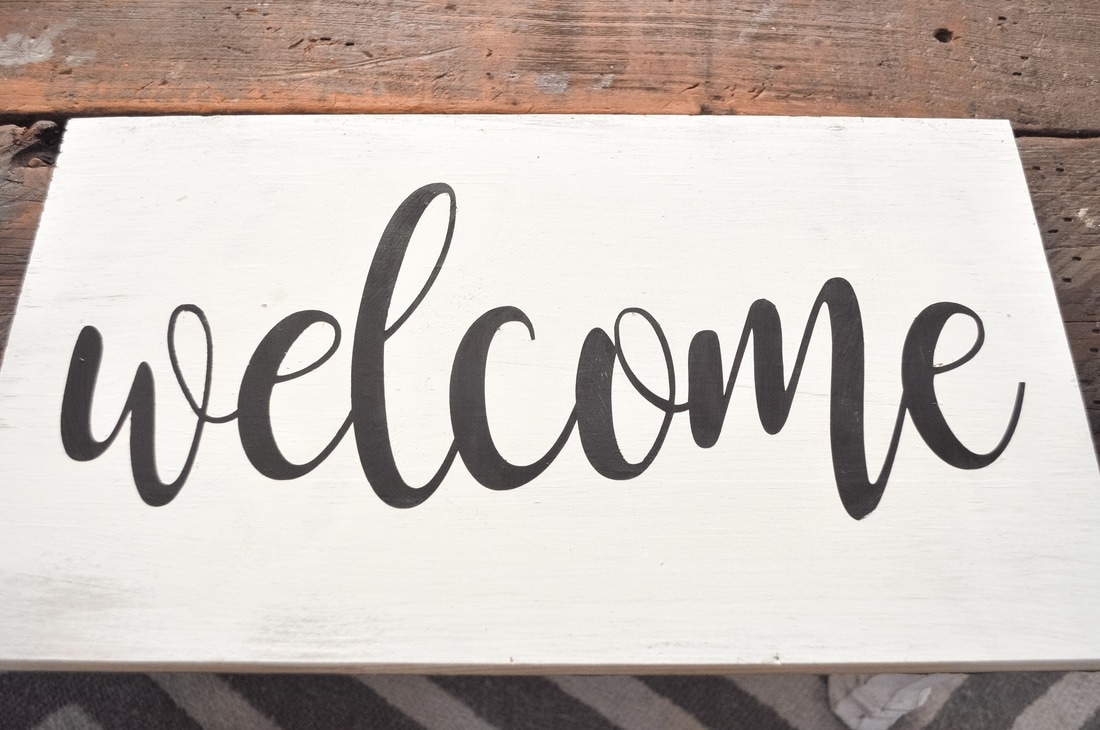
The end result is crisp clean lines! But remember, stenciling is not perfect, so if you are striving for perfection, go with the vinyl 😉
If you have any questions at all, please comment below or send us an email!
Happy stenciling friends!
Pin it!!!

Hi where did you get this stencil? Looking for something exactly like this.
We actually made it. If you know someone with a Cricut or Silhouette vinyl machine, they can cut any design just like this.
Is the stencil just contact paper?
Yep! I like Duck brand the best. It adheres really well to the board.
what font did you use for this sign love it
I’m having an issue with the paint pulling up from the base wood when pulling vinyl stencils off. It pulls up paint and some wood splinters.
We are sanding prior to painting with 220, We are also taking 220 over the paint before we lay the adhesive vinyl stencil.
Not sure what we’re doing wrong.
Nancy,
I am not sure either as it sounds like you are doing it correctly. Two questions that come to mind... 1- What type of paint are you using and 2- How long are you letting the base paint dry before applying your stencil?