
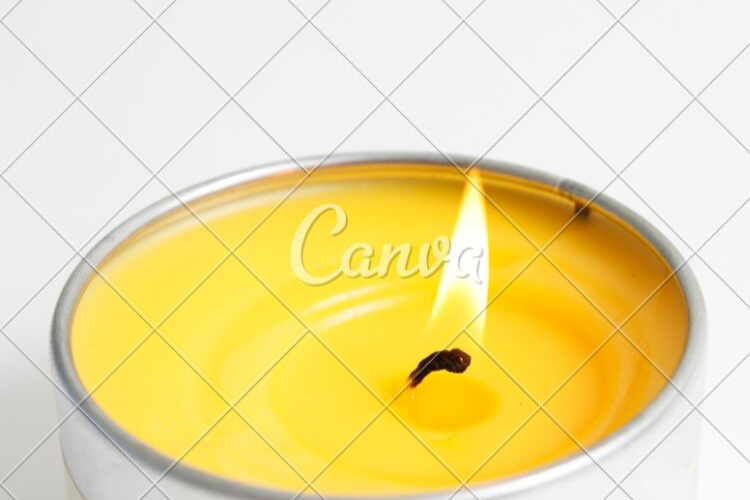
Citronella candles are an essential part of outdoor summer living in missouri! These DIY citronella candles are my favorite because I can choose the container and save money!
I LOVE having company over- especially in the summer time! Who doesn't love the hot summer days and the cool evenings? There are so many things to love about living in Ohio, with the exception to the humidity....I mean who really enjoys being sticky and damp all day!?
With the humidity comes the constant presence of MOSQUITO'S!
I have the blood they want and am guaranteed to be devoured. I decided one way to remedy this problem with still having a good time was to make my own Citronella Candles, because those hideous ones from the local drugstores aren't fun to look at!
Just a few steps and you too can have these darling candles that will add a touch of color and functionality to any gathering!
DIY Citronella Candle Supplies:
Candle Containers (I got mine at Target in the “One Spot” area- they were $1 each)
Soy Wax
(wax, wicks, and oil are from www.naturesgardencandles.com)
Citronella Oil
Wicks
Reynolds "Slow Cooker Liners"
Reynolds Aluminum Foil, optional
Ribbon
Scissors
Instructions
- Line your crock pot with a liner.
- Fill the crock pot up with the wax.
- Set temperature to high; if you are nervous about it getting too hot then stick with low temperature setting…if you do high watch it to insure you don’t get your wax too hot!
- Two hours into the melting process you should be ready to go!
- Place the wick in your container.
- For the fragrance you have two options; first, add your fragrance now or second, add it once the melted wax is in the container.
- This next step is totally optional, I added aluminum foil to the top and made a small hole (with a writing pen), I then stuck the top of the wick through the hole and wrapped the foil around my container so it would support the wick and hold it centered as it set up.
- Set them aside and allow them to completely solidify, this should happen within an hour.
- Next you will take the foil off and cut the wick so only a ½ inch is left. Tie cute ribbon on the bucket handle to dress it up!!
Leave a Reply