• Skip to primary navigation
  • Skip to main content
  • Skip to primary sidebar
  • Skip to footer
Clover Lane
  • Home
  • About Clover Lane
    • Legal Disclaimer
  • DIY
  • Home Decor
  • Recipe Box
    • Appetizers
    • Dessert
    • Drinks
    • Entrees
    • Sauces and Dressings
    • Side Dishes
  • Welcome to Clover Lane All Things DIY and Home

Home » Budget Bathroom makeover

Budget Bathroom makeover

September 13, 2015 by Sadie Leave a Comment

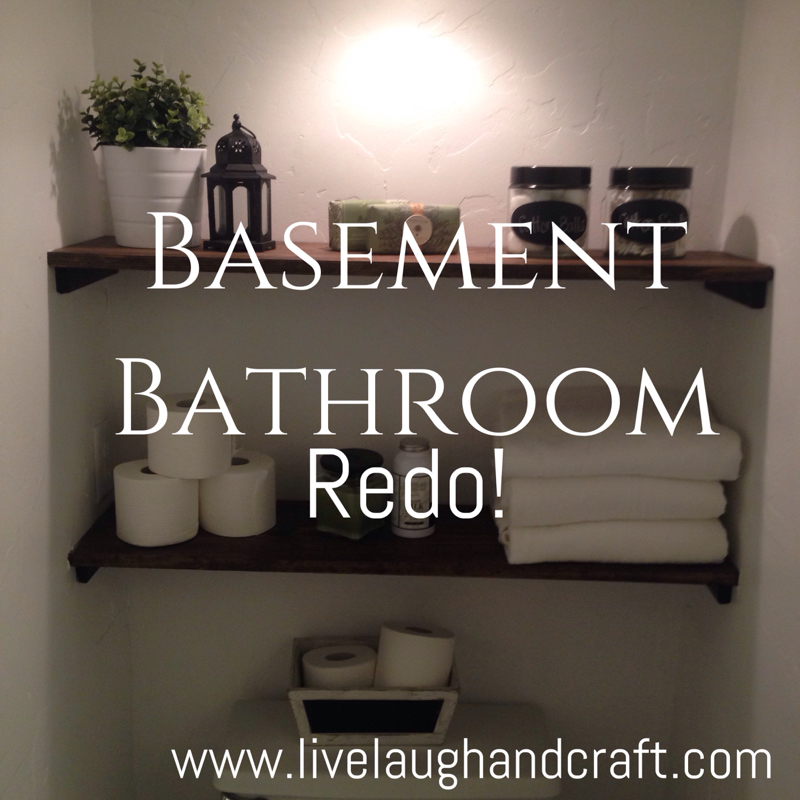
my Downstairs Bathroom was absolutely atrocious. here is my budget friendly way to update a bathroom with big impact.

Picture
I'm feeling totally sick about this but I didn't get a great "before" shot of this basement bathroom! But I hope you get an idea from what I do have!
Picture

This bathroom is a bit weird- there's a door out to the garage from here.
Here's what most drives me crazy about this bathroom....it doesn't have a sink! We talked about taking the door out and throwing a wall up so we could put one in, but this is the widest doorway out of the basement and the easiest way to get furniture in and out! So with that out there, keep in mind that this is an all around weird bathroom! We didn't have a ton to work with, but I think the overall look is 100% better!
The old linoleum flooring came up and the concrete was "dyed" I'll have more on this later!
Picture 
Picture 
This bathroom came complete with hand rails and wallpaper! We decided to get rid of
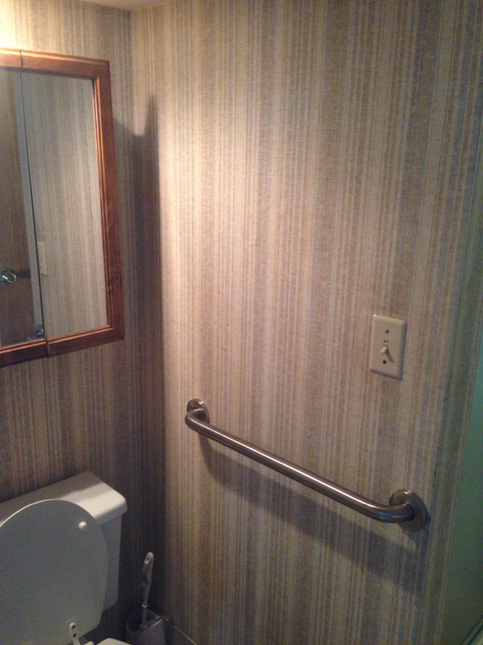
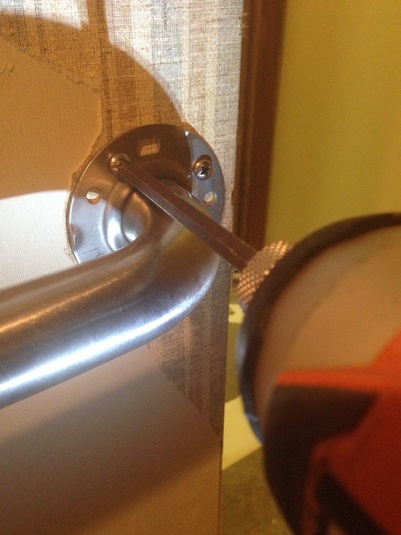
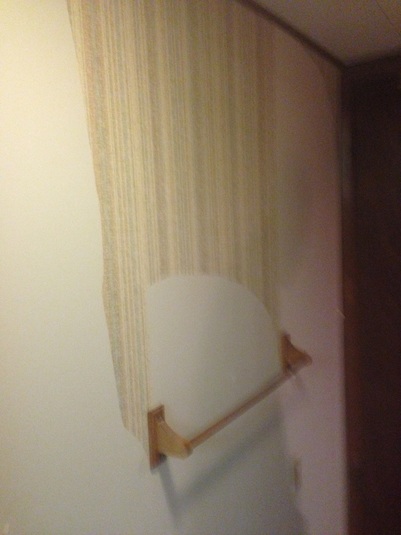
 both- Rex is still sad that the bars came down! 
(Wallpaper is making a big comeback, but this stuff hopefully won't EVER come back)

Picture
Picture
The drop in ceiling was removed and Rex fixed the terrible wiring so everything was to code!
He's pretty much amazing and the bomb.com!
Once he had the sheet rock in place, taped the seam, and hung the light I was able to get in there and get the texturing taken care of. It took a day to dry until I was able to sand out some of my sloppy imperfections!

Picture

Picture

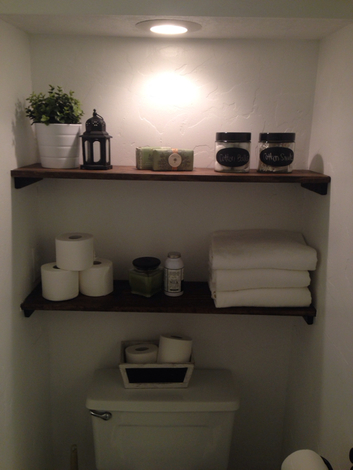
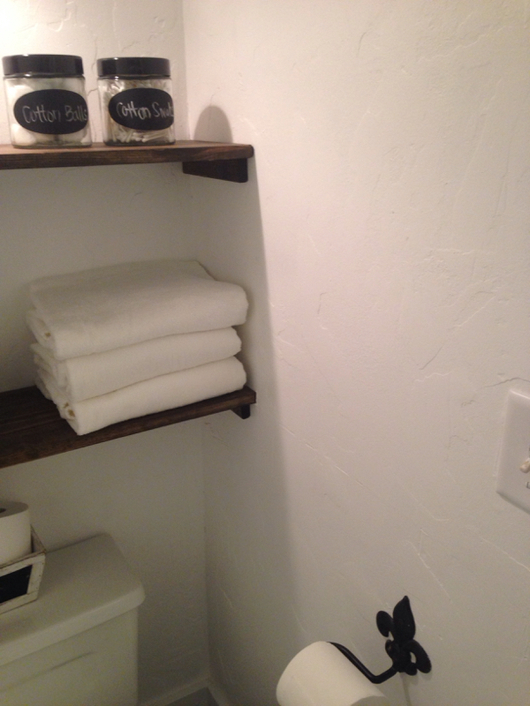
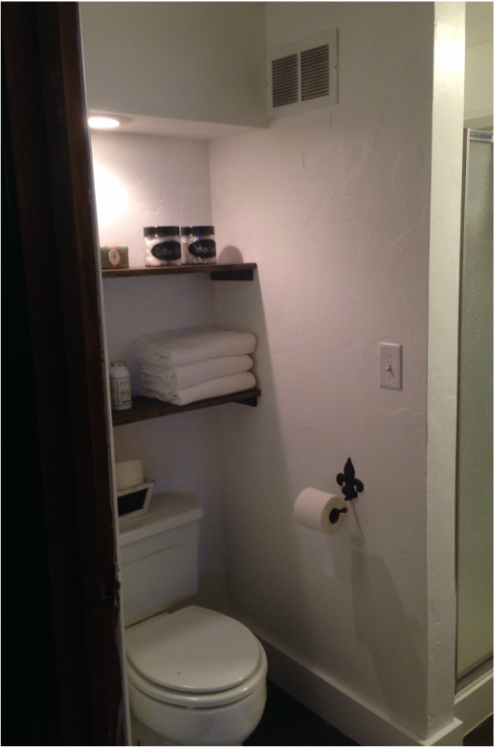
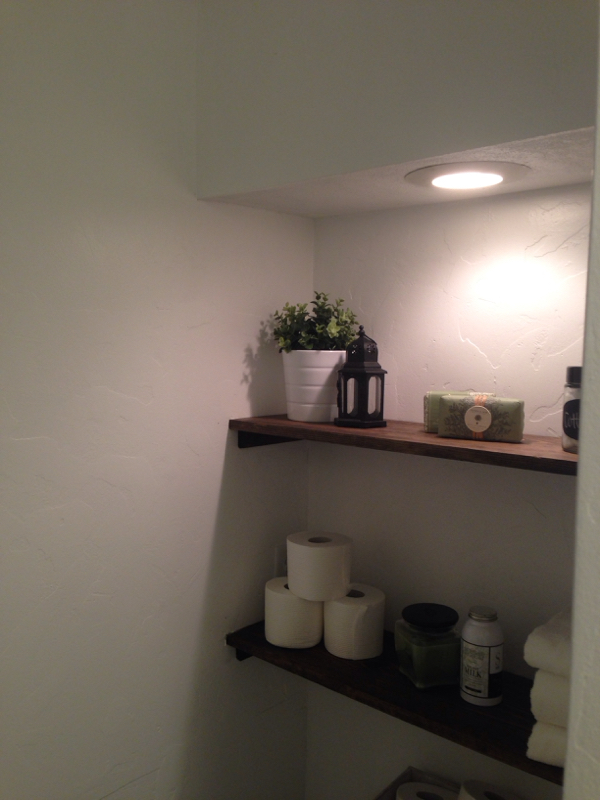
We needed a cheap but cute shelving option for above the toilet. We couldn't do more than a 10" depth because we didn't want people hitting the back of their heads while they were using the restroom. So we picked up a 1x10 and measured the width from wall to wall. Then a 1x2 was cut to 8". All pieces were stained then sprayed with a matte poly acrylic spray. Rex nailed the 1x2 to studs and then we just rested the 1x10 on top of the 1x2's. I threw some decorations up and we were done!

Picture 
Picture 
Picture

Picture 
Picture 
I am overall very pleased with the way this little space turned out! The ceiling and floor alone where a huge improvement!

This is a rough breakdown of supplies that we didn't have on hand!

Sheetrock $12

Door knob $15

Light $15 (it was a pack of two for $30 from Home Depot and we used one in the bedroom)

Decorations $20

Shelves $10

Rugs and towels $30

Baseboards $20

Total around $130 not too shabby!

Filed Under: DIY

Pages

  • About Clover Lane
  • ALL THINGS HOME
  • Legal Disclaimer
  • Privacy Policy
  • Recipe Box
  • Welcome to Clover Lane All Things DIY and Home
  • Welcome to Clover Lane...we're happy you stopped by!

Reader Interactions

Leave a Reply Cancel reply

Your email address will not be published. Required fields are marked *

Recipe Rating


This site uses Akismet to reduce spam. Learn how your comment data is processed.

Primary Sidebar

About Us

Welcome to Clover Lane! We are Cassie and Sadie-- A sister DIY duo with serious "go get 'em" personalities. We take boring rooms and make them not-so-boring by knocking down walls and getting stuff done!! Oh, and we LIVE to eat.

Footer

Copyright © 2022 Clover Lane on the Foodie Pro Theme