
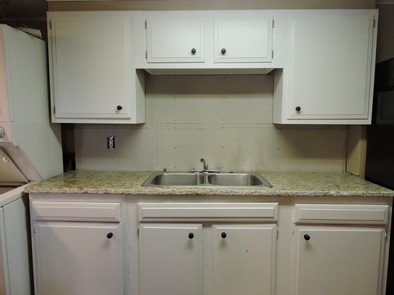
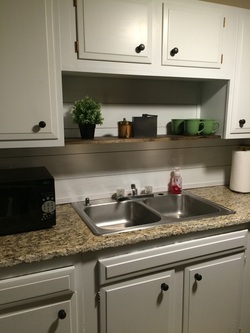
It's time for a house update!! This was a small update with a big punch! If you haven't seen the other two updates to the kitchenette you can see them here!
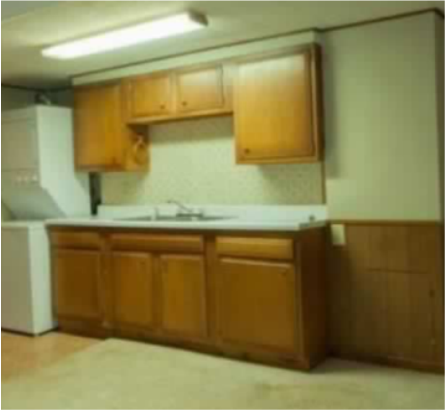
The back splash area was prepped and ready to go with backer-board. We knew we wanted travertine (it's a natural stone and gorgeous), once we got to home depot and started to run numbers we'd be into the back splash for over $100. I know that sounds inexpensive, but when you are on a tight budget for resale purposes you save where you can. I suggested an alternative route, this way we can take the $80 saved and buy some new door knobs. We totally wasted money on the backer board, but it wasn't worth taking down.
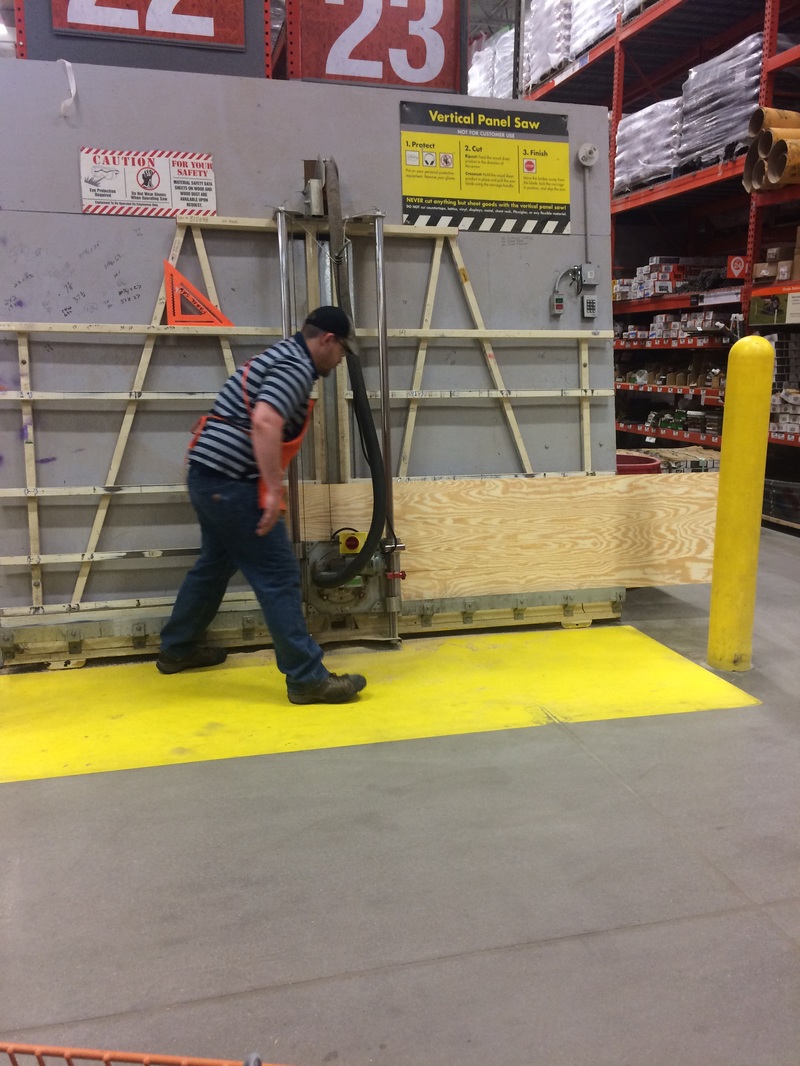
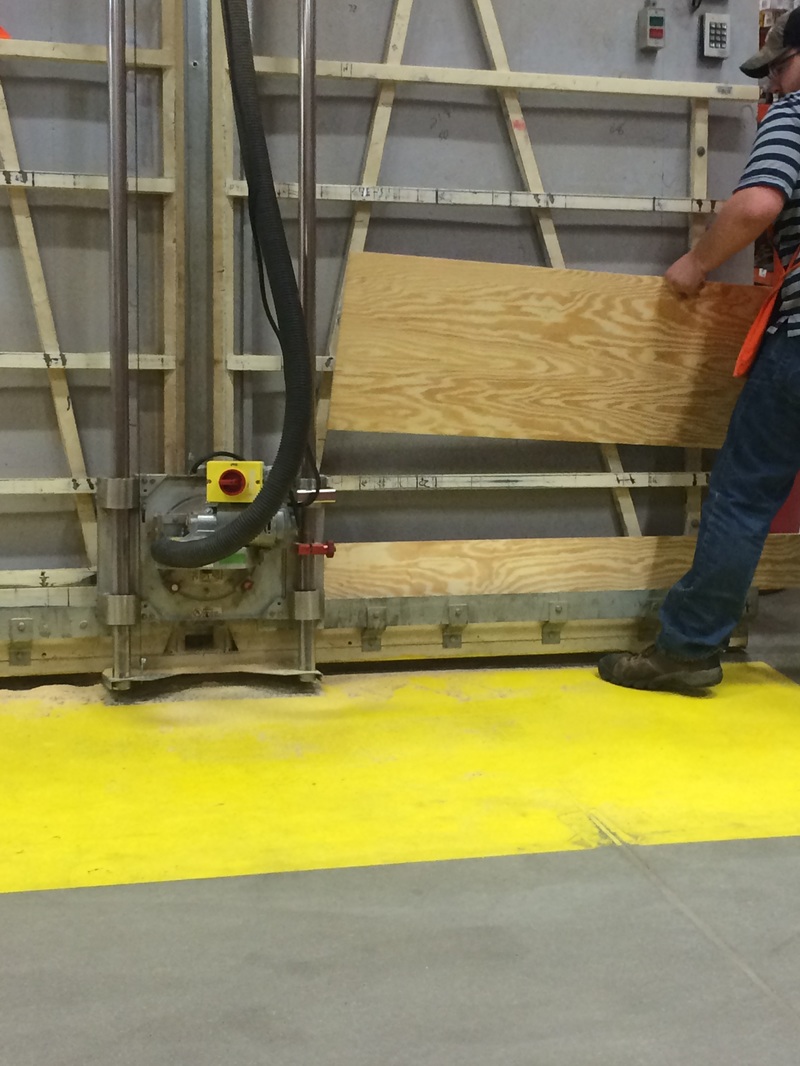
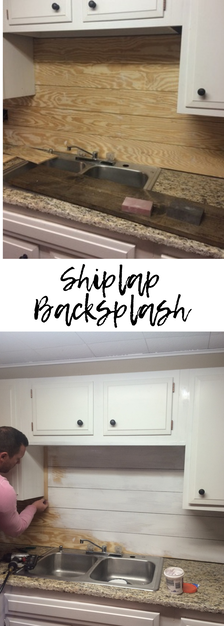
I may or may not have a serious obsession with Shiplap. I love the texture and the feel that it gives a room. We did some in our bathroom with 1x4 and I love it, but we needed something a little more affordable that is more low profile. That's when we stumbled upon the 1/4 sanded plywood! A 4 ft. x 8 ft. sheet is right at $20 and our new friend at Home Depot ripped it down to 6" x 8 ft. strips.
 |
 |
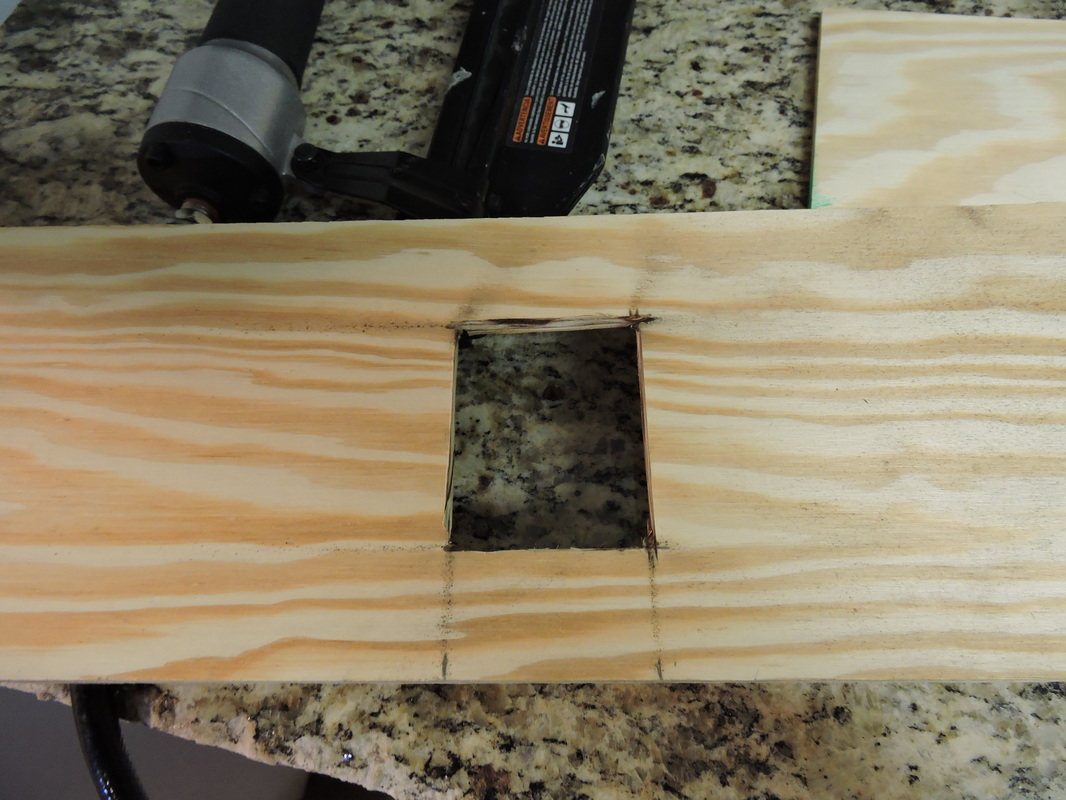
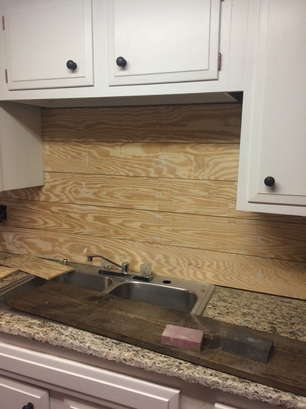
Rex measured the length of the back splash area and we used our nail gun to adhere the wood planking to the studs. In between each plank we spaced out nickels to give it the same spacing between each plank. Rex cut out the area for the outlet with one of his prized tools, a jigsaw.
 |
 |
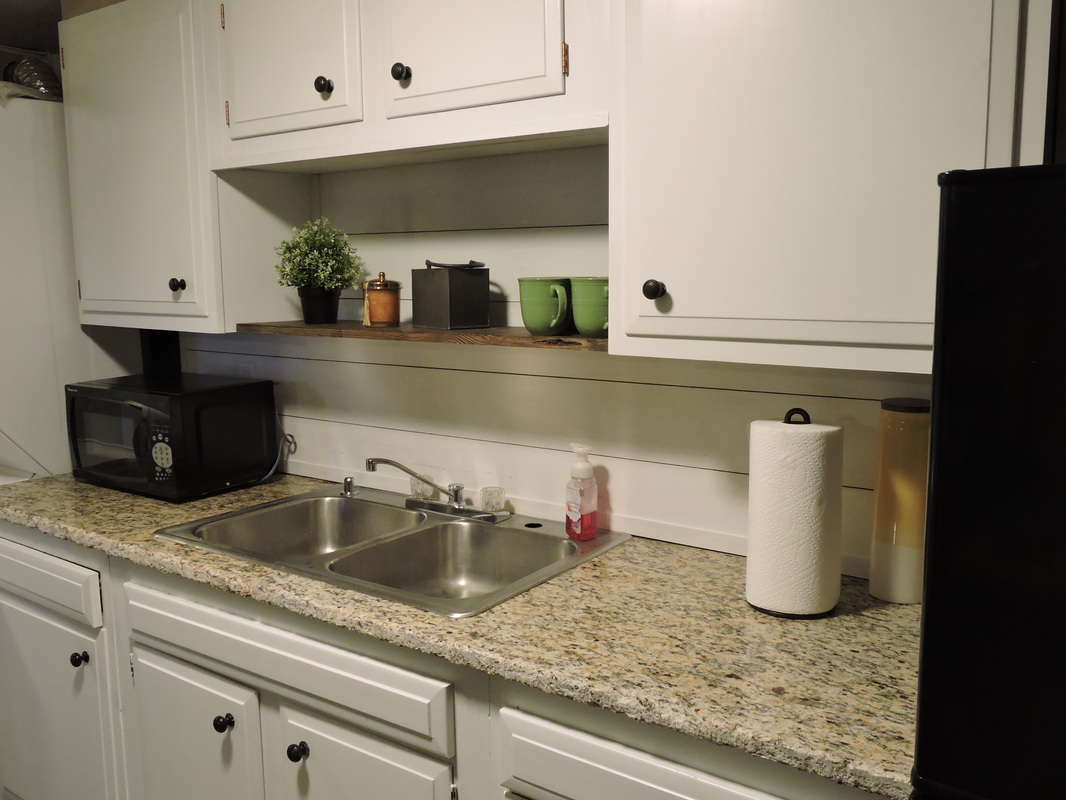
This was such a fast project! Once it was done we decided to build a shelf. I had some scrap 1x10 in the garage so we decided to use it. It was already stained with Dark Walnut so literally was no work what so ever! Also, as each plank went up I filled each nail hole with wood filler. This made that process of filling and sanding a little more bearable.
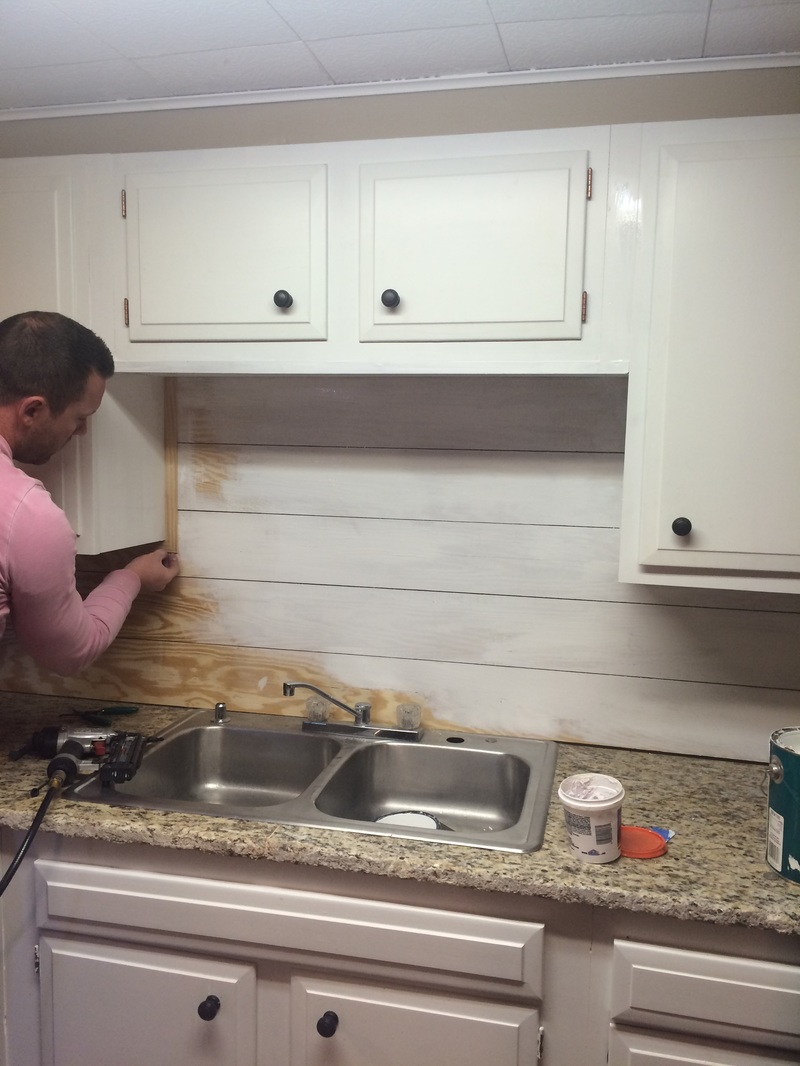
We found some trim that is 1" wide that's perfect to finish off the edges, and Rex mitered them, it looks dreamy in person! I gave the back splash a quick coat of white paint. I decided on one coat so you can see the texture and imperfections through the paint. I wanted it to look different then the solid white cabinets to break things up a bit! We finished the backsplash up by spraying a few coats of acrylic protection spray over the area.
 |
 |
We have just three things left to check off our list then we can sit back and actually enjoy and admire our work!!
Up next:
New Faucet
Spray Paint Door Hinges
Polish and seal granite
New Faucet
Spray Paint Door Hinges
Polish and seal granite
****UPDATE AS OF MAY 21, 2017****
Backsplash still looks amazing! This area is in our basement kitchenette so it's not used as much as our main kitchen. We contemplated using shiplap in the main kitchen, but decided on subway tiles. We are NOT professionals so use your best judgement or consult a contractor to make sure this is a good fit!
Pin it!
How did you hang the shelf?
Hello Connor,
We went through the bottom inside of the cabinets directly into the wood shelf. I am sorry I cannot offer any photos as we don't live in this house anymore. Best of luck!
-Cassie