
It's about high time we did an rv update post! If you haven't been following our rv reno then you are seriously missing out! Hop on over to Facebook, Instagram, or Twitter to see the latest!
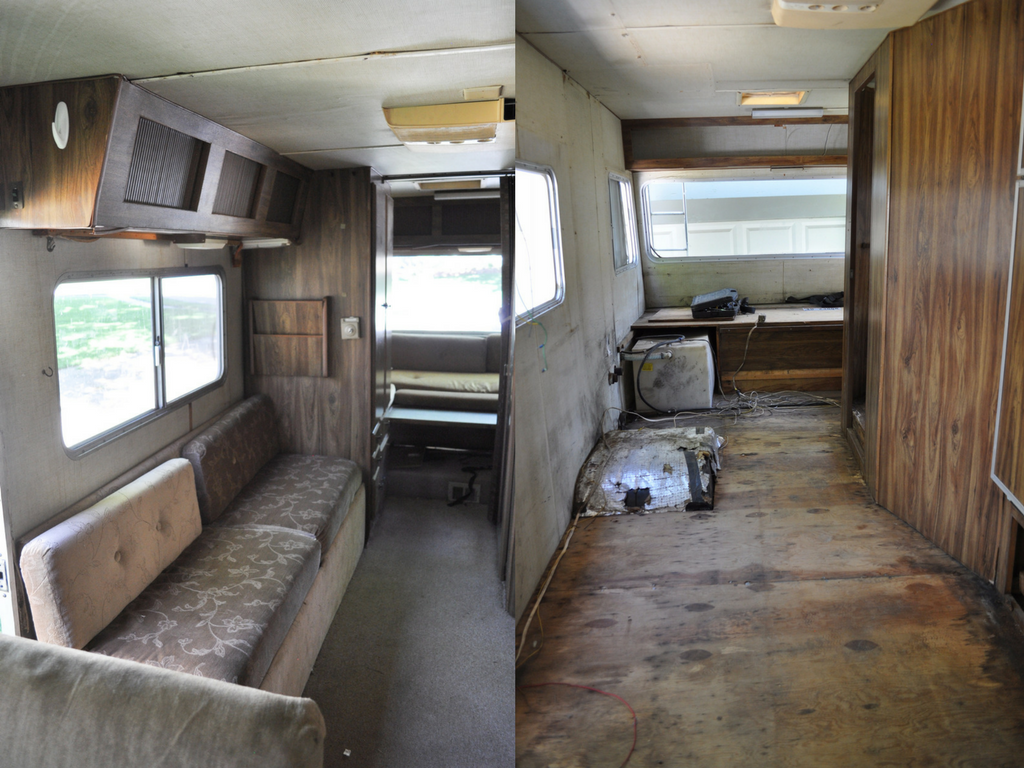
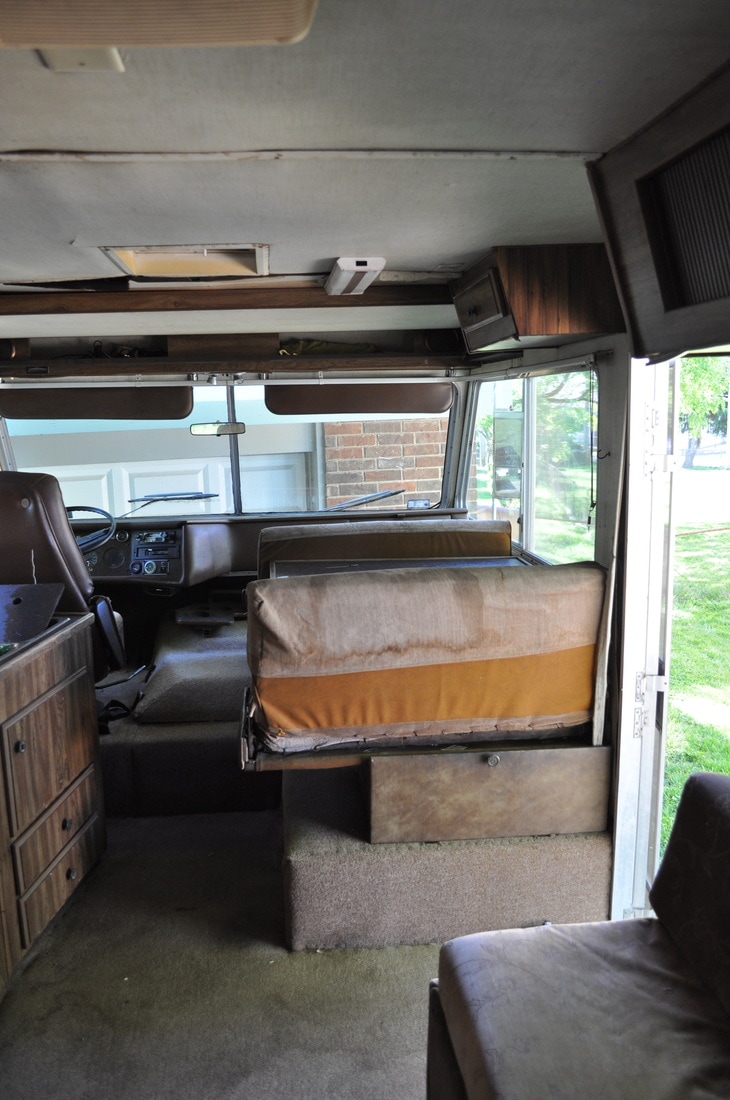
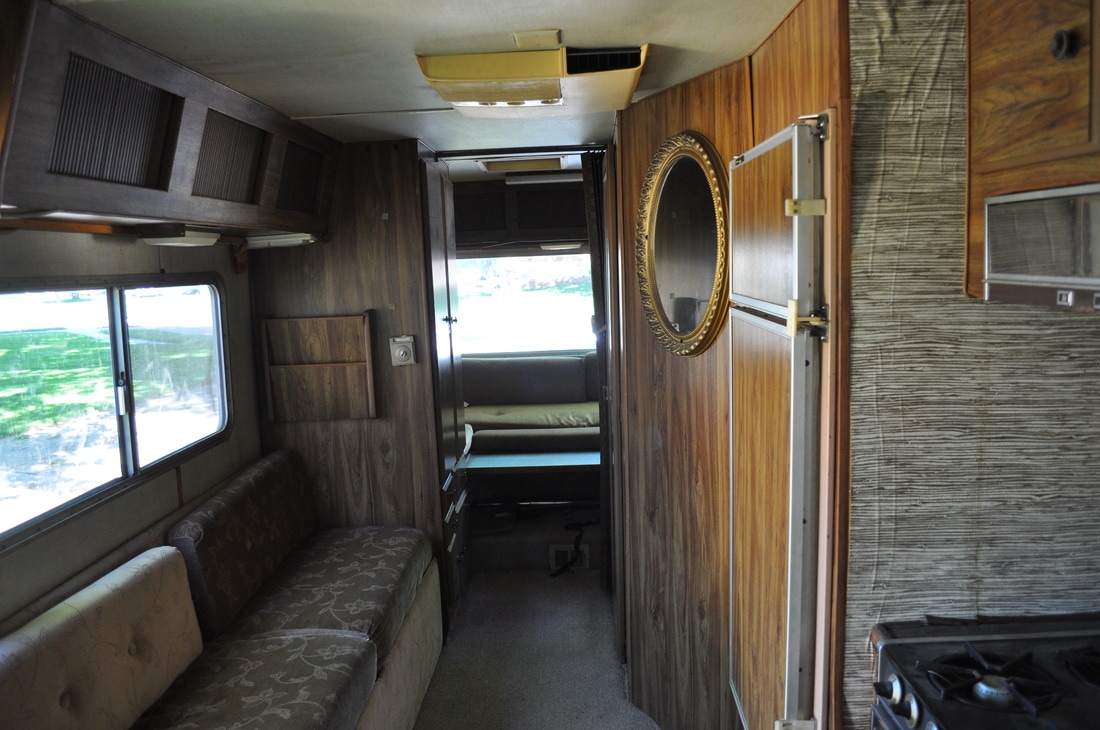
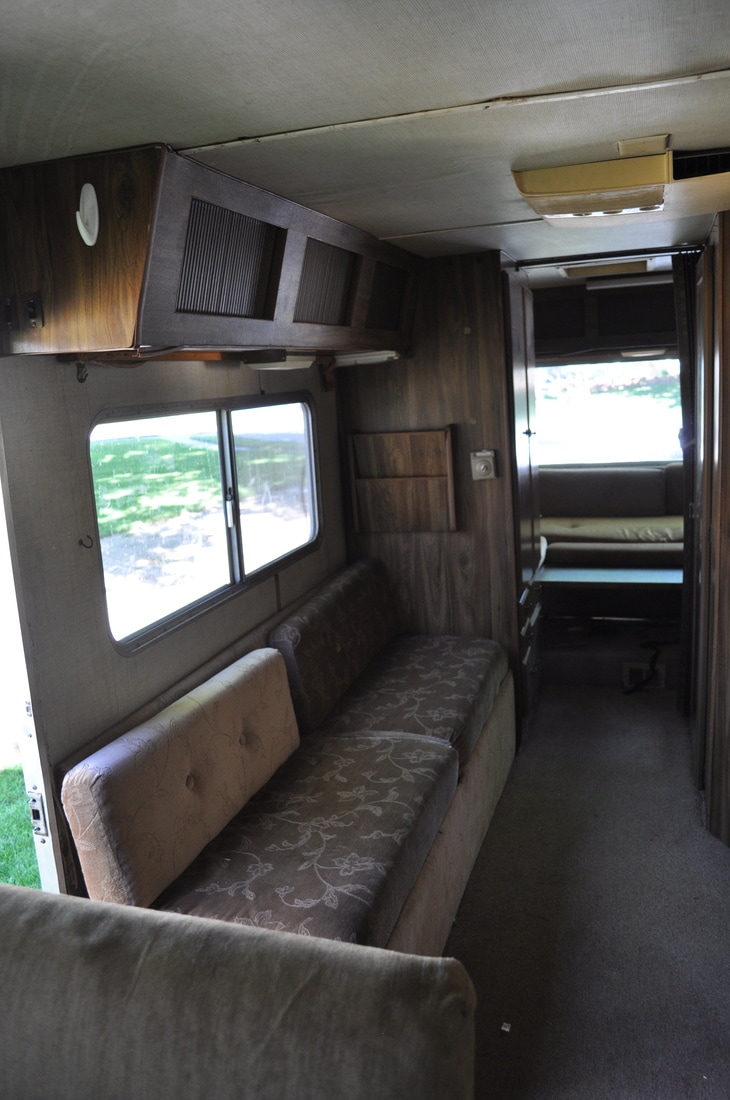


Have you ever seen anything quite so bad before? Isn't it great?!! We have been hard at work the last two weeks. Our bodies hurt and we have some gnarly battle wounds (not really). Here's what we've accomplished thus far:
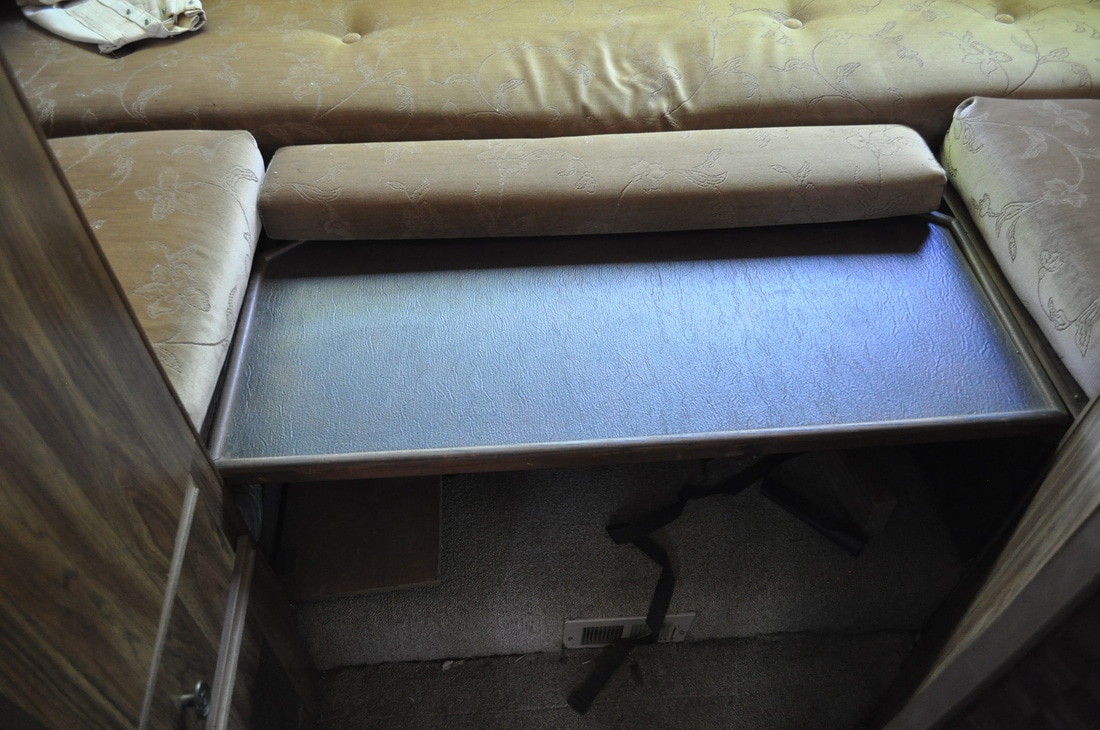
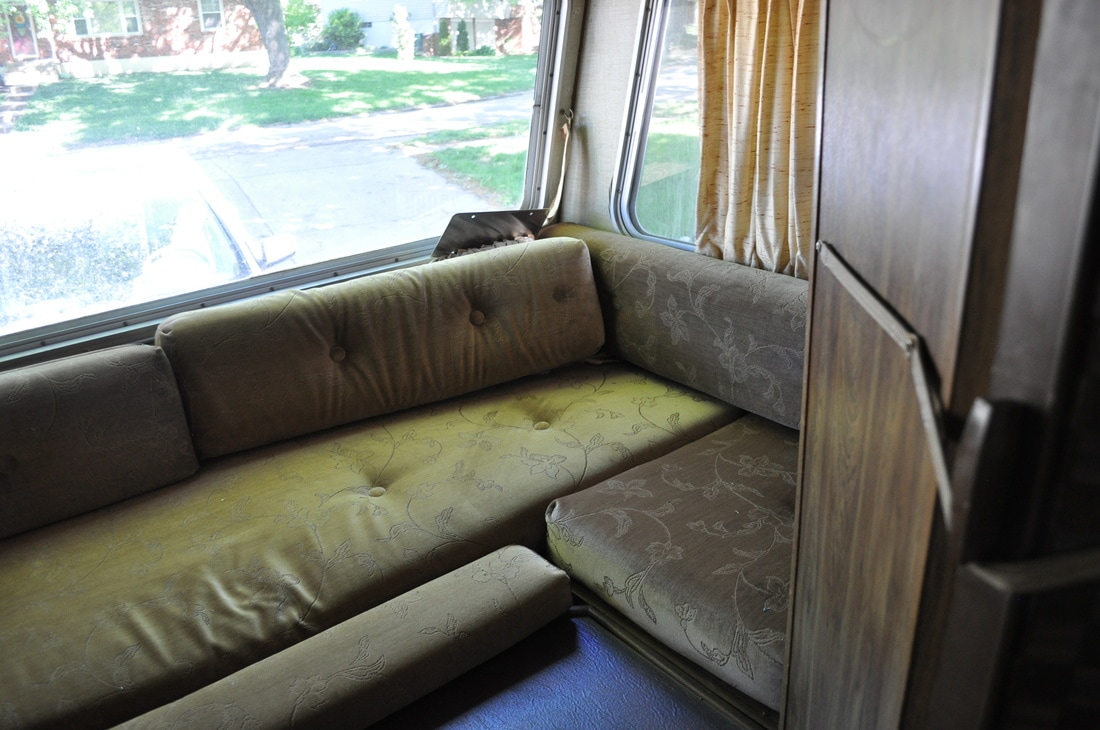
Ripped out nearly everything. Table and built in seating, couch, floor to ceiling closet, layers of carpet, trim, and upper cabinetry in the kitchen area.We were so pleased with how much better it looked just to get all of that nasty stuff out of there.


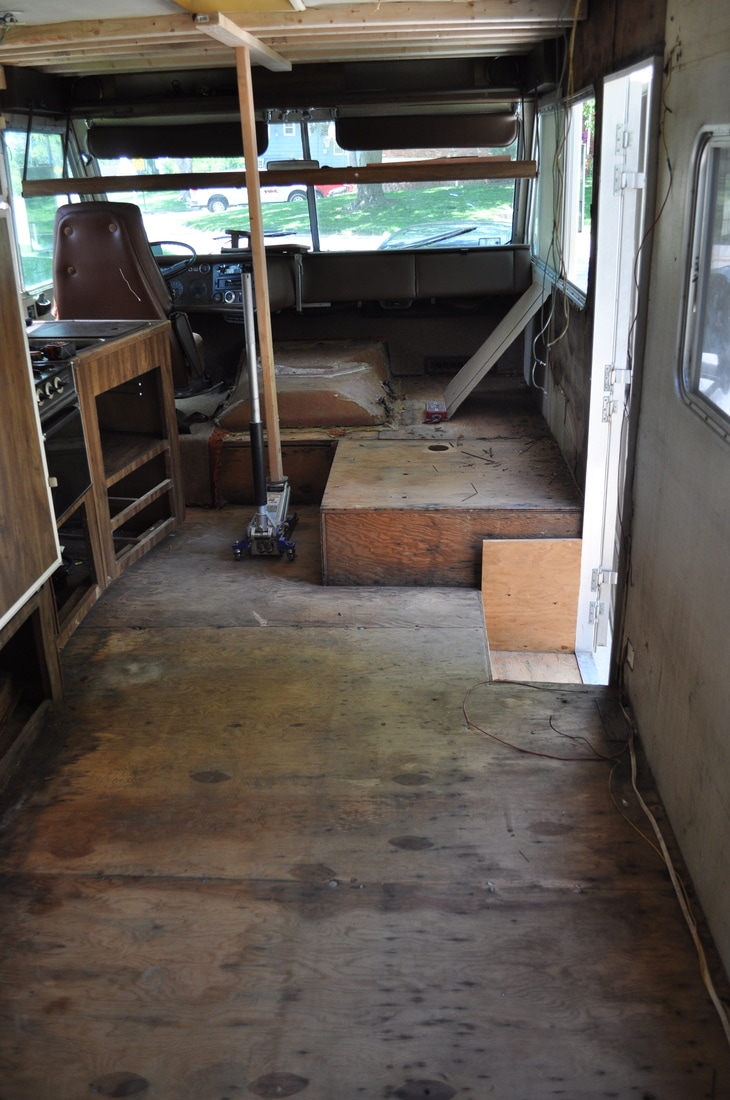
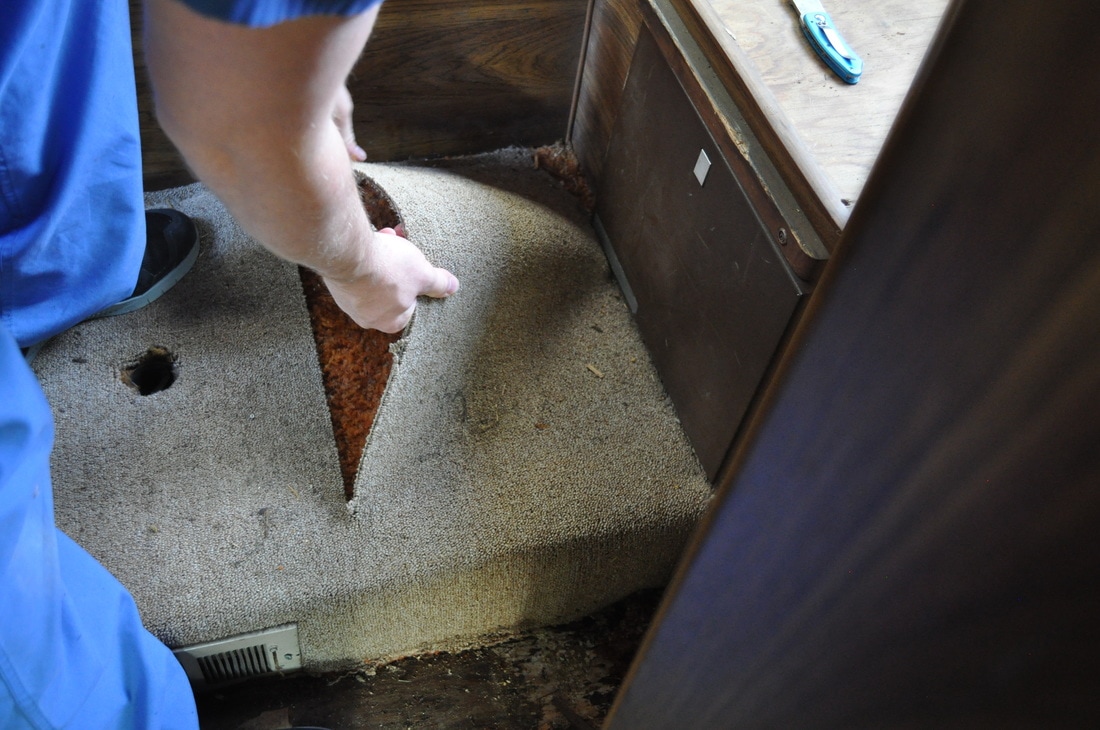
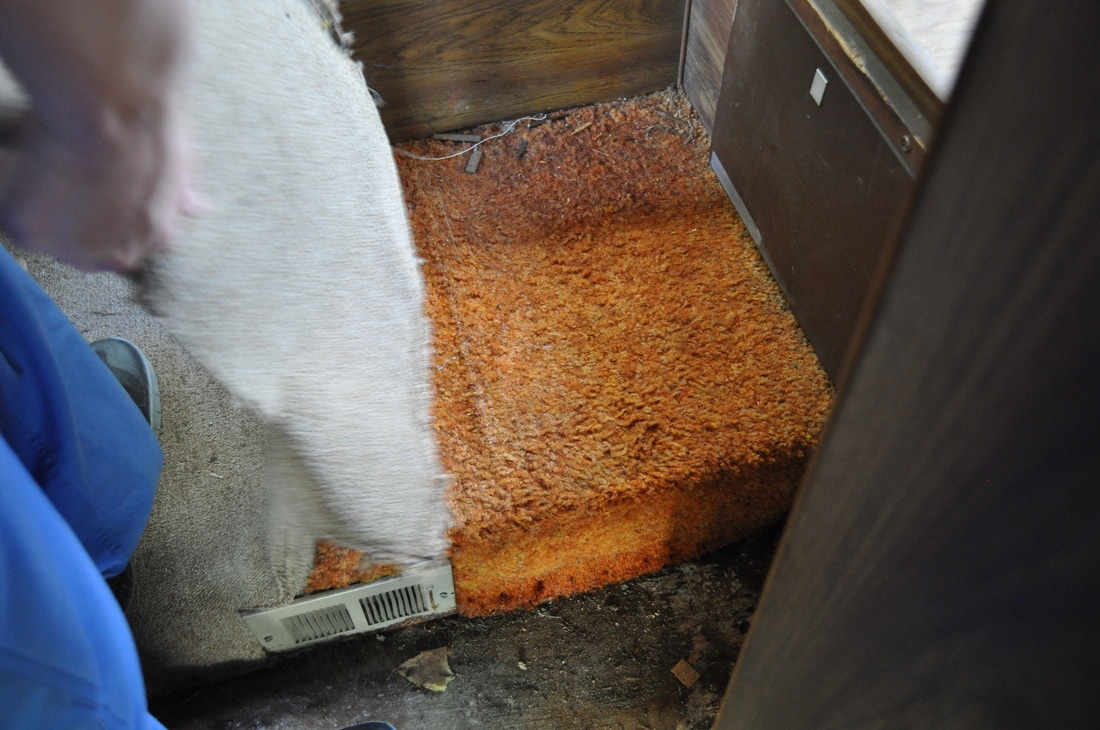

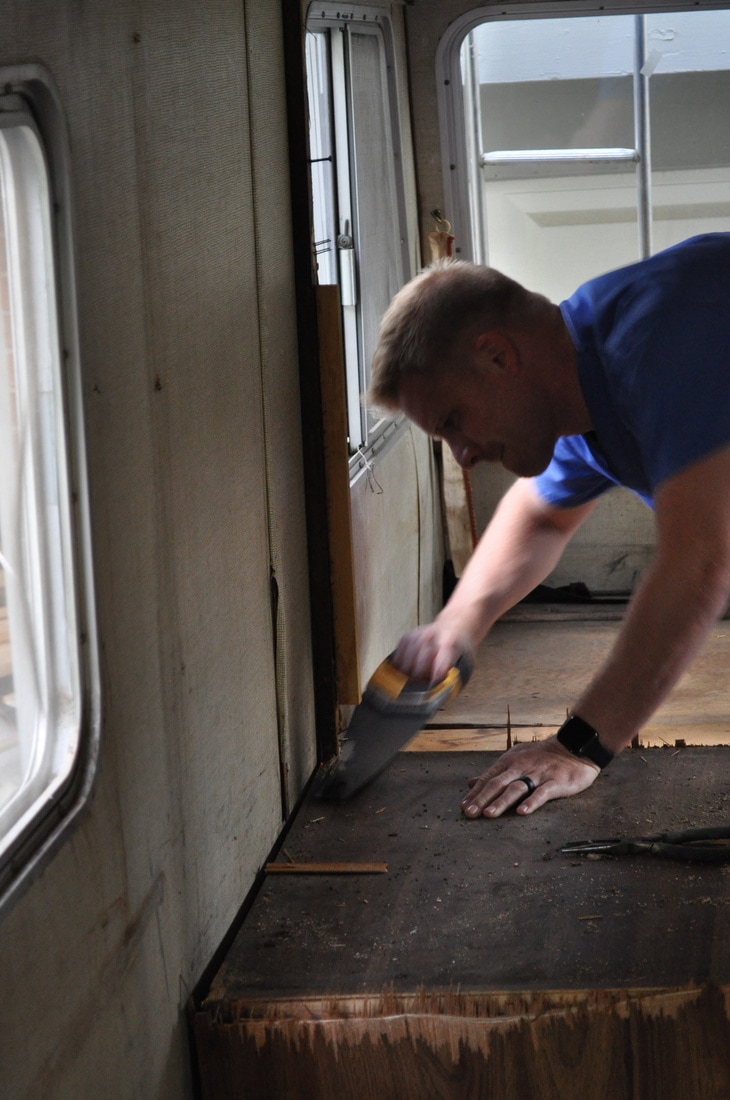


Next up was the cleaning/preparing for new wall covering and flooring. During this stage we ripped out about a million staples out of the flooring and walls, What a nightmare! Our hands were nearly blistered after this step.
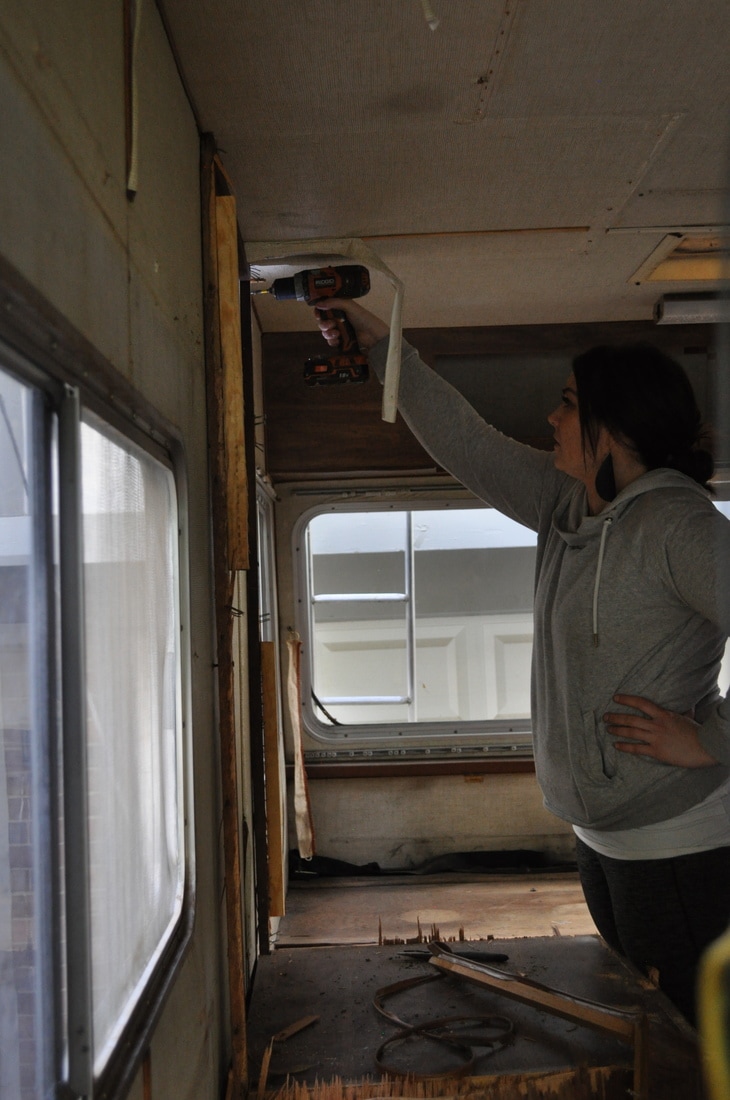
Once things were cleaned up we started on the shiplap. Now when we say shiplap we don't mean the expensive nice stuff...we mean 4'x8' sheets of underlayment that has been ripped down to 6' wide pieces. This is the lighter more inexpensive way to go. It took a long time with all of the weird cuts around window but we finally got it hung and one coat of white paint on it.
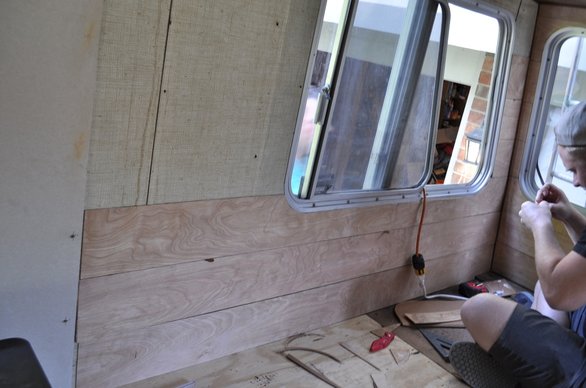
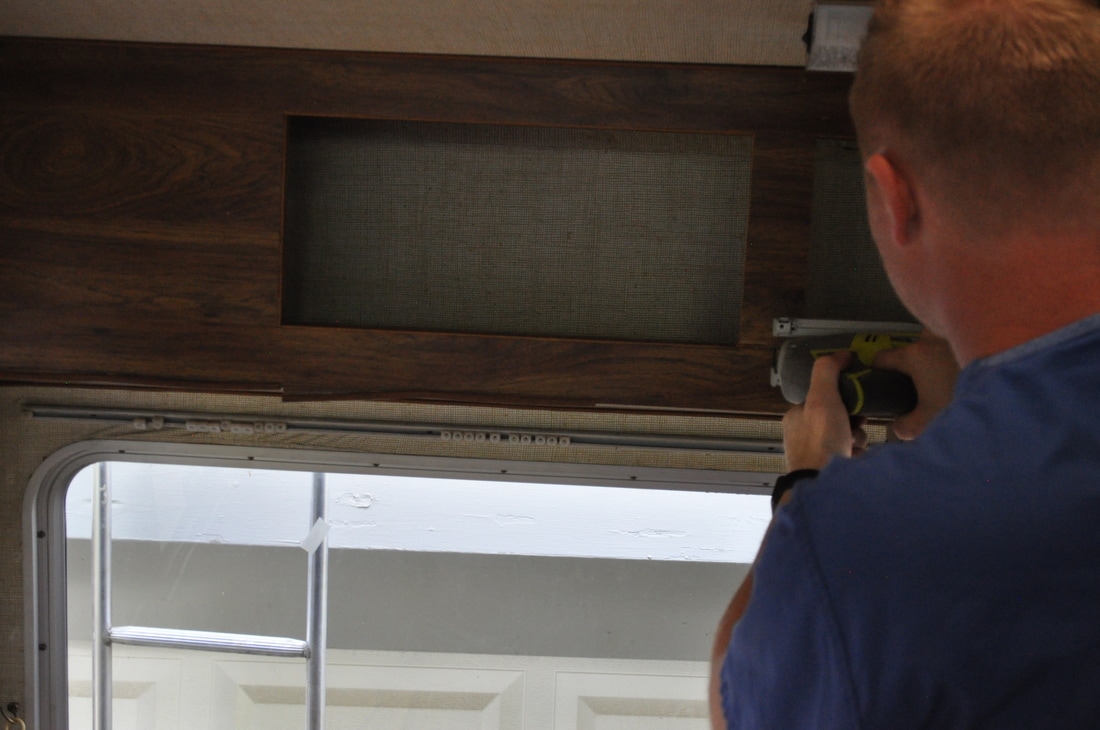
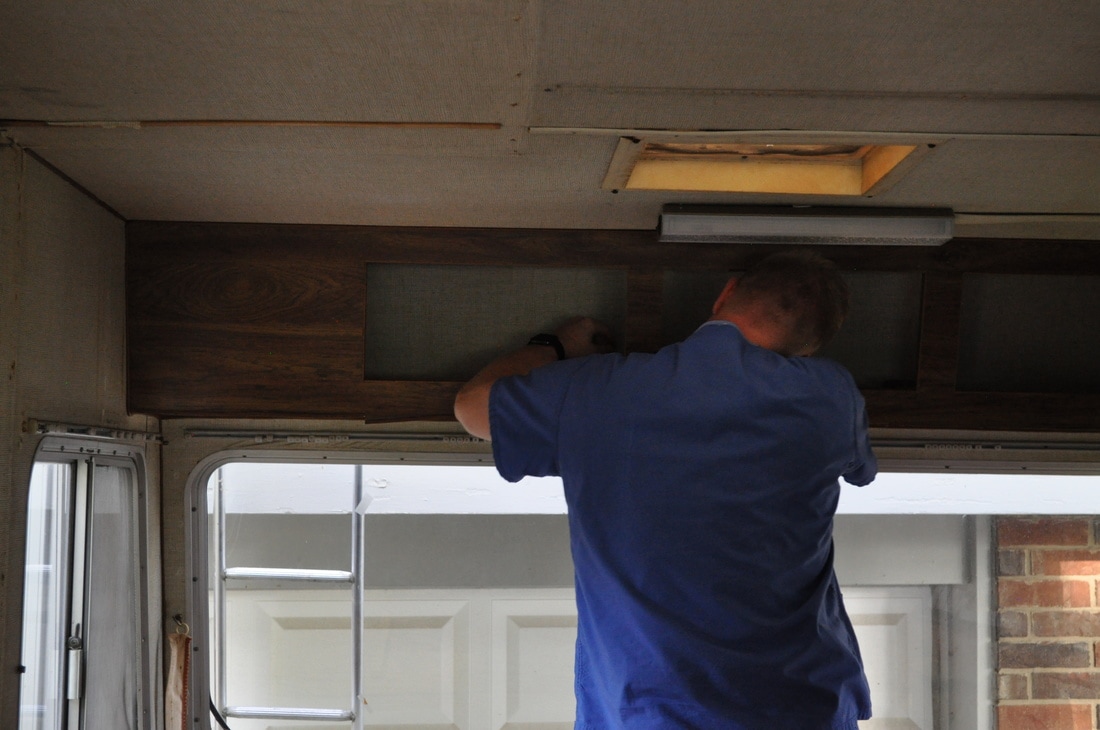
During the shiplap process Rex built in a side bench on our back area that will be seating in the daytime and a bed at night. He and David also reinforced the ceiling and started repair on the leaky roof.
During all of these "big projects" we worked on some smaller things on the side. A few of those being:
Cabinetry reface. We added small underlayment strips to the face of each cabinet and then painted them matte black. It gave the cabinets a more expensive and custom look. We are SOOOOOOOO happy with how they turned out!!
Cabinetry reface. We added small underlayment strips to the face of each cabinet and then painted them matte black. It gave the cabinets a more expensive and custom look. We are SOOOOOOOO happy with how they turned out!!


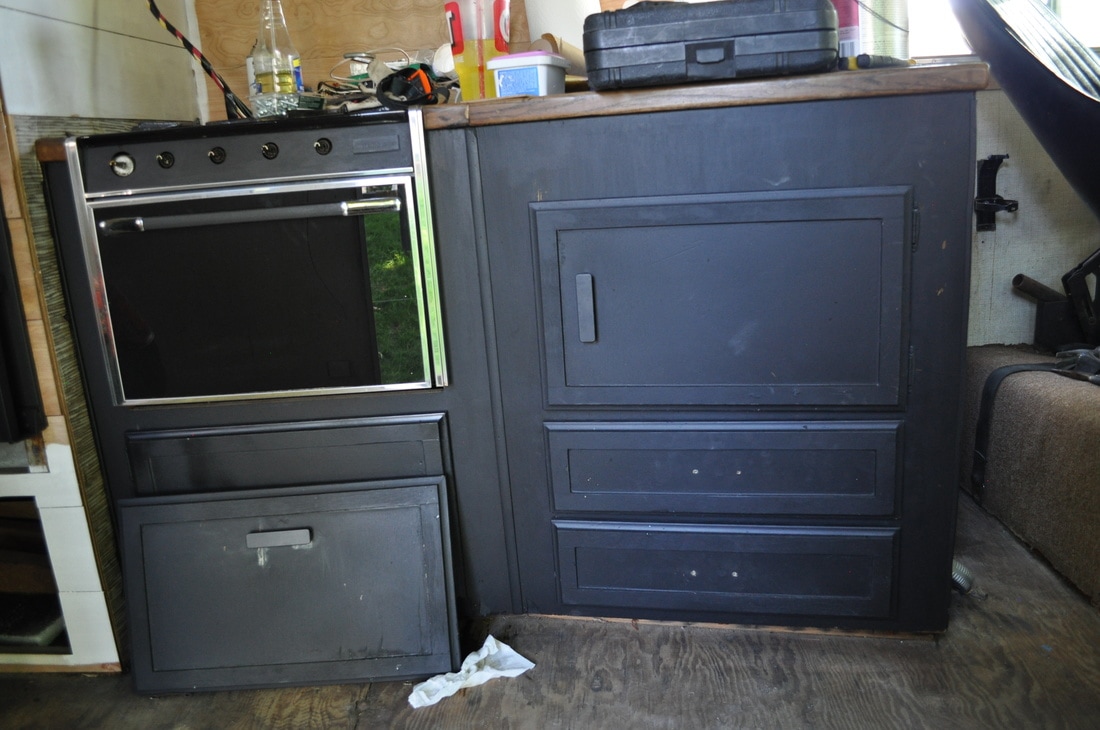
Fridge update. This was super easy update that has a HUGE impact. We sprayed the fridge matte black. It seriously looks brand new! We also painted the inside with an enamel based white paint meant for appliances. The white interior yellowed over the years so this gave it a fresh clean look.
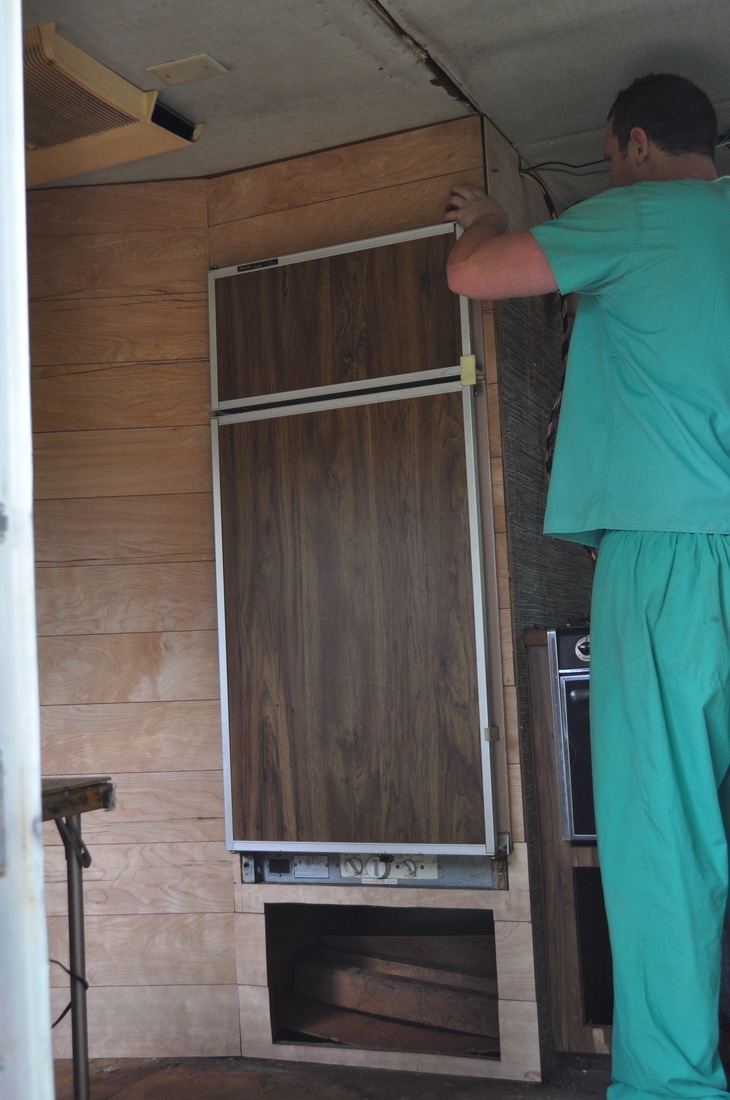
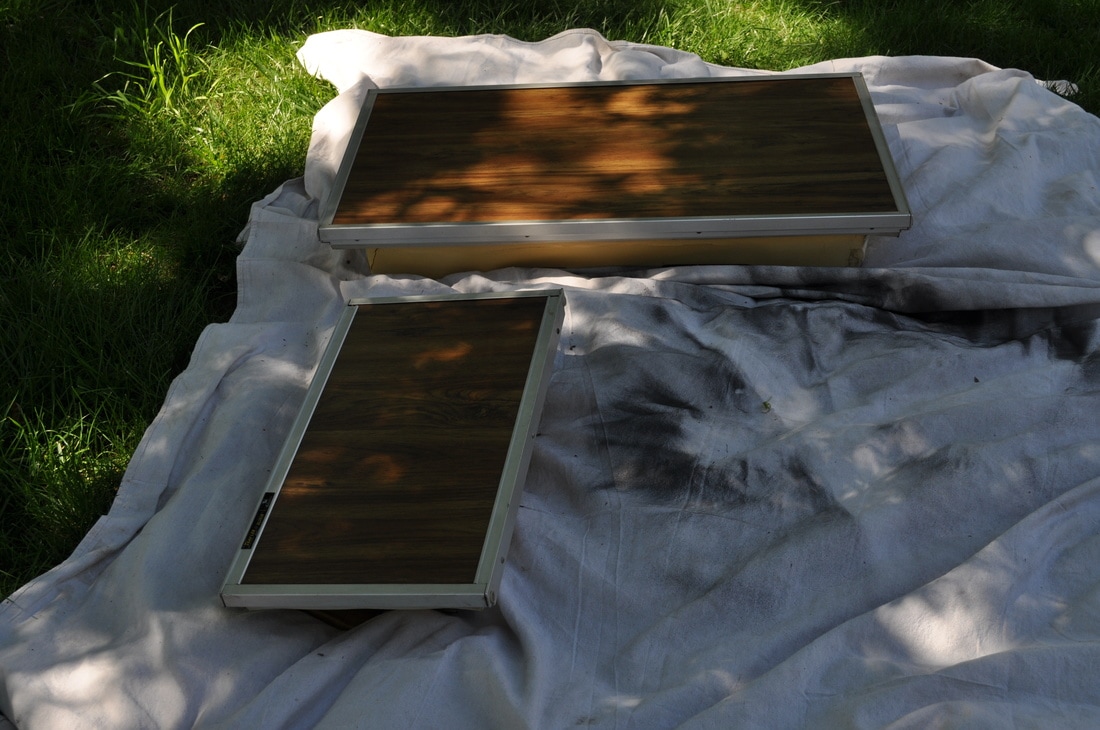
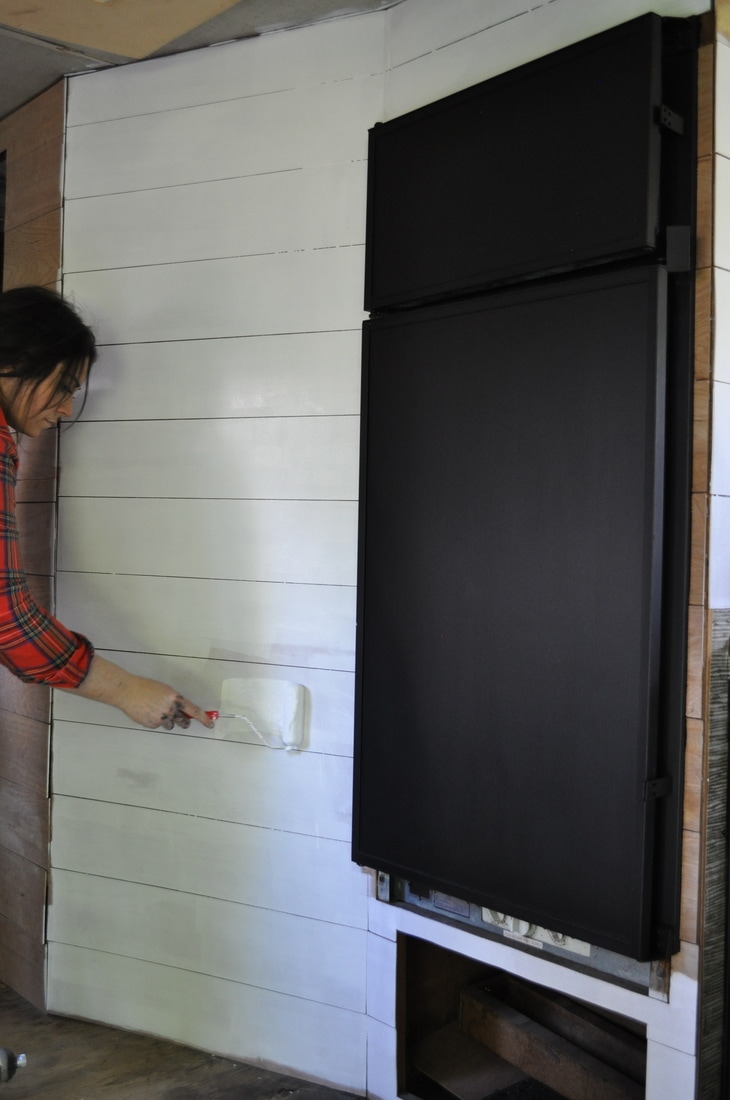
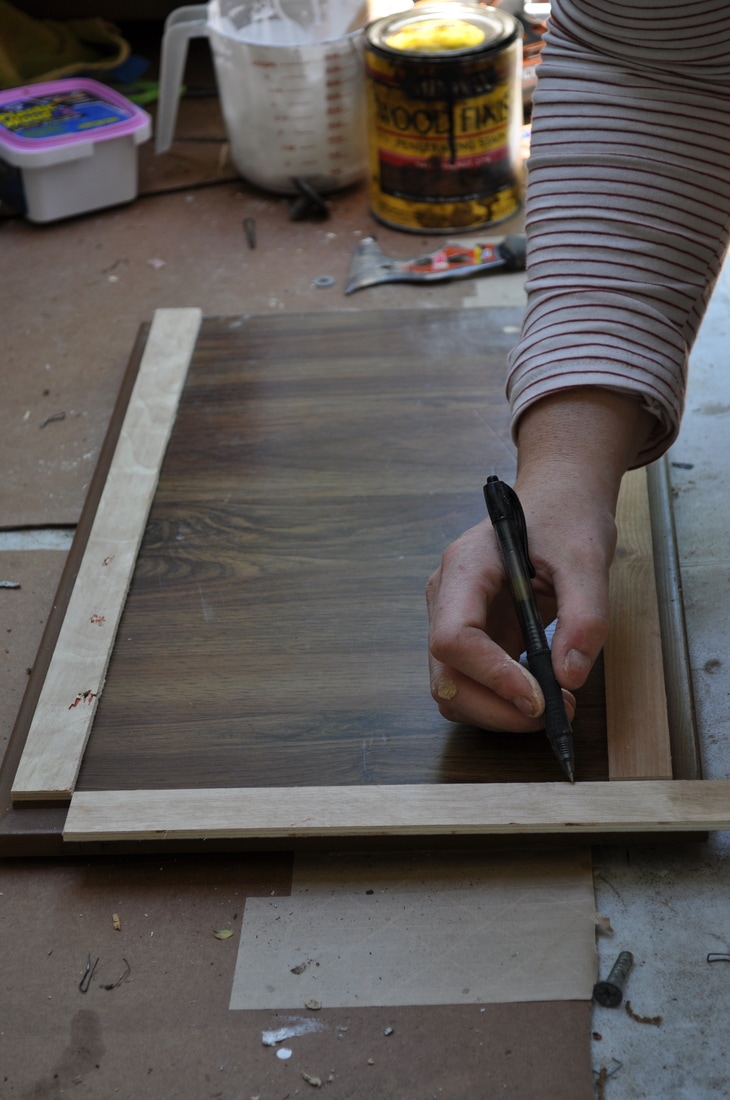
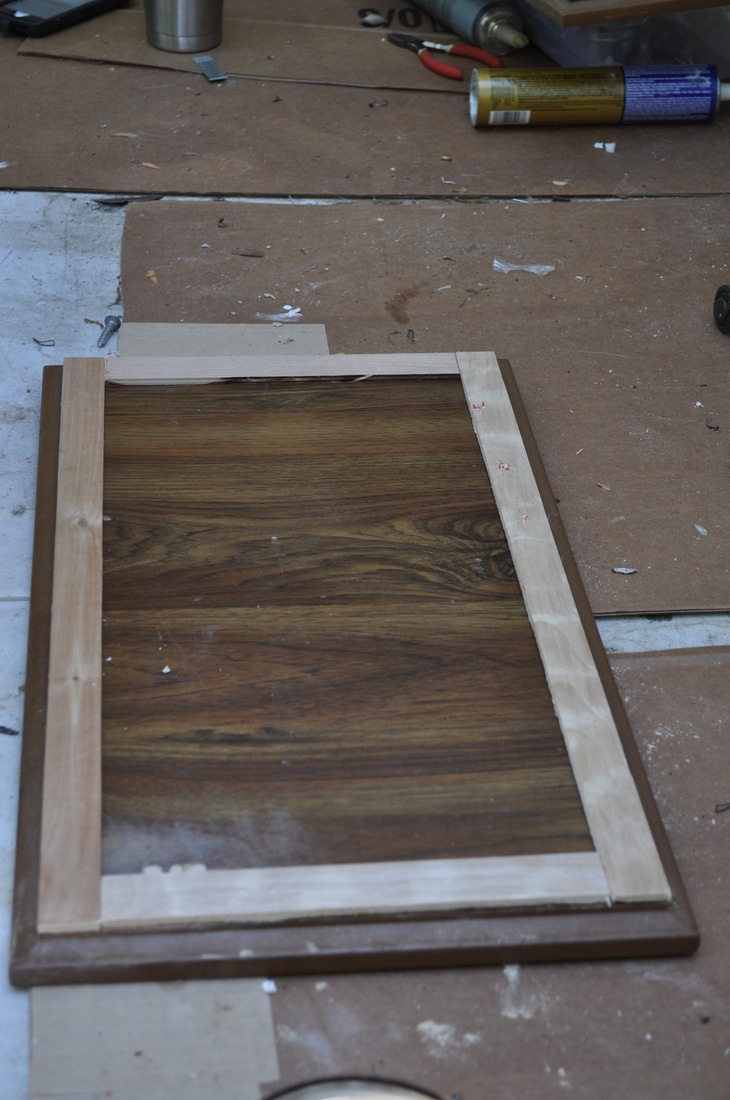
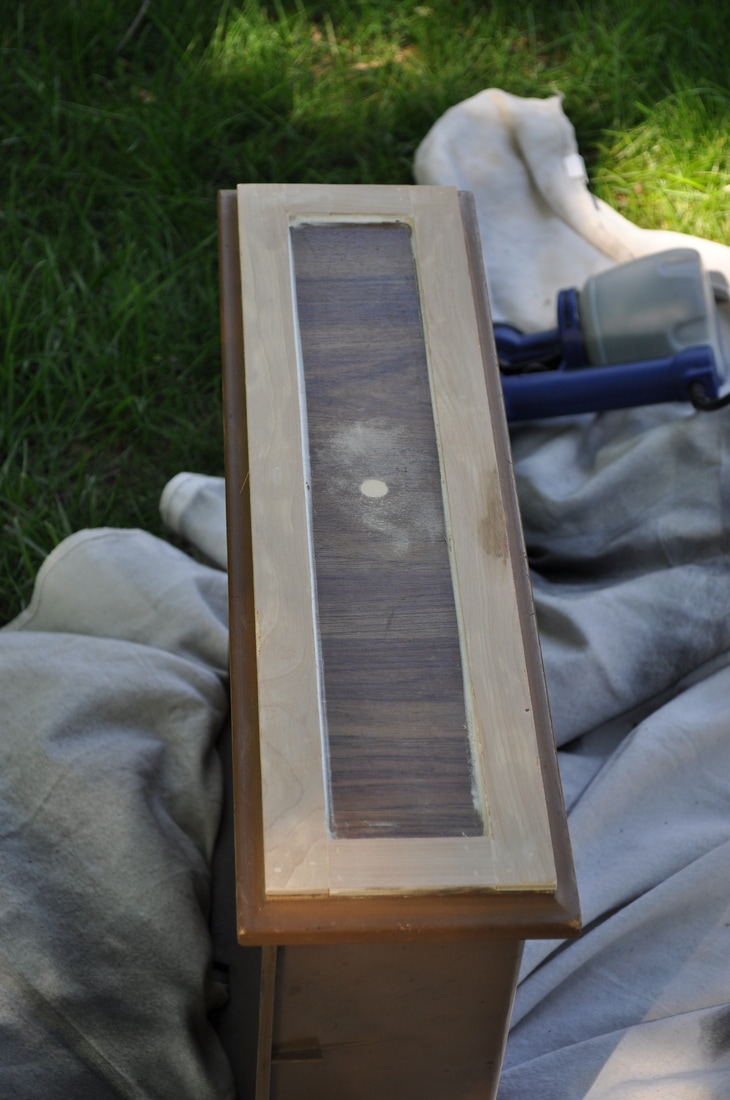
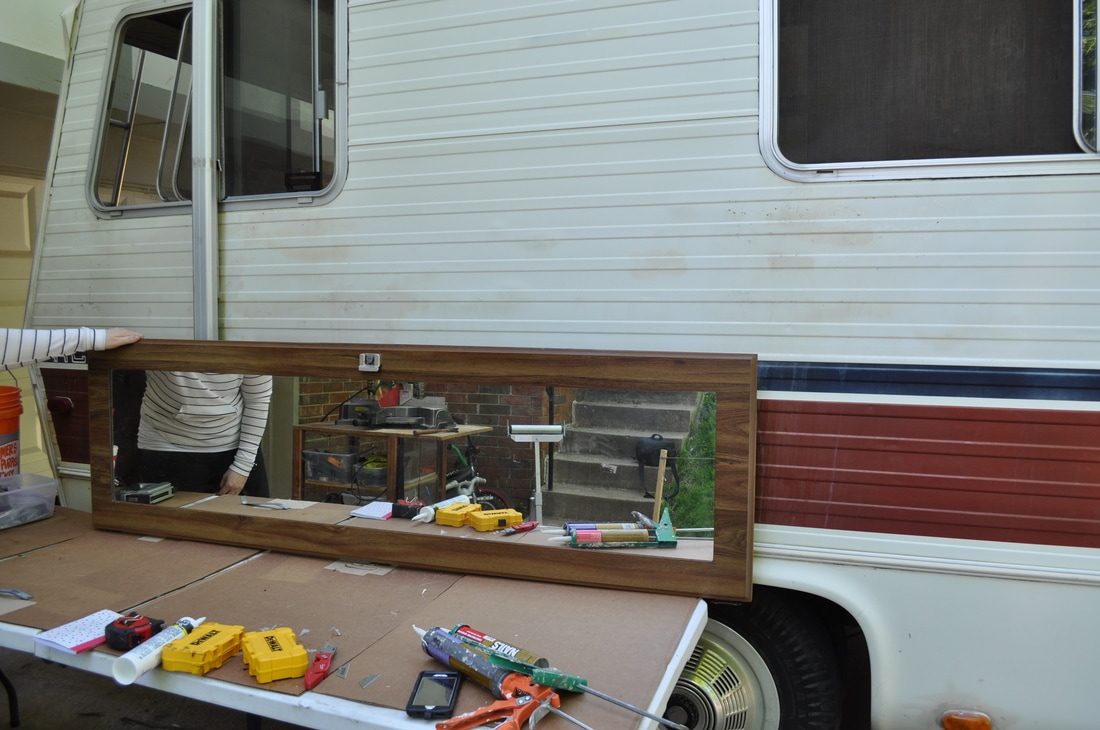
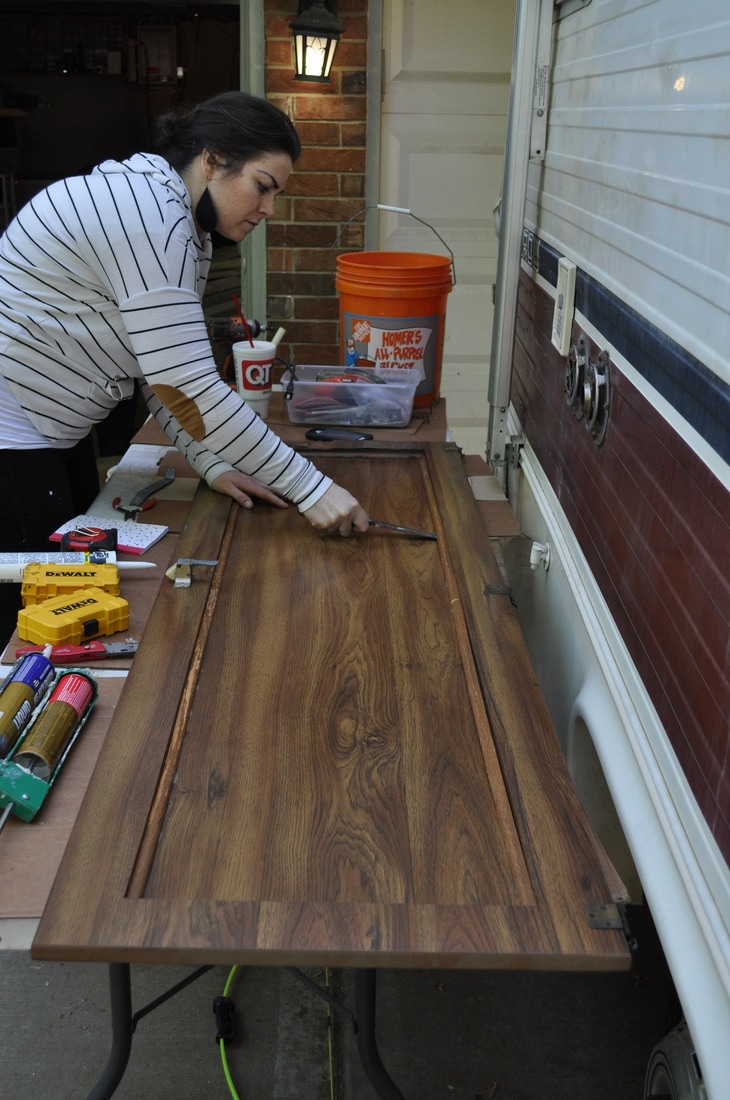
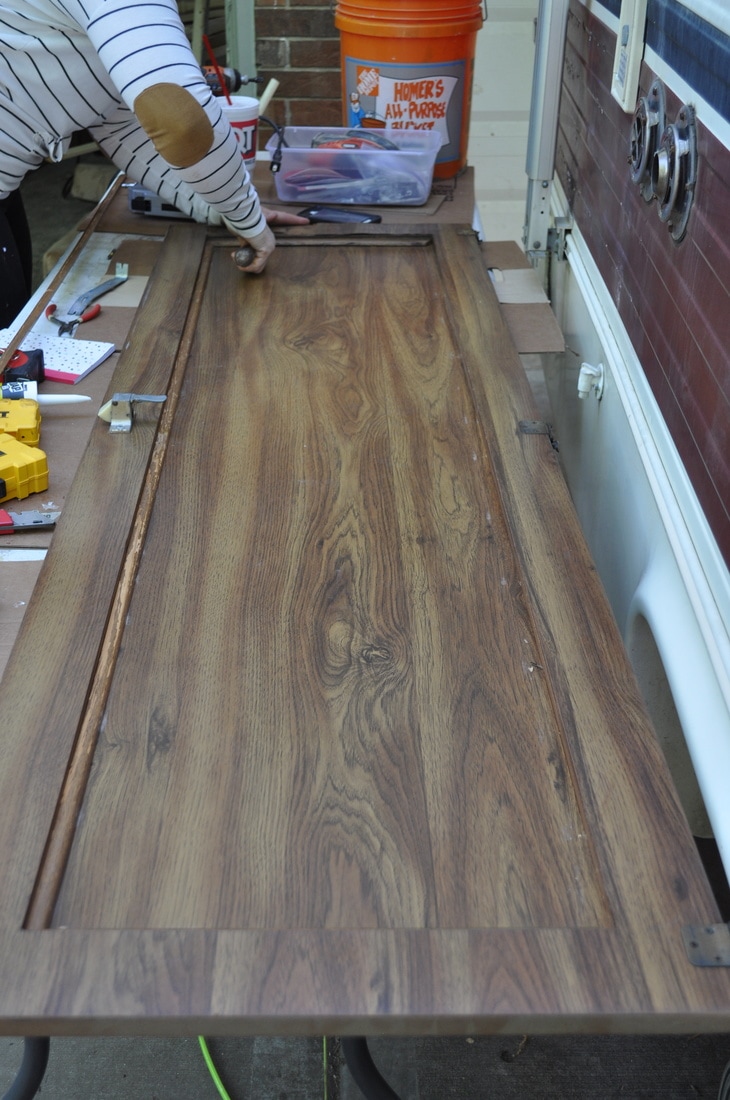
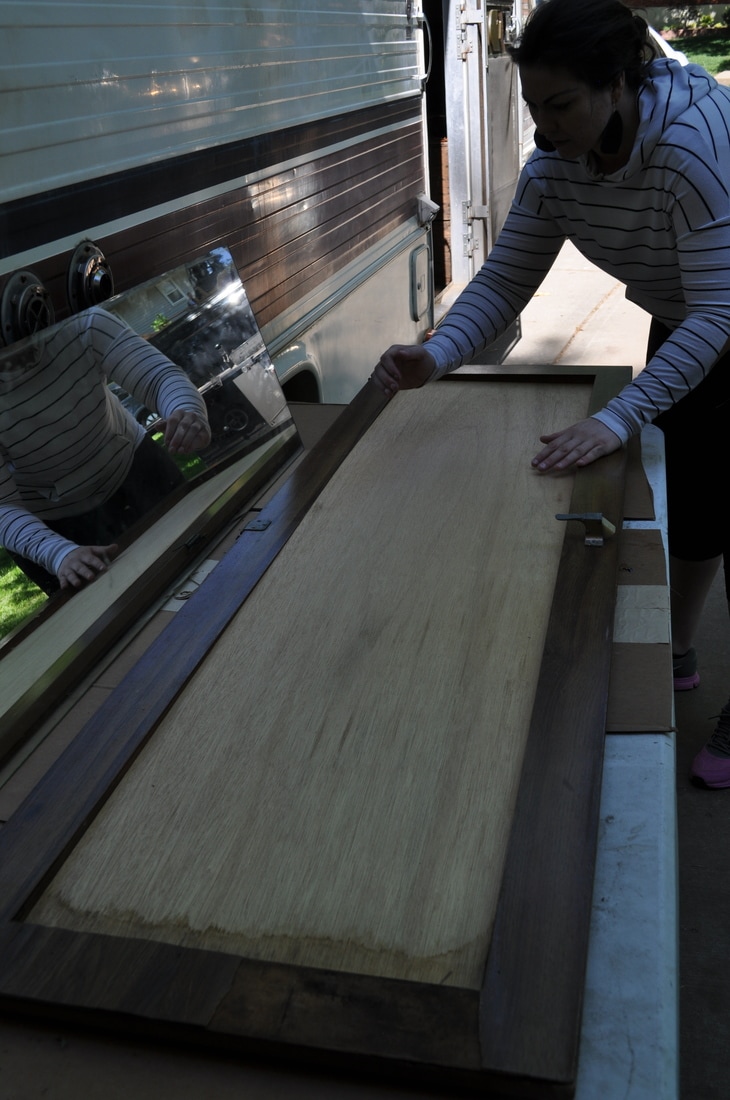
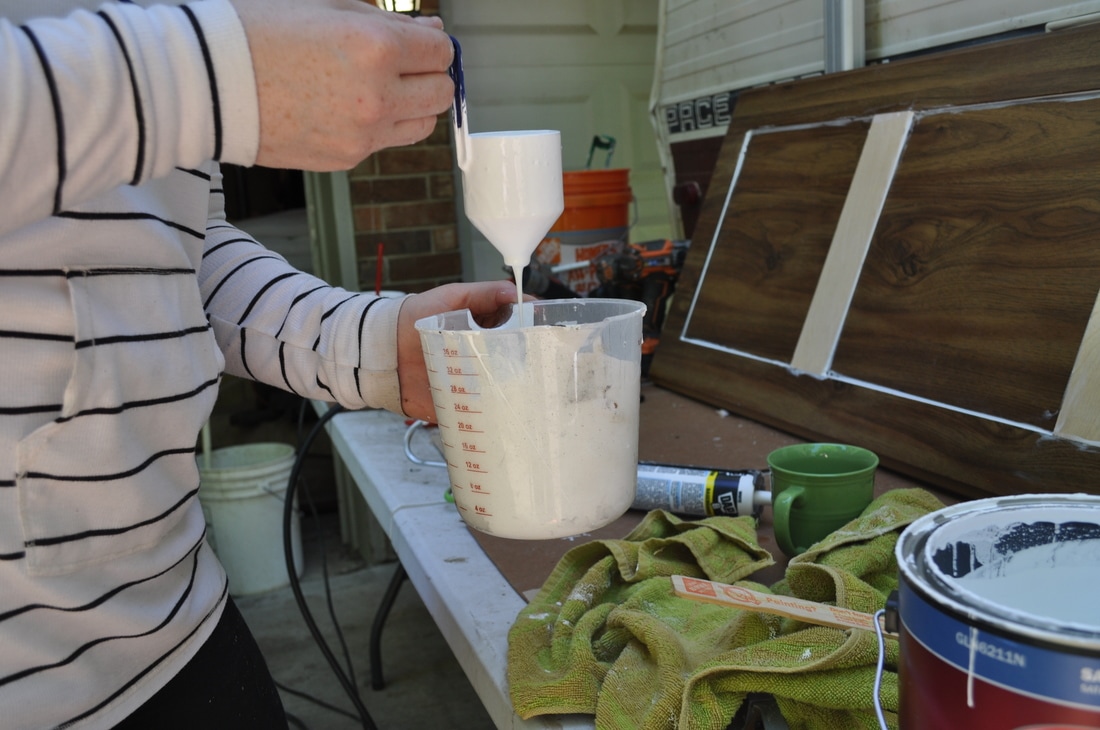
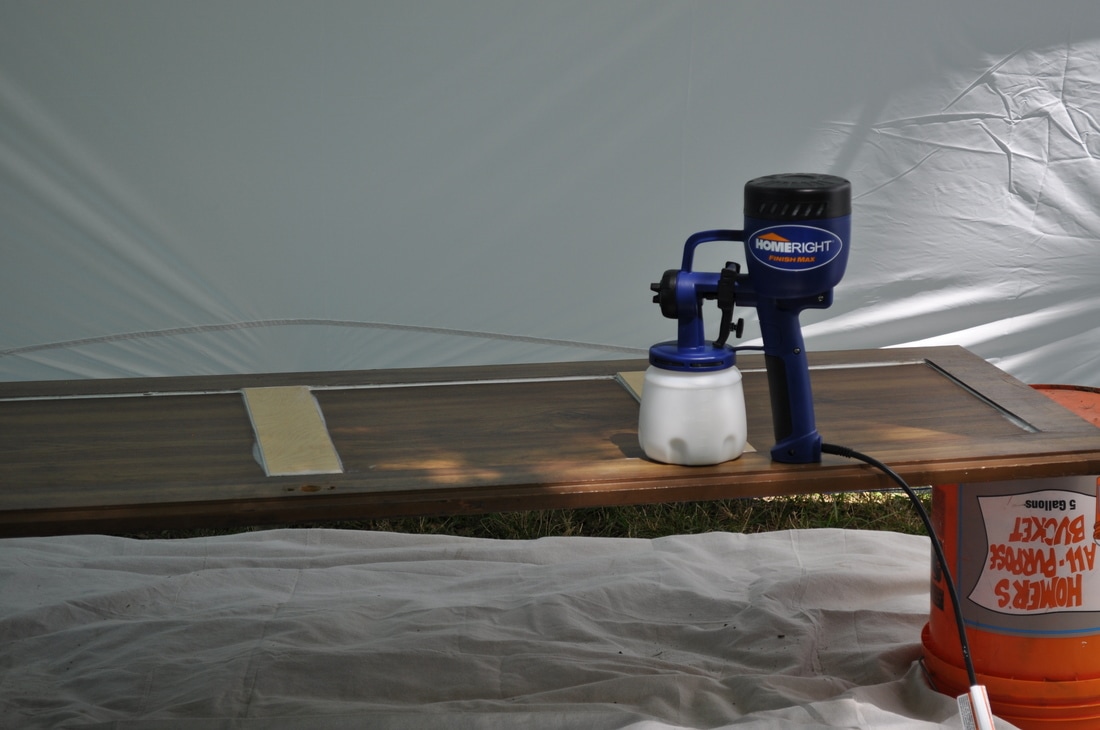
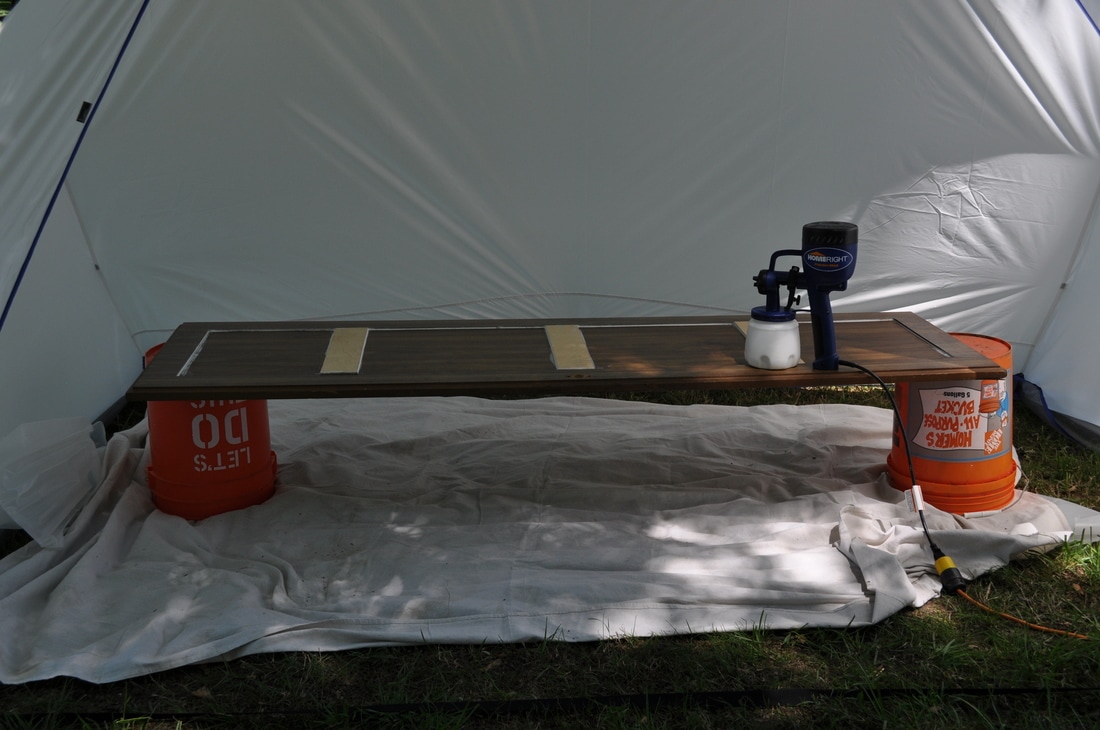
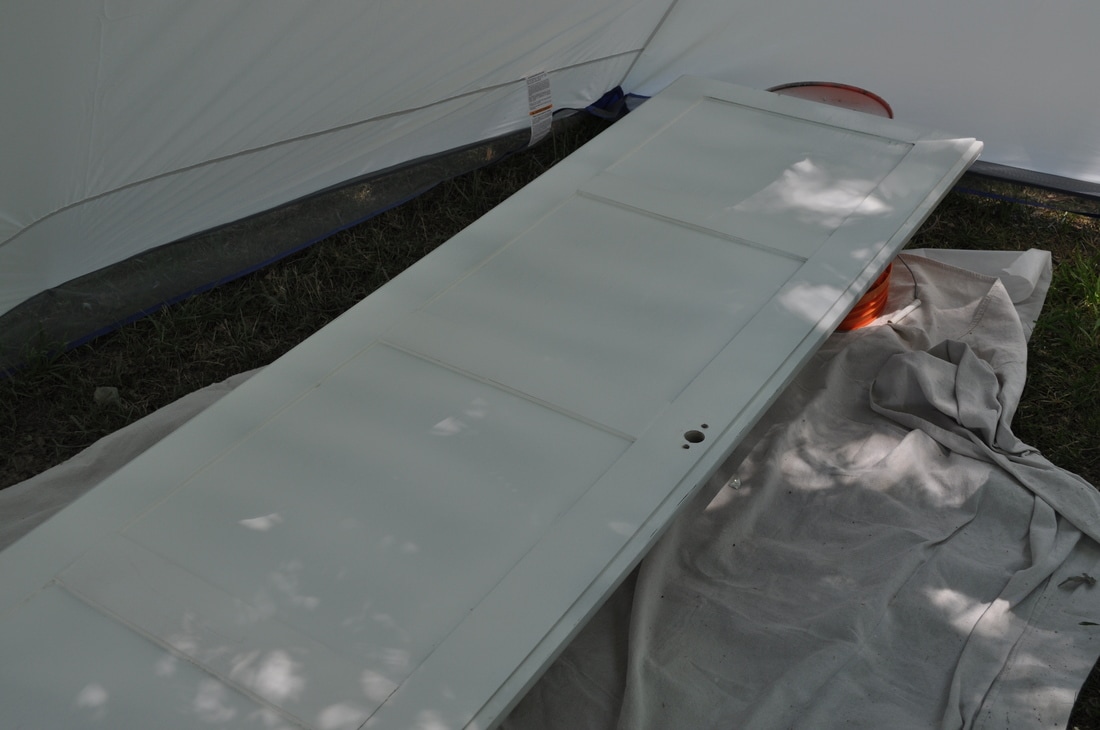
Bathroom door upcycle. This door was ugly. There's no other way to put it. There was a full length mirror on the outside and the door itself is covered in a vinyl wood. We decided to flip the mirror around so it was facing the inside of the bathroom (makes way more sense that way anyway). We caulked in the mirror and stapled the wooden frame pieces that hold it together back in place. Then we added strips of underlayment to the front of the door. This gives the illusion that it is a shaker door. We sprayed the door white, and the hardware black. The difference is crazy!


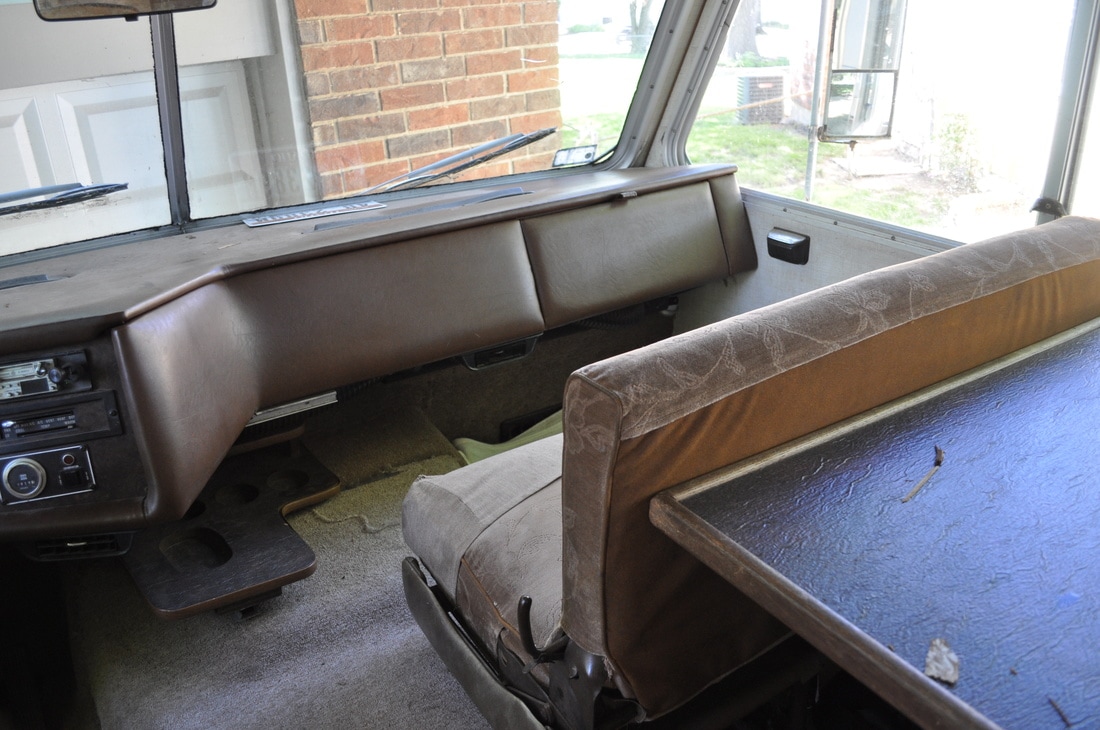
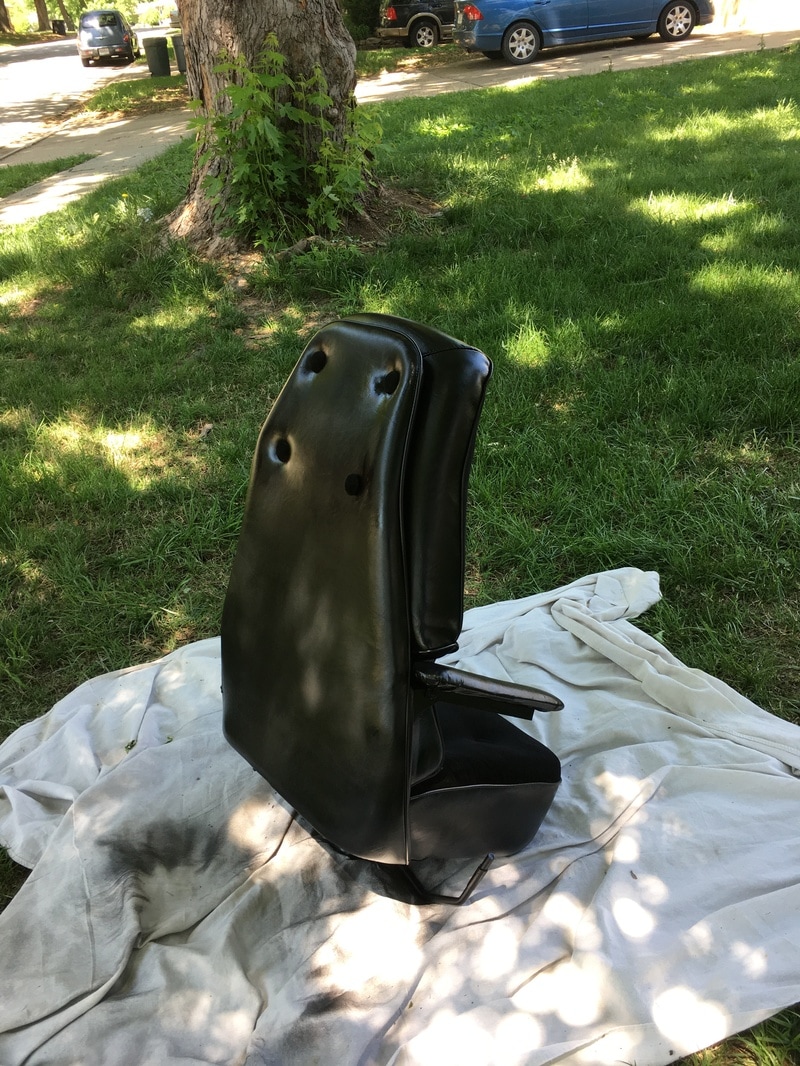
Captains chair upcycle. This chair was a poop brown color. The armrests were torn and it was just bad. We found a spray paint formulated for car interiors. It paints vinyl and fabric. We used it to paint the entire captains chair. It was a fast update and a dramatic one at that. We also used this spray on the dashboard and sun visors.

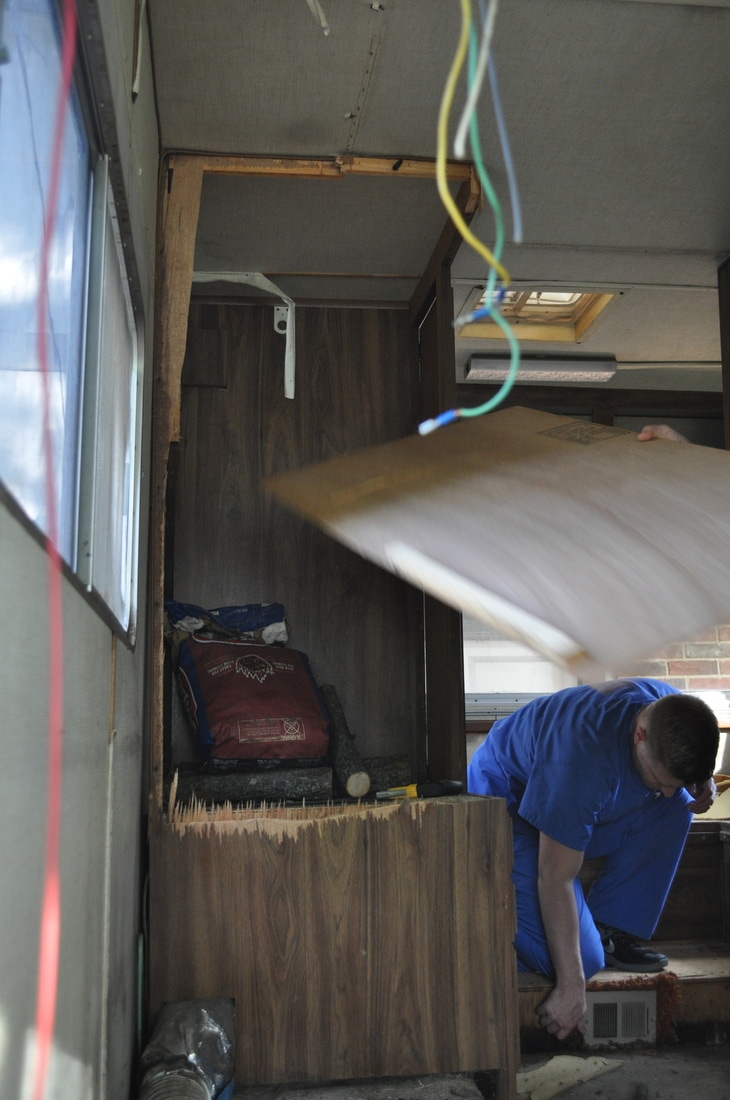
Rex and David are still working on the roof repairs at this point. They only have a few hours if even in the evenings after work and school to help us. Slowly but surely it is all coming together.
In a perfect world here is what would happen this week:
Flooring
Ceiling paneling
2nd coat of white paint
Trim work
Built in couch installed
Farmhouse table built and installed
Flooring
Ceiling paneling
2nd coat of white paint
Trim work
Built in couch installed
Farmhouse table built and installed
Stay tuned for more updates as we go. Follow us on our social media channels so you don't miss a thing!
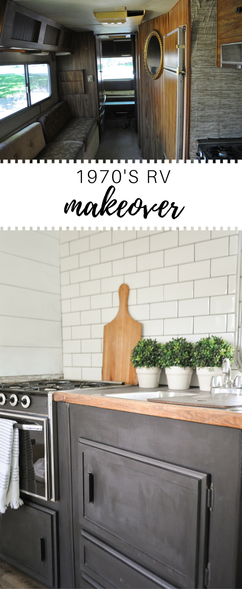
Pin it!!
Leave a Reply