
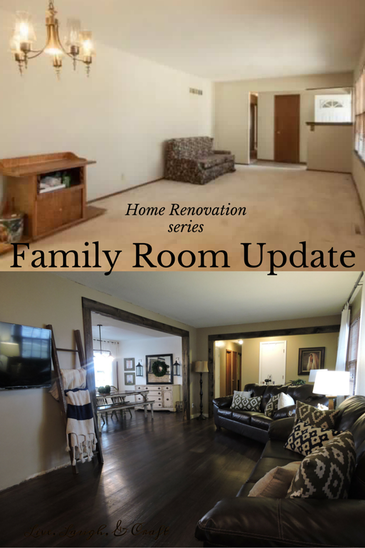
It's time for another house update! I'm so grateful we are almost done with the family room area because the construction zone has been driving me batty!!! There's still lots to do, so don't judge!!!!
For those that are new to the Renovation Series, check out the other updated areas! This house, I'm afraid, will be a work in progress until the day we move! I hope you get inspired by our DIY projects done on a very very tight budget! There's a lot that we did here, so please let me know if there's some confusion and I'll do my best to clarify!
Renovation Series
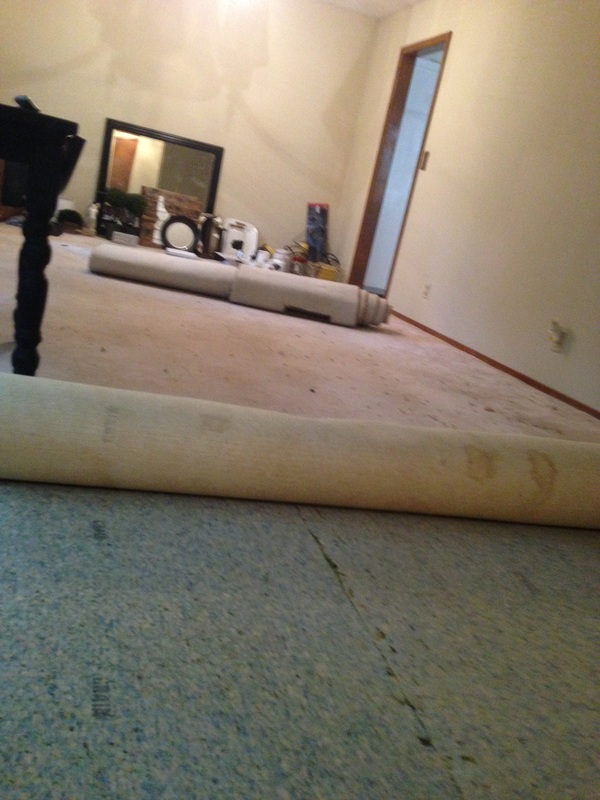
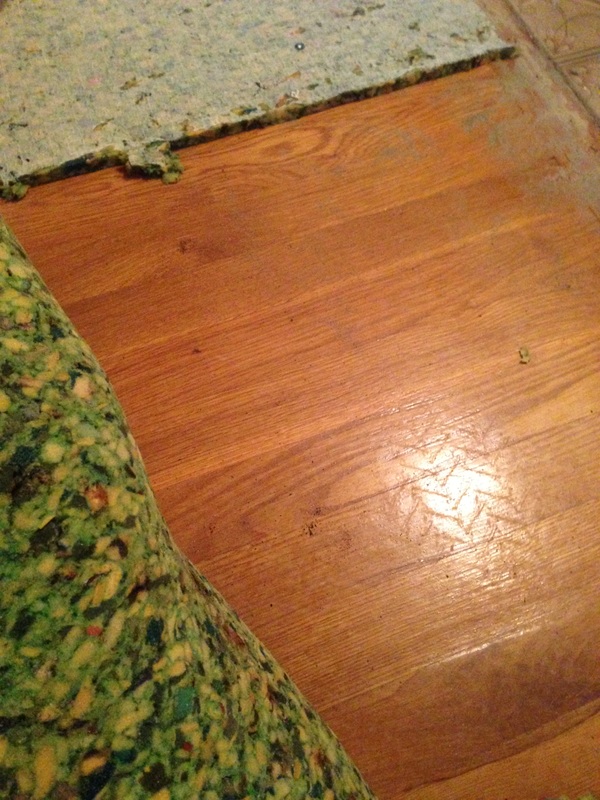
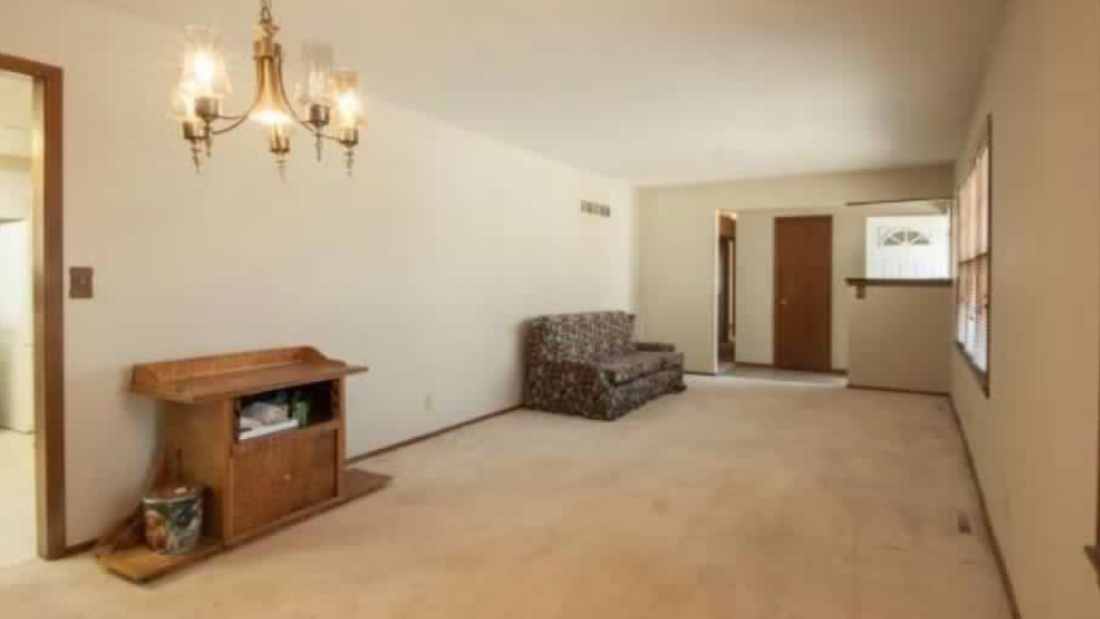
First item of business, we removed the carpet. I'm 99% sure the carpet was the designated potty area for an indoor animal (or the location of a couple homicides.) It didn't stink, the carpet was just FILTHY!
When Rex and I looked at the house the first time in all it's glorious horror, Rex looked under the vents and could see the upper level was hardwood, and it seemed to be in pretty good shape! We were super excited about that, and removing the carpet was very simple!
I rolled the carpet and padding up (roll it super tight so it's easier to haul off) then I pulled up all the staples with needle nose pliers. To get the tack strip on the edge, I used a mini crowbar and hammer, I just hit the crowbar with the hammer and they popped off pretty easy!
Somewhere along the road, one of the previous owners broke razor blades.....that's right......RAZOR BLADES between the wood seams to eliminate squeaking! We have literally removed over 100 broken razor blades.
 |
 |
Let me just say my husband is the bomb.com! Seriously anyone that can put up with my crazy deserves a reward and he does it on the daily. He should have beat me for this next part, but he didn't!
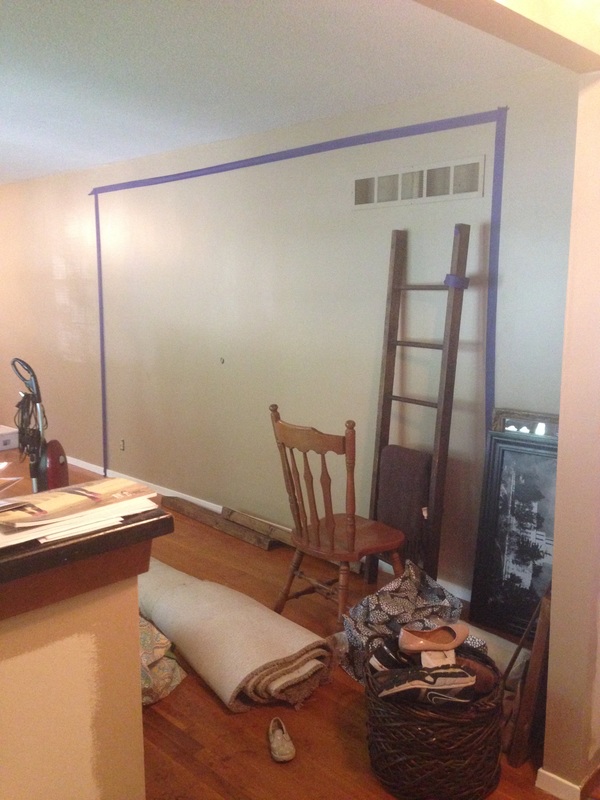
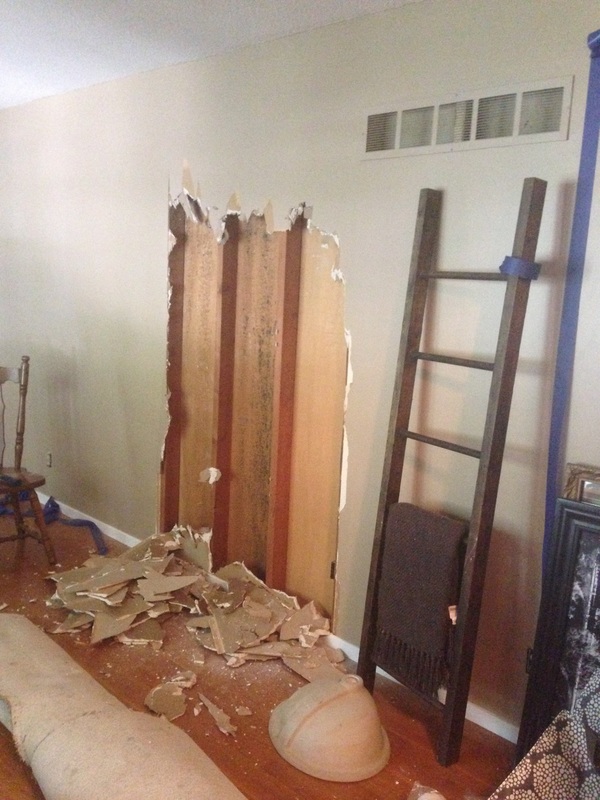
So this wall here we both knew had to come down. Rex was thinking more like in a year, and I had a way different plan.
One day I was walking past the wall with a hammer in hand, and I totally fell into it (wink wink.) He wasn't super pumped, but he wasn't mad either....so I took that as a "Cass go ahead and knock the wall down!"
I went ahead and taped off the portion I wanted down. I knew we'd take more out once we saw what was behind that sheet rock, but this was a good start. When the boys and I left for Idaho, Rex and I decided this would be a great time to refinish the floors so the boys weren't being exposed to nasty fumes.
I removed all the furniture and baseboards while he was at work to save him a little time. I'll be doing a separate post on the floors so you'll hear more about them later!
 |
 |
 |
So in this area, I wanted to remove that little pony/half wall, and Rex was only 10% sold on this idea....so I took matters into my hands and removed the beast while he was at work one afternoon.
He loved it when he got home, which leads me to believe he just didn't want to do the manual labor!
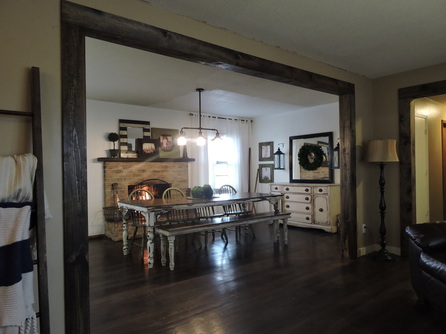
Once that beauty was gone, Rex decided we should remove some of the wall to the left. We love having that more open. The 18" made a big difference! Rex did the sheet rock/drywall patching, and made sure all the messed up electrical work was corrected.
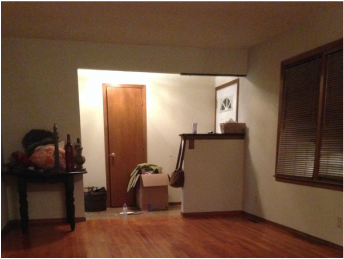
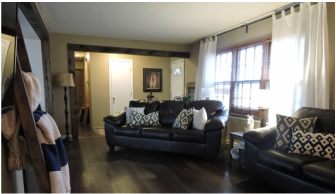
Here are a couple Before and Afters
 |
 |
 |
 |
Still on the list of things to do:
I need to paint the ceiling, Rex is going to remove the ghastly chandelier and install canned lights. We need to finish the hardwood floors, install new floors (travertine is the plan) in the front entry, new doors, and white trim. Stay posted for the next update!!!!
I need to paint the ceiling, Rex is going to remove the ghastly chandelier and install canned lights. We need to finish the hardwood floors, install new floors (travertine is the plan) in the front entry, new doors, and white trim. Stay posted for the next update!!!!
What we've done!
Removed carpet- Free
Painted walls-$30
Removed half wall-free
Removed big wall-under $50 (for the header beams)
Faux Beams-$60
Hardwood Floor-$500 (for the dining room, family room, hall, and master bedroom)
Drywall Patching-under $50
Electrical-under $30
We are very pleased with the outcome for being under $800 spent!

More posts to love!


Leave a Reply