

Who doesn't love a cheap and easy DIY project!? I do!! I found a planked sign in the garage that I made for the "fall planked sign" tutorial, so it was the perfect excuse to make a cute farmhouse sign for my kitchen! I've linked up the tutorial for the planked sign. if you have scrap wood laying around then use that up!
Supplies
Planked sign
Stain (Minwax and my fave go to color- dark walnut)
Sandpaper
Foam paint brush
White paint
stencil sheet (hobby lobby)
x-acto Knife
Rust-Oleum finishing spray
Planked sign
Stain (Minwax and my fave go to color- dark walnut)
Sandpaper
Foam paint brush
White paint
stencil sheet (hobby lobby)
x-acto Knife
Rust-Oleum finishing spray
Make your planked sign by following the fall planked sign tutorial here.
I created a stencil with an image that can be purchased online. Honestly, I was in a hurry, but I'm sure I could have found a thousand free images. I put the image in Microsoft Word and enlarged it to as big as I could with .2 margins.
My planked sign and picture are landscape so I changed the orientation to landscape as well.
Here's a picture of the stencil sheet. You can find it at Hobby Lobby by the other stencils. I laid a large cutting board down on my table, the picture on top of the cutting board, the stencil sheet on top of the picture, then I put some duct tape on the stencil to hold it all in place.
You can use an x-acto knife or a #15 blade scalpel. I'm telling you the $300,000 we paid for my husbands medical degree all the sudden became worth it when I used that scalpel!
They. Are. Amazing.

I made a whitewash with my paint. You don't have to do this, but I wanted the paint to look worn out. I mixed equal parts water and paint. With your foam brush dab the paint on the stencil. I just centered my stencil and held it to the board with my left hand while I painted with the right hand. As soon as you finish dabbing the paint on, remove the stencil immediately.

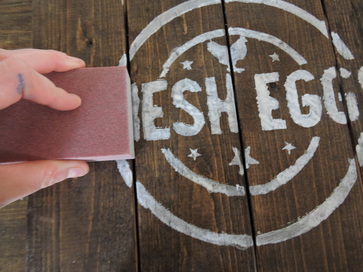
The paint should dry pretty quick. With either a sanding block or an electric sander, rough it up a bit. Then lightly spray with Rust-Oleum finishing spray!!! Pretty dang easy!!!
Leave a Reply